Home » Posts tagged 'Christmas decorations'
Tag Archives: Christmas decorations

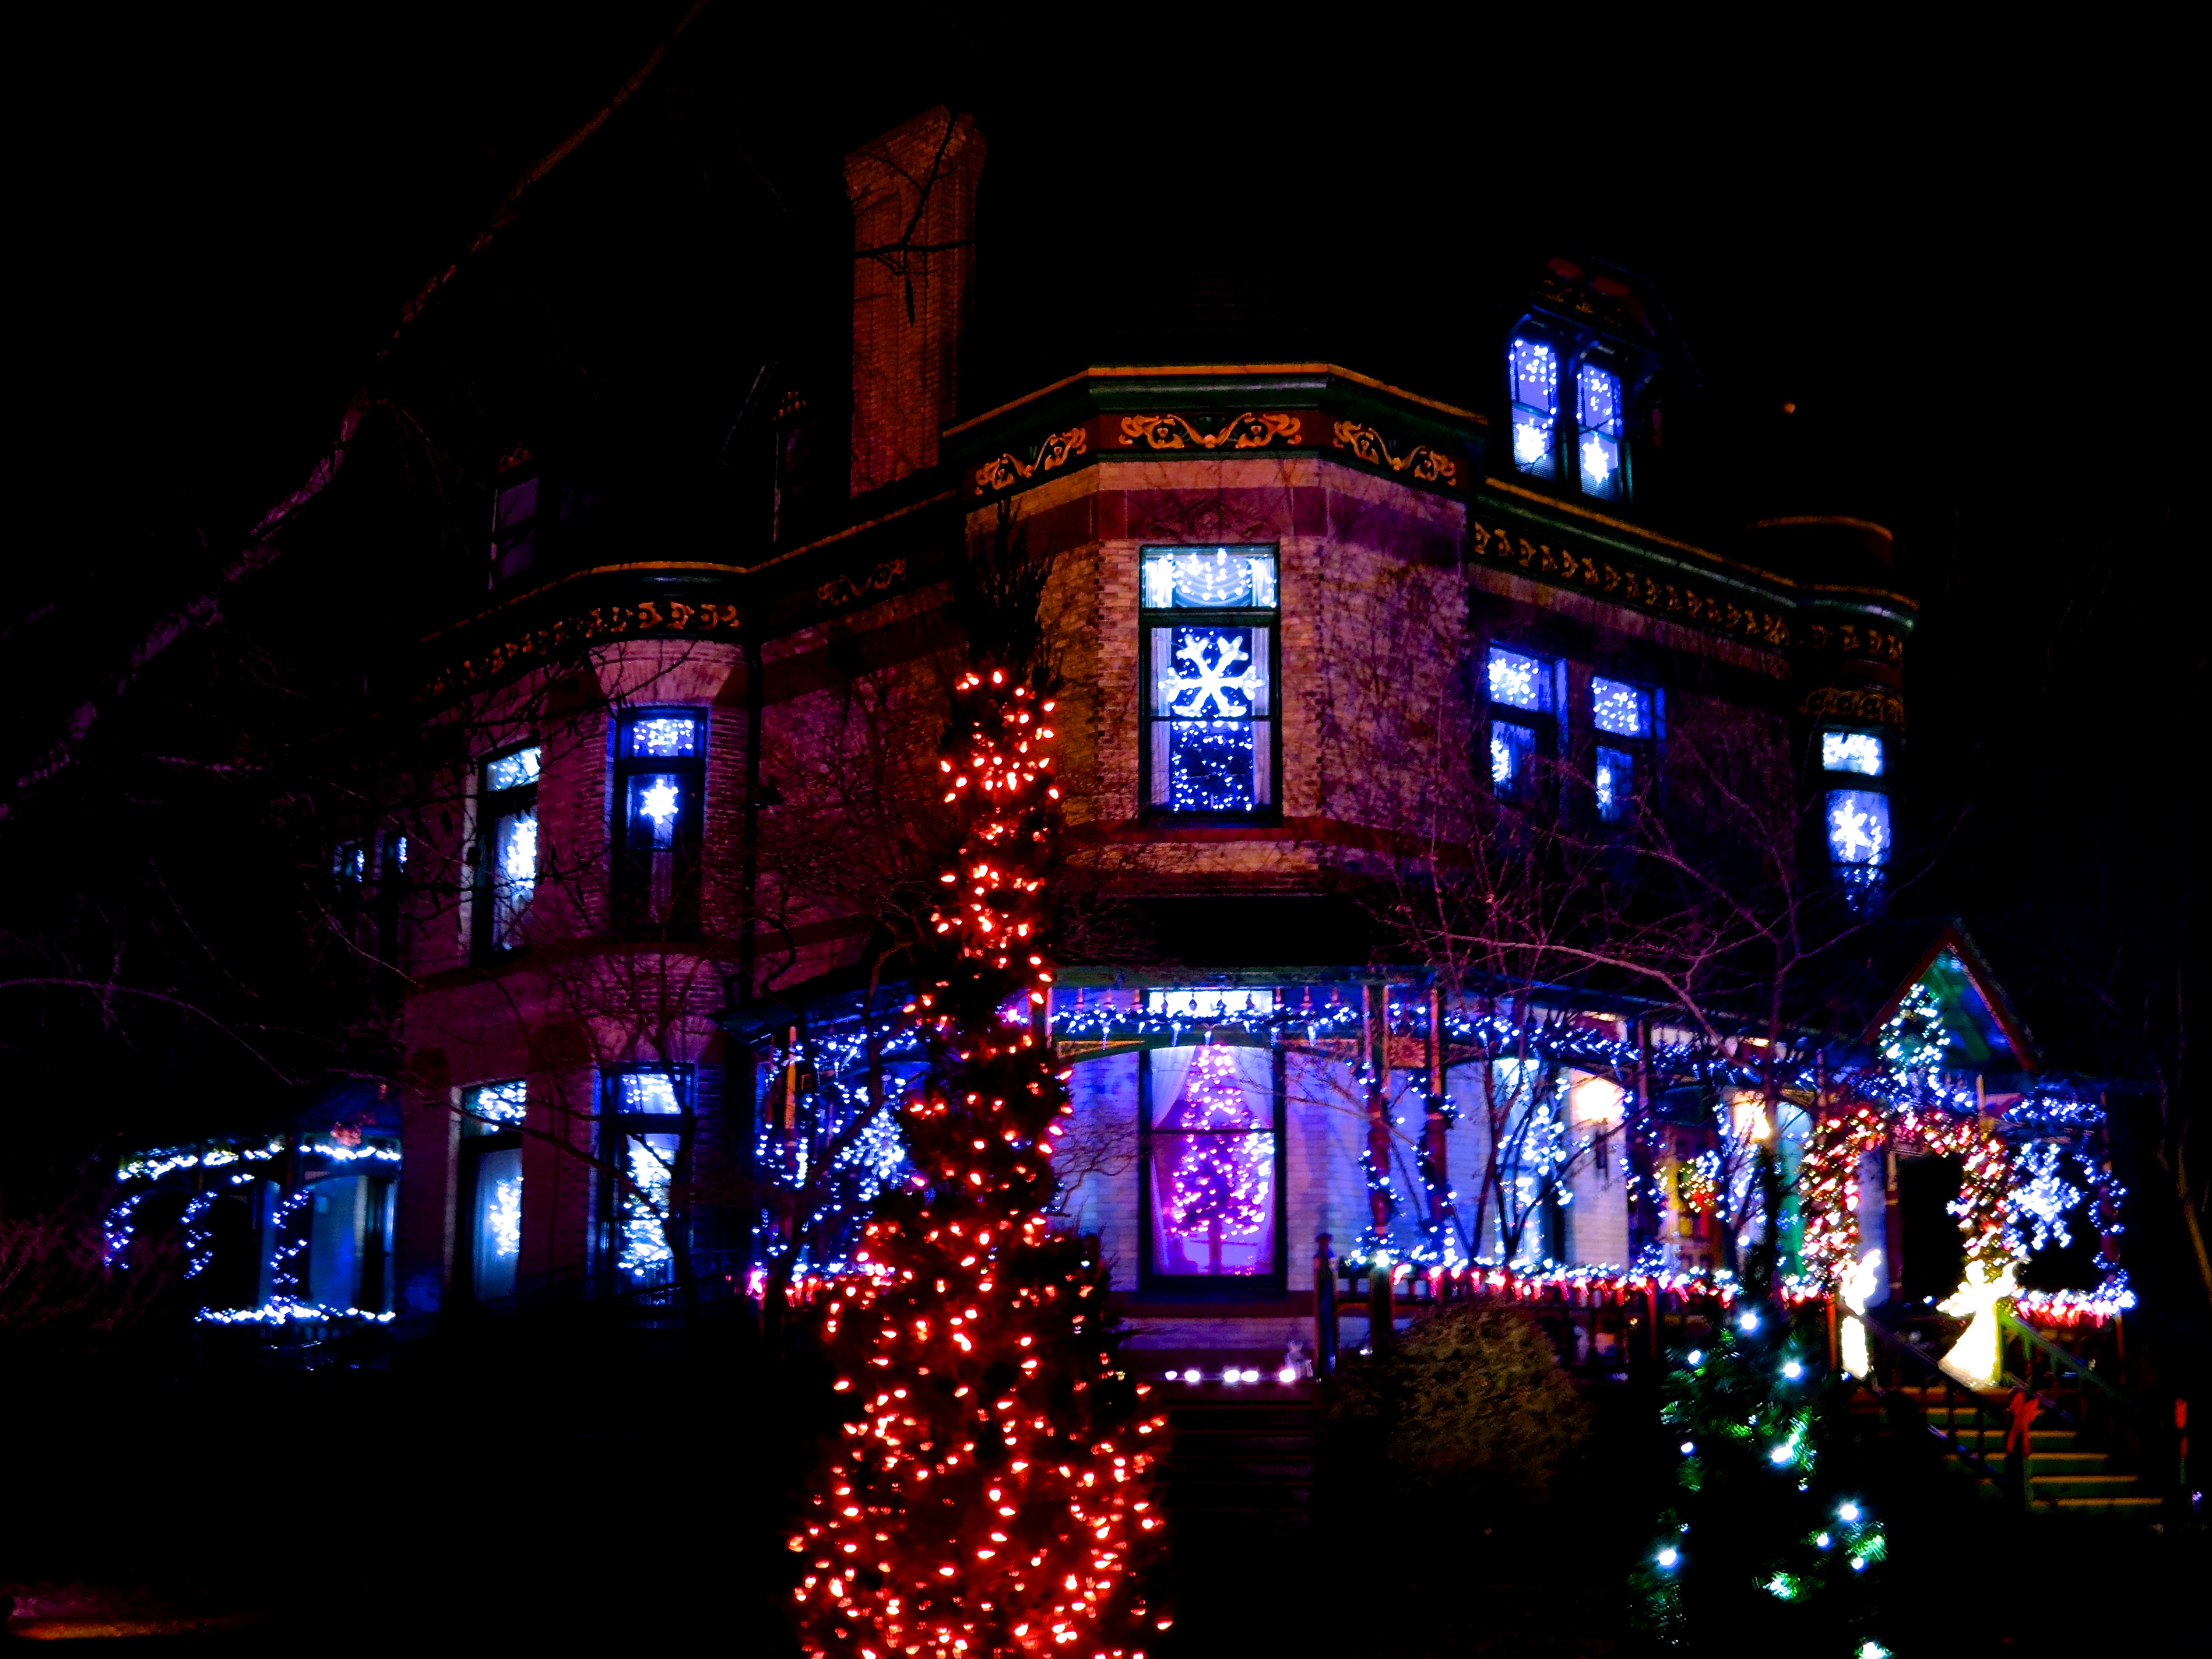
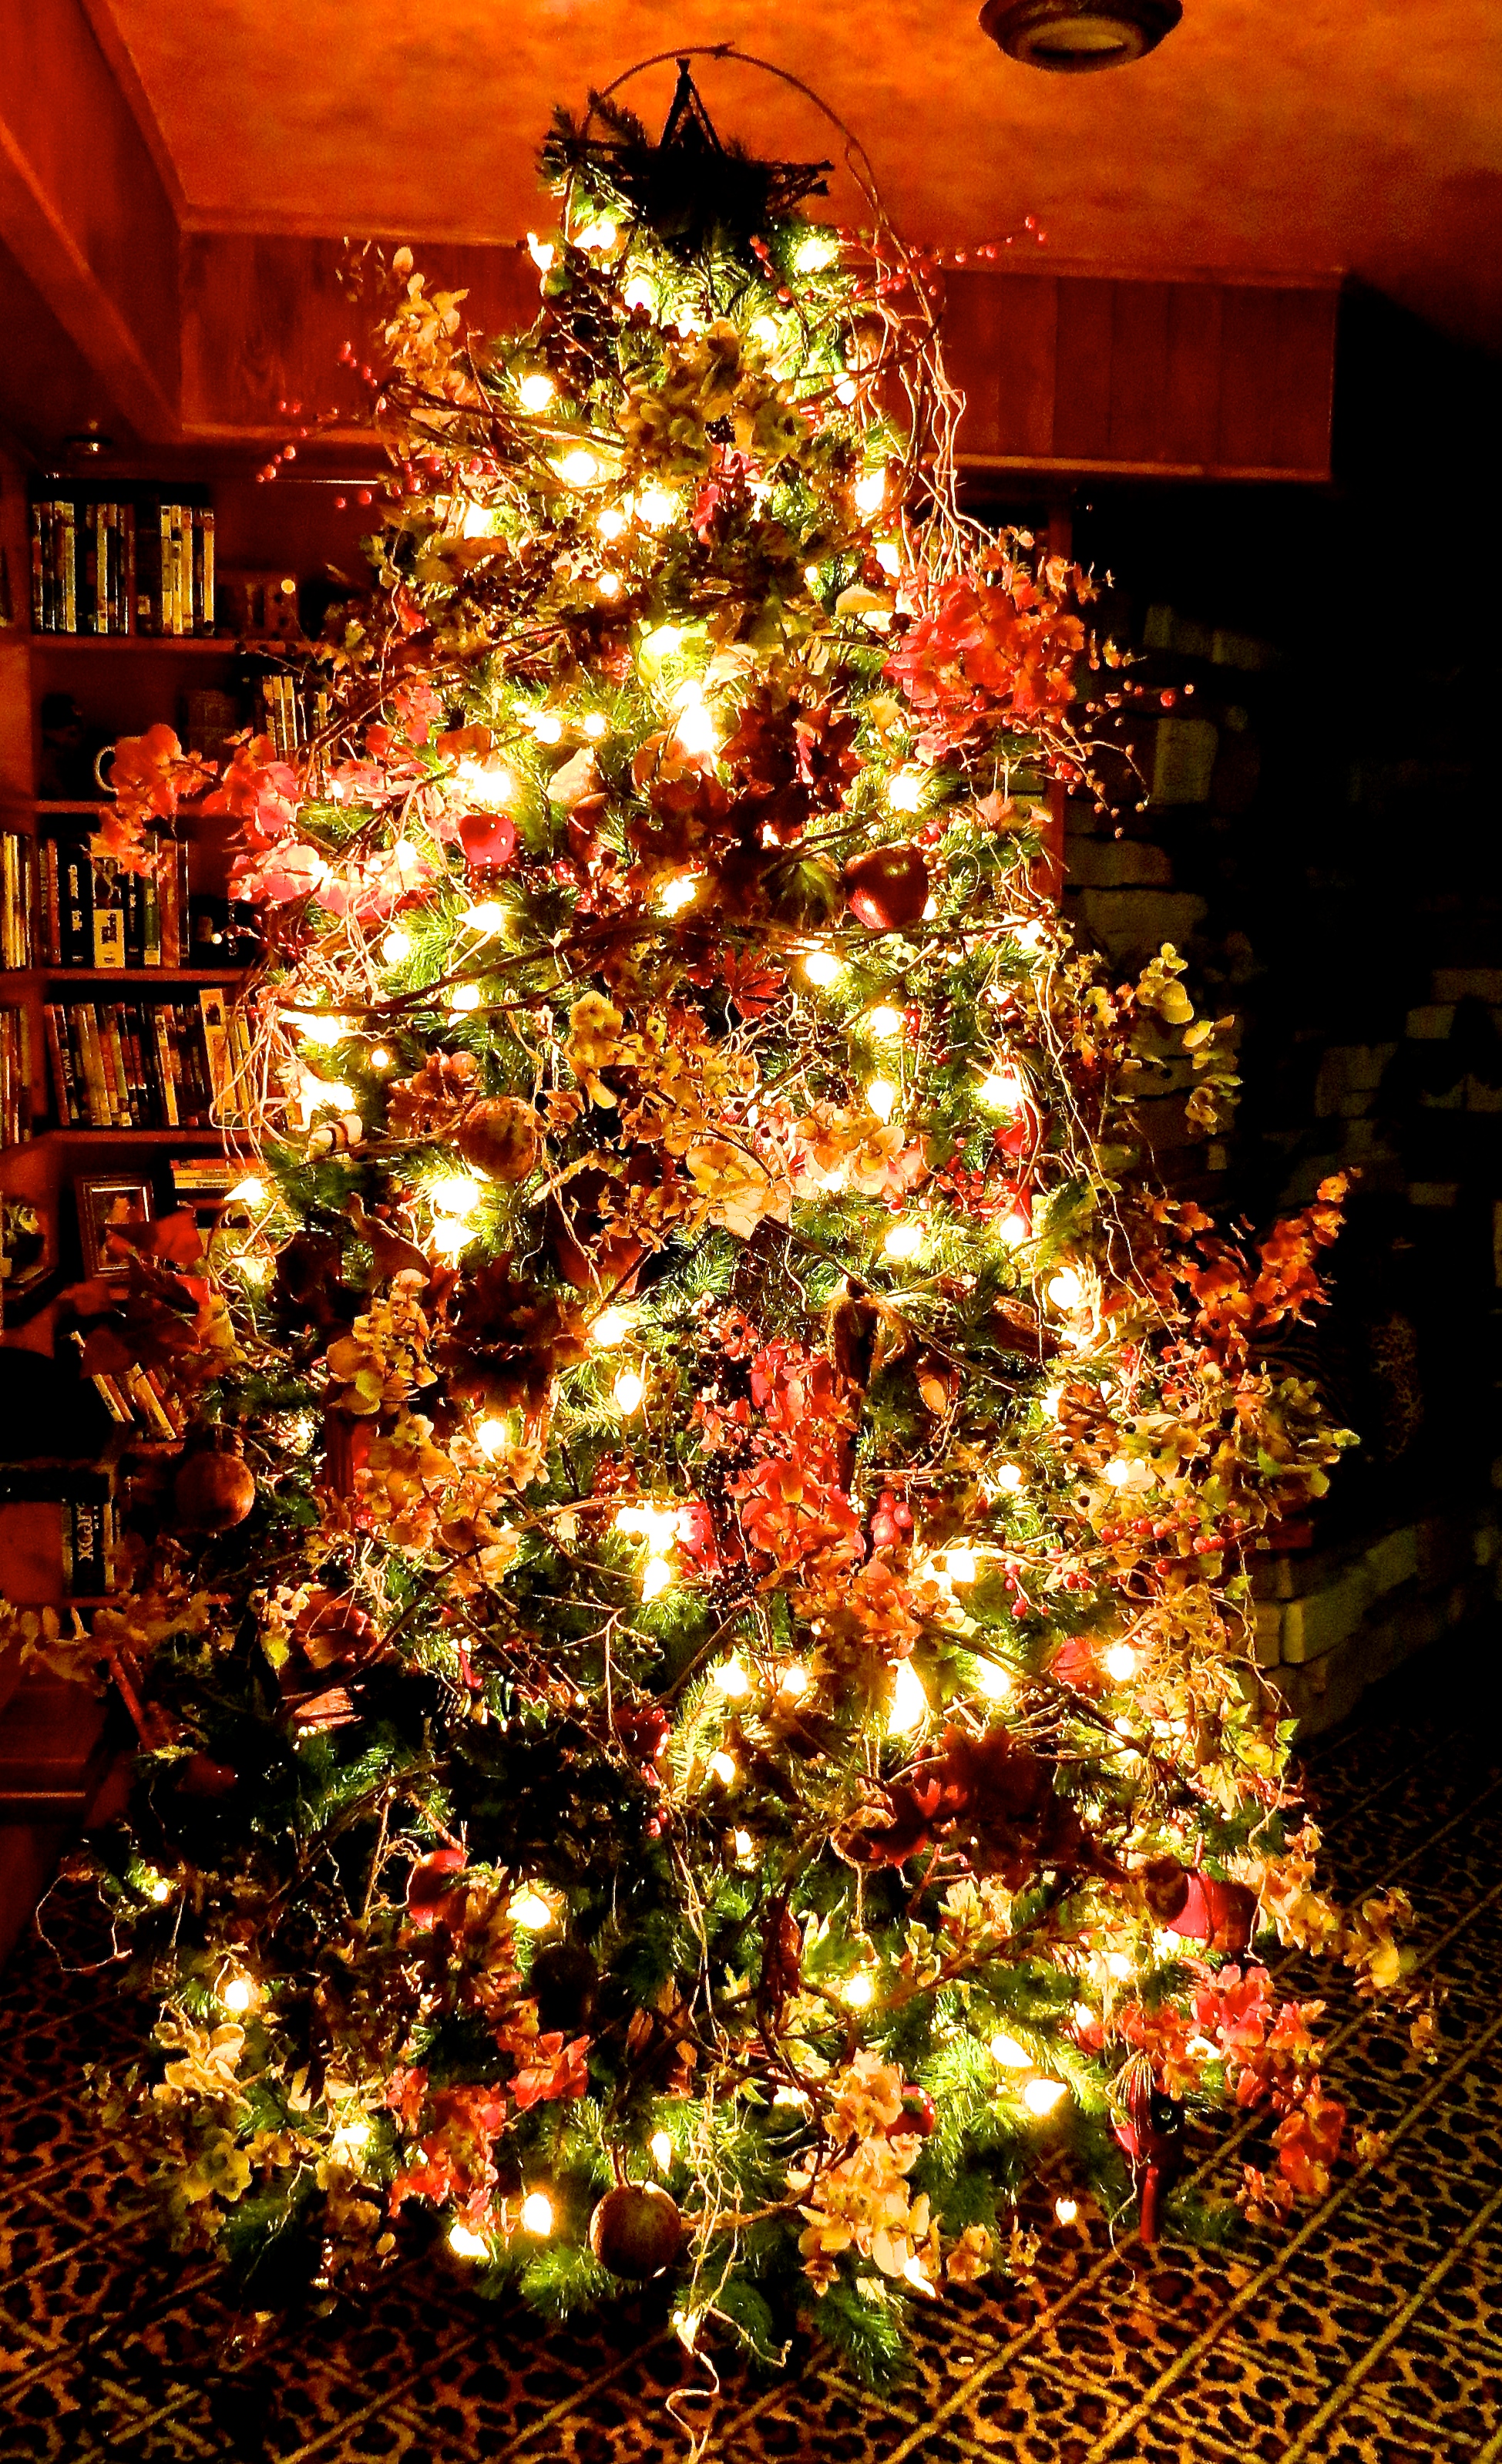
Let There Be Light: Christmas 2016

I shot this after the first big snow December 4th. Decorations not complete yet. The snow on the trees really caught the area lights.
Ever since I was a child, Christmas lights have cast a magical spell over me. Mood, color, ambiance– combined to create a winter fantasy.
This year Michael and I decided to scale back on the interior decorating and focus primarily on the exterior of the house– since that is what the most people see.
With the unseasonable warm weather we had this year, I was able to work on outdoor projects longer– like repairing and painting stairs and porches, all the way in to November. The trees held their leaves much longer this year, postponing yard clean up as well. So, I didn’t really start decorating until the week after Thanksgiving.
The majority of the decorating took approximately 60 hours over two and a half weeks. I used over 900 feet of garland, 10 artificial trees, 65 bows, thousands of LED lights, 24 egg strobes and 10 laser projectors to complete the effect outside. Every year it’s a little different, depending on time, resources and whatever mood strikes me.
Inside, I didn’t put up any traditional, full-size trees but did decorate 12 ‘stick’ and tabletop trees (3 ft. to 9 ft. tall) along with some mantle and stair garland. In the windows I used 27 LED snowflakes, 28 sets of icicle lights and 36 battery operated candles. I experimented with LED ‘curtain lights’ in 6 windows in place of Christmas trees I’d used in the past.

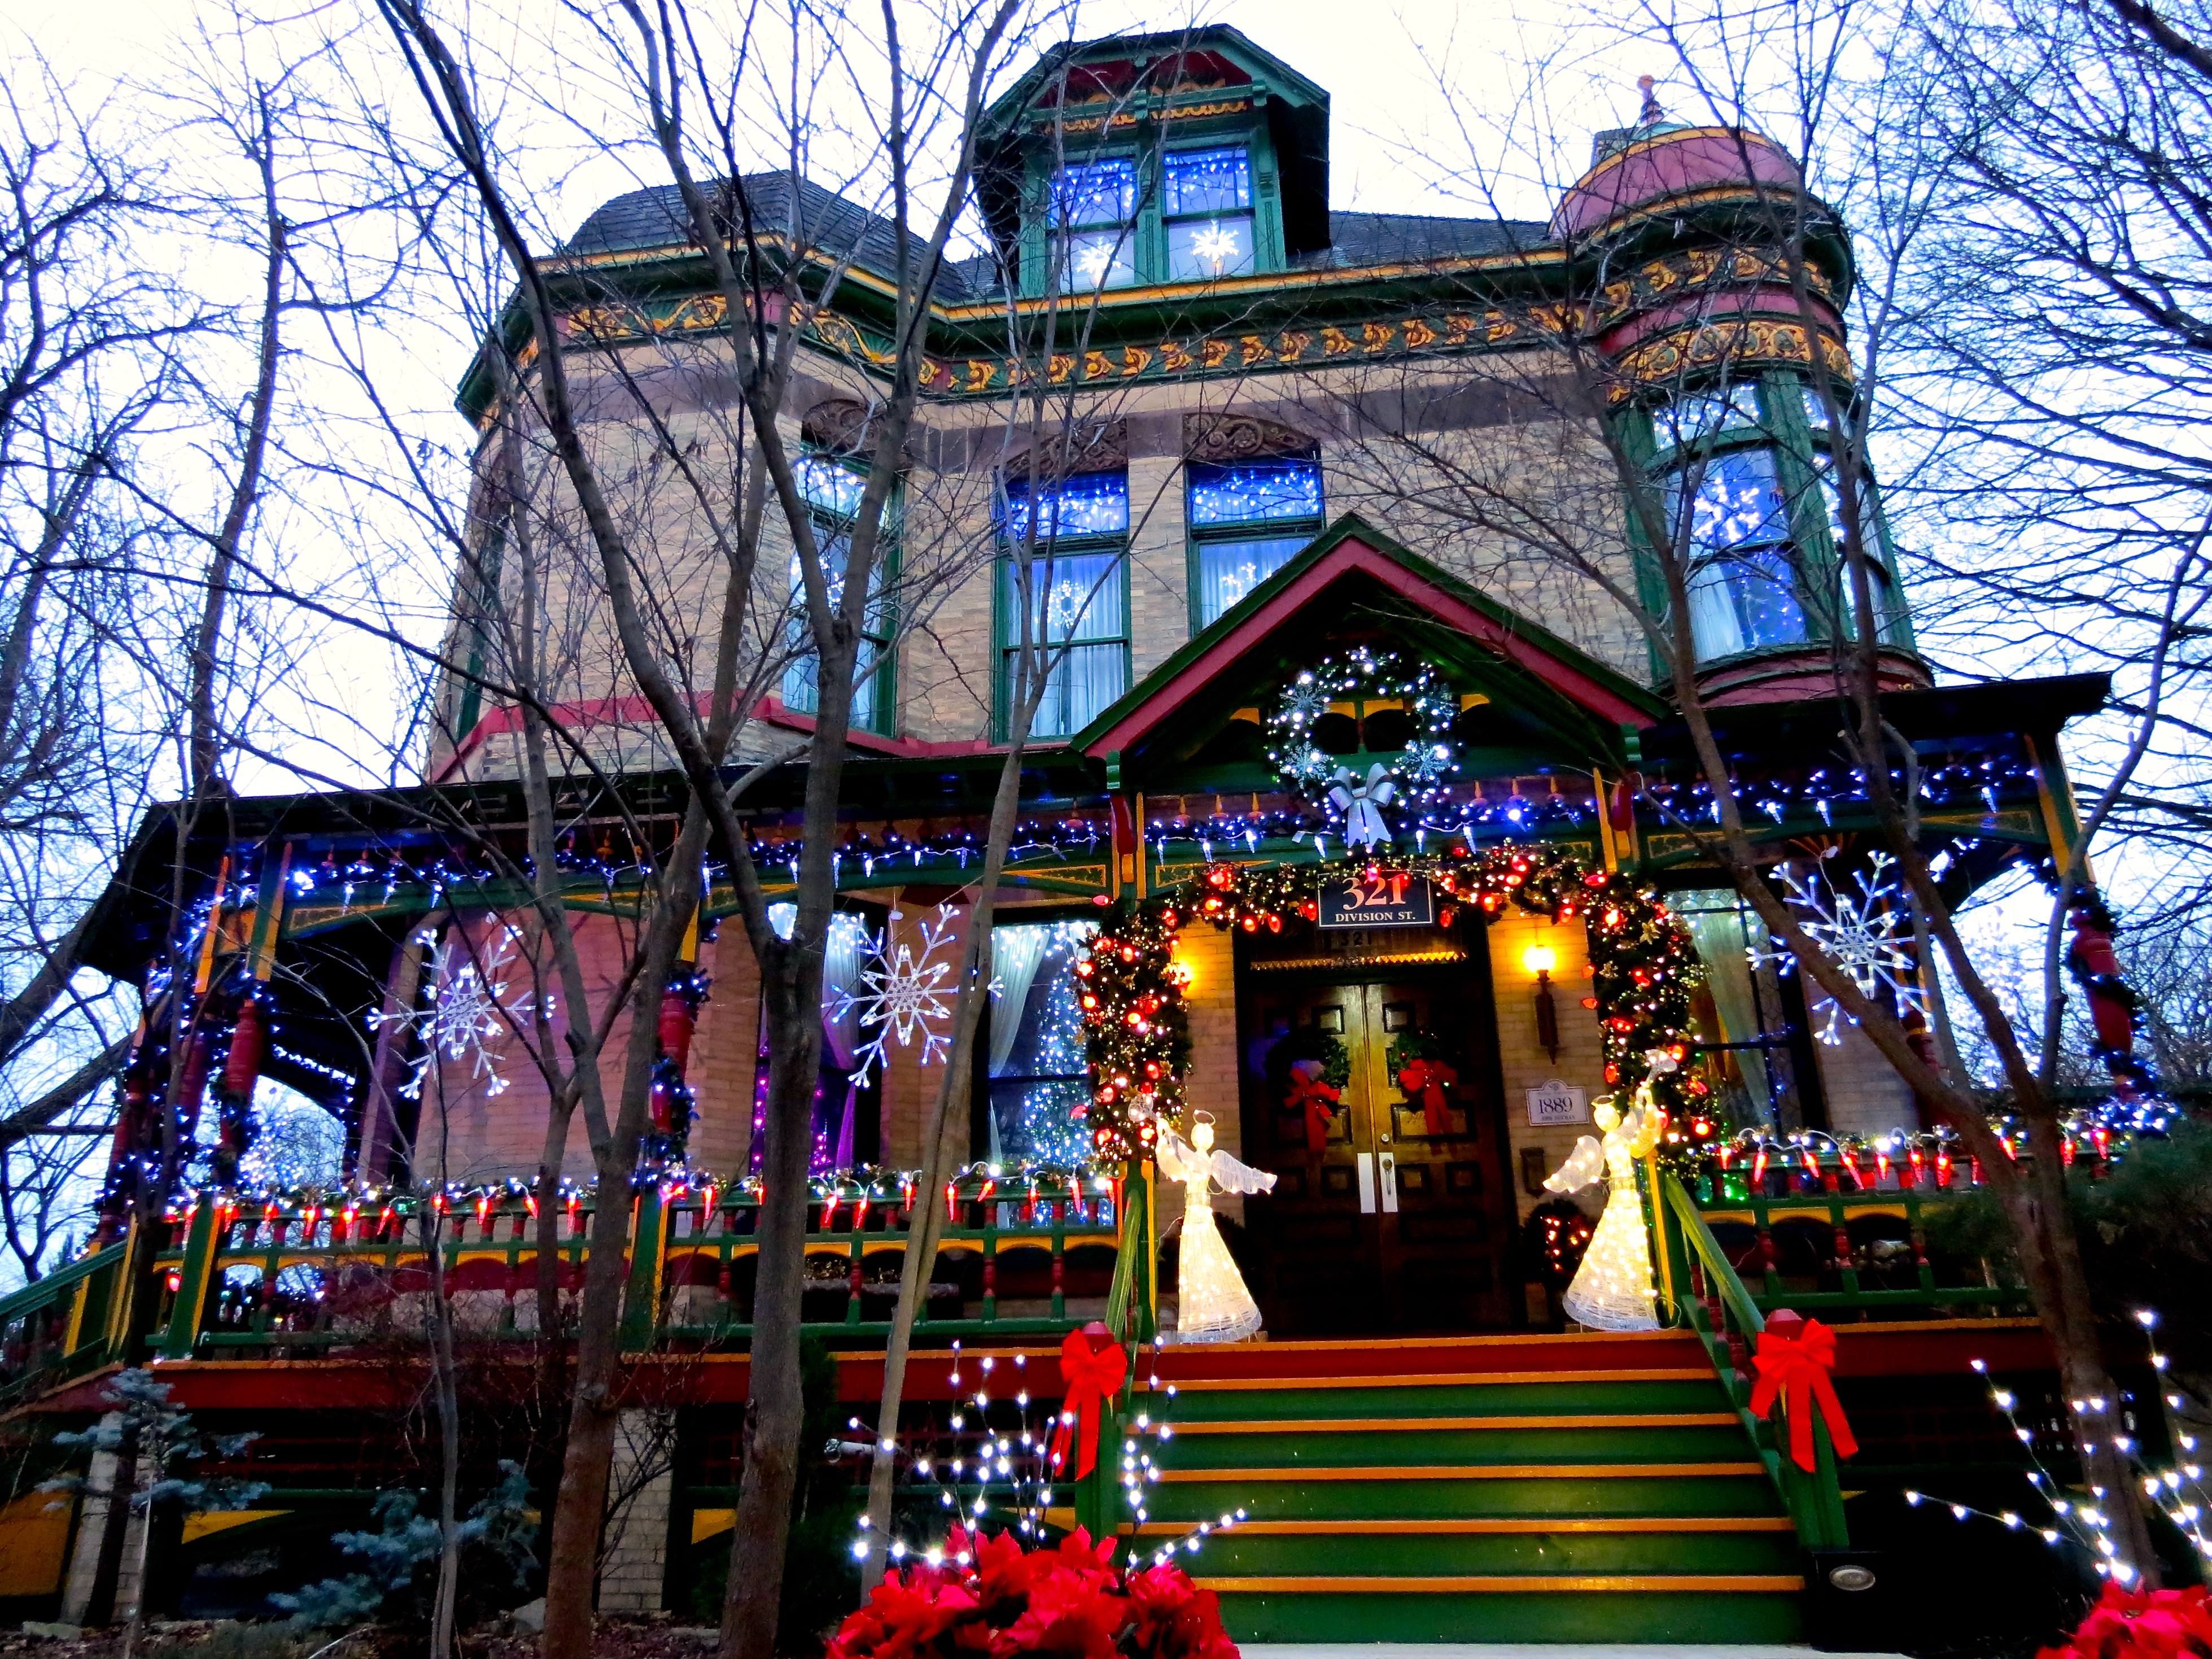
321 Division St. on a beautiful sunny morning after a good snow.

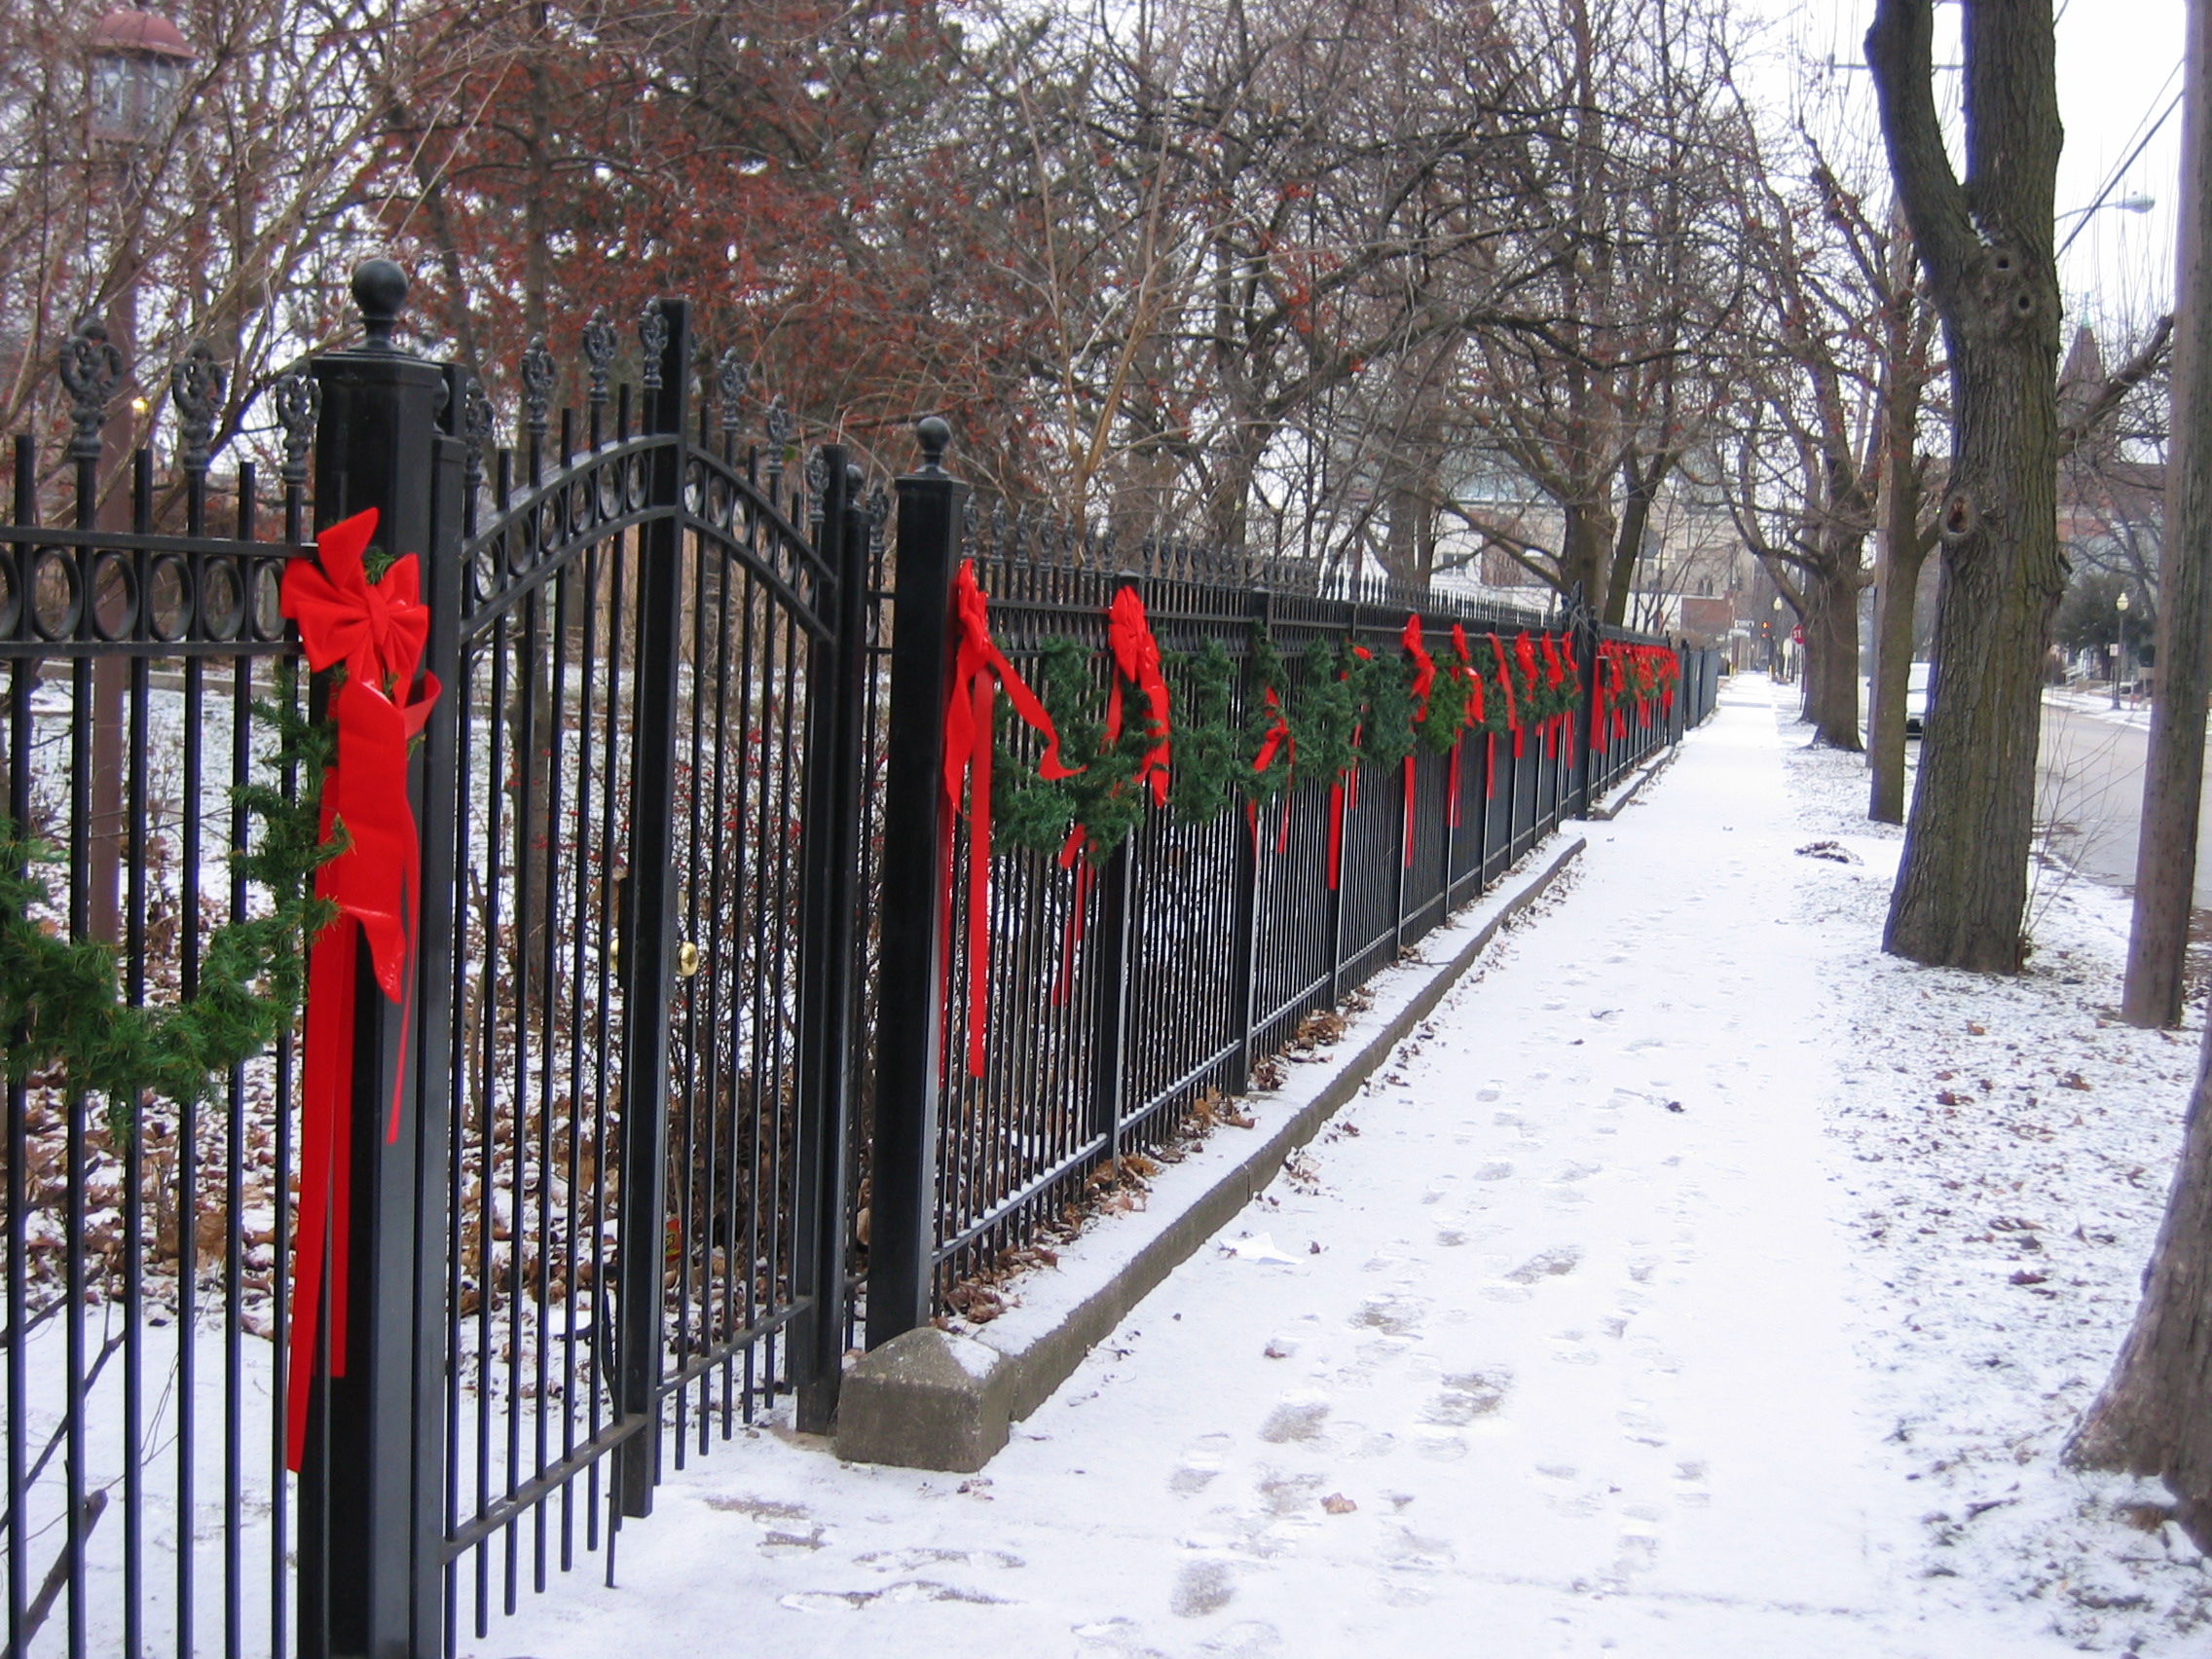
Garland and bows decorate the fence around 321 Division Street.

The house before dusk.

321 Division Street just before sunset.

Looking across the front yard at our spiral tree with the church in the background.

Trees line both sides of the front driveway.

On the hill behind our house.

One of two light & bead trees I created from scratch.

321 Division from the street.

Christmas at home.

Front porch fully decorated.

The statue of Liberty on the front center porch.

The front parlor at 321 Division St.

In the dining room.

The side of the house.
The lights will be on display through at least New Years’ weekend.

Christmas At Home: Pictures
Merry Christmas Everyone! Here are some pictures of our house decorated for the holidays. 321 Division Street is all lit up. A total of 34 trees lit this year, inside and out.

Our house shot from across the street.

Daytime shot of the front porch.

Our ‘A Christmas Story’ Leg Lamp in the window.

The Front Parlor.

Tree in the Foyer.

Our tree in the front yard with the church in the background.

Front Porch at night.

Dudley looking like the Grinch.

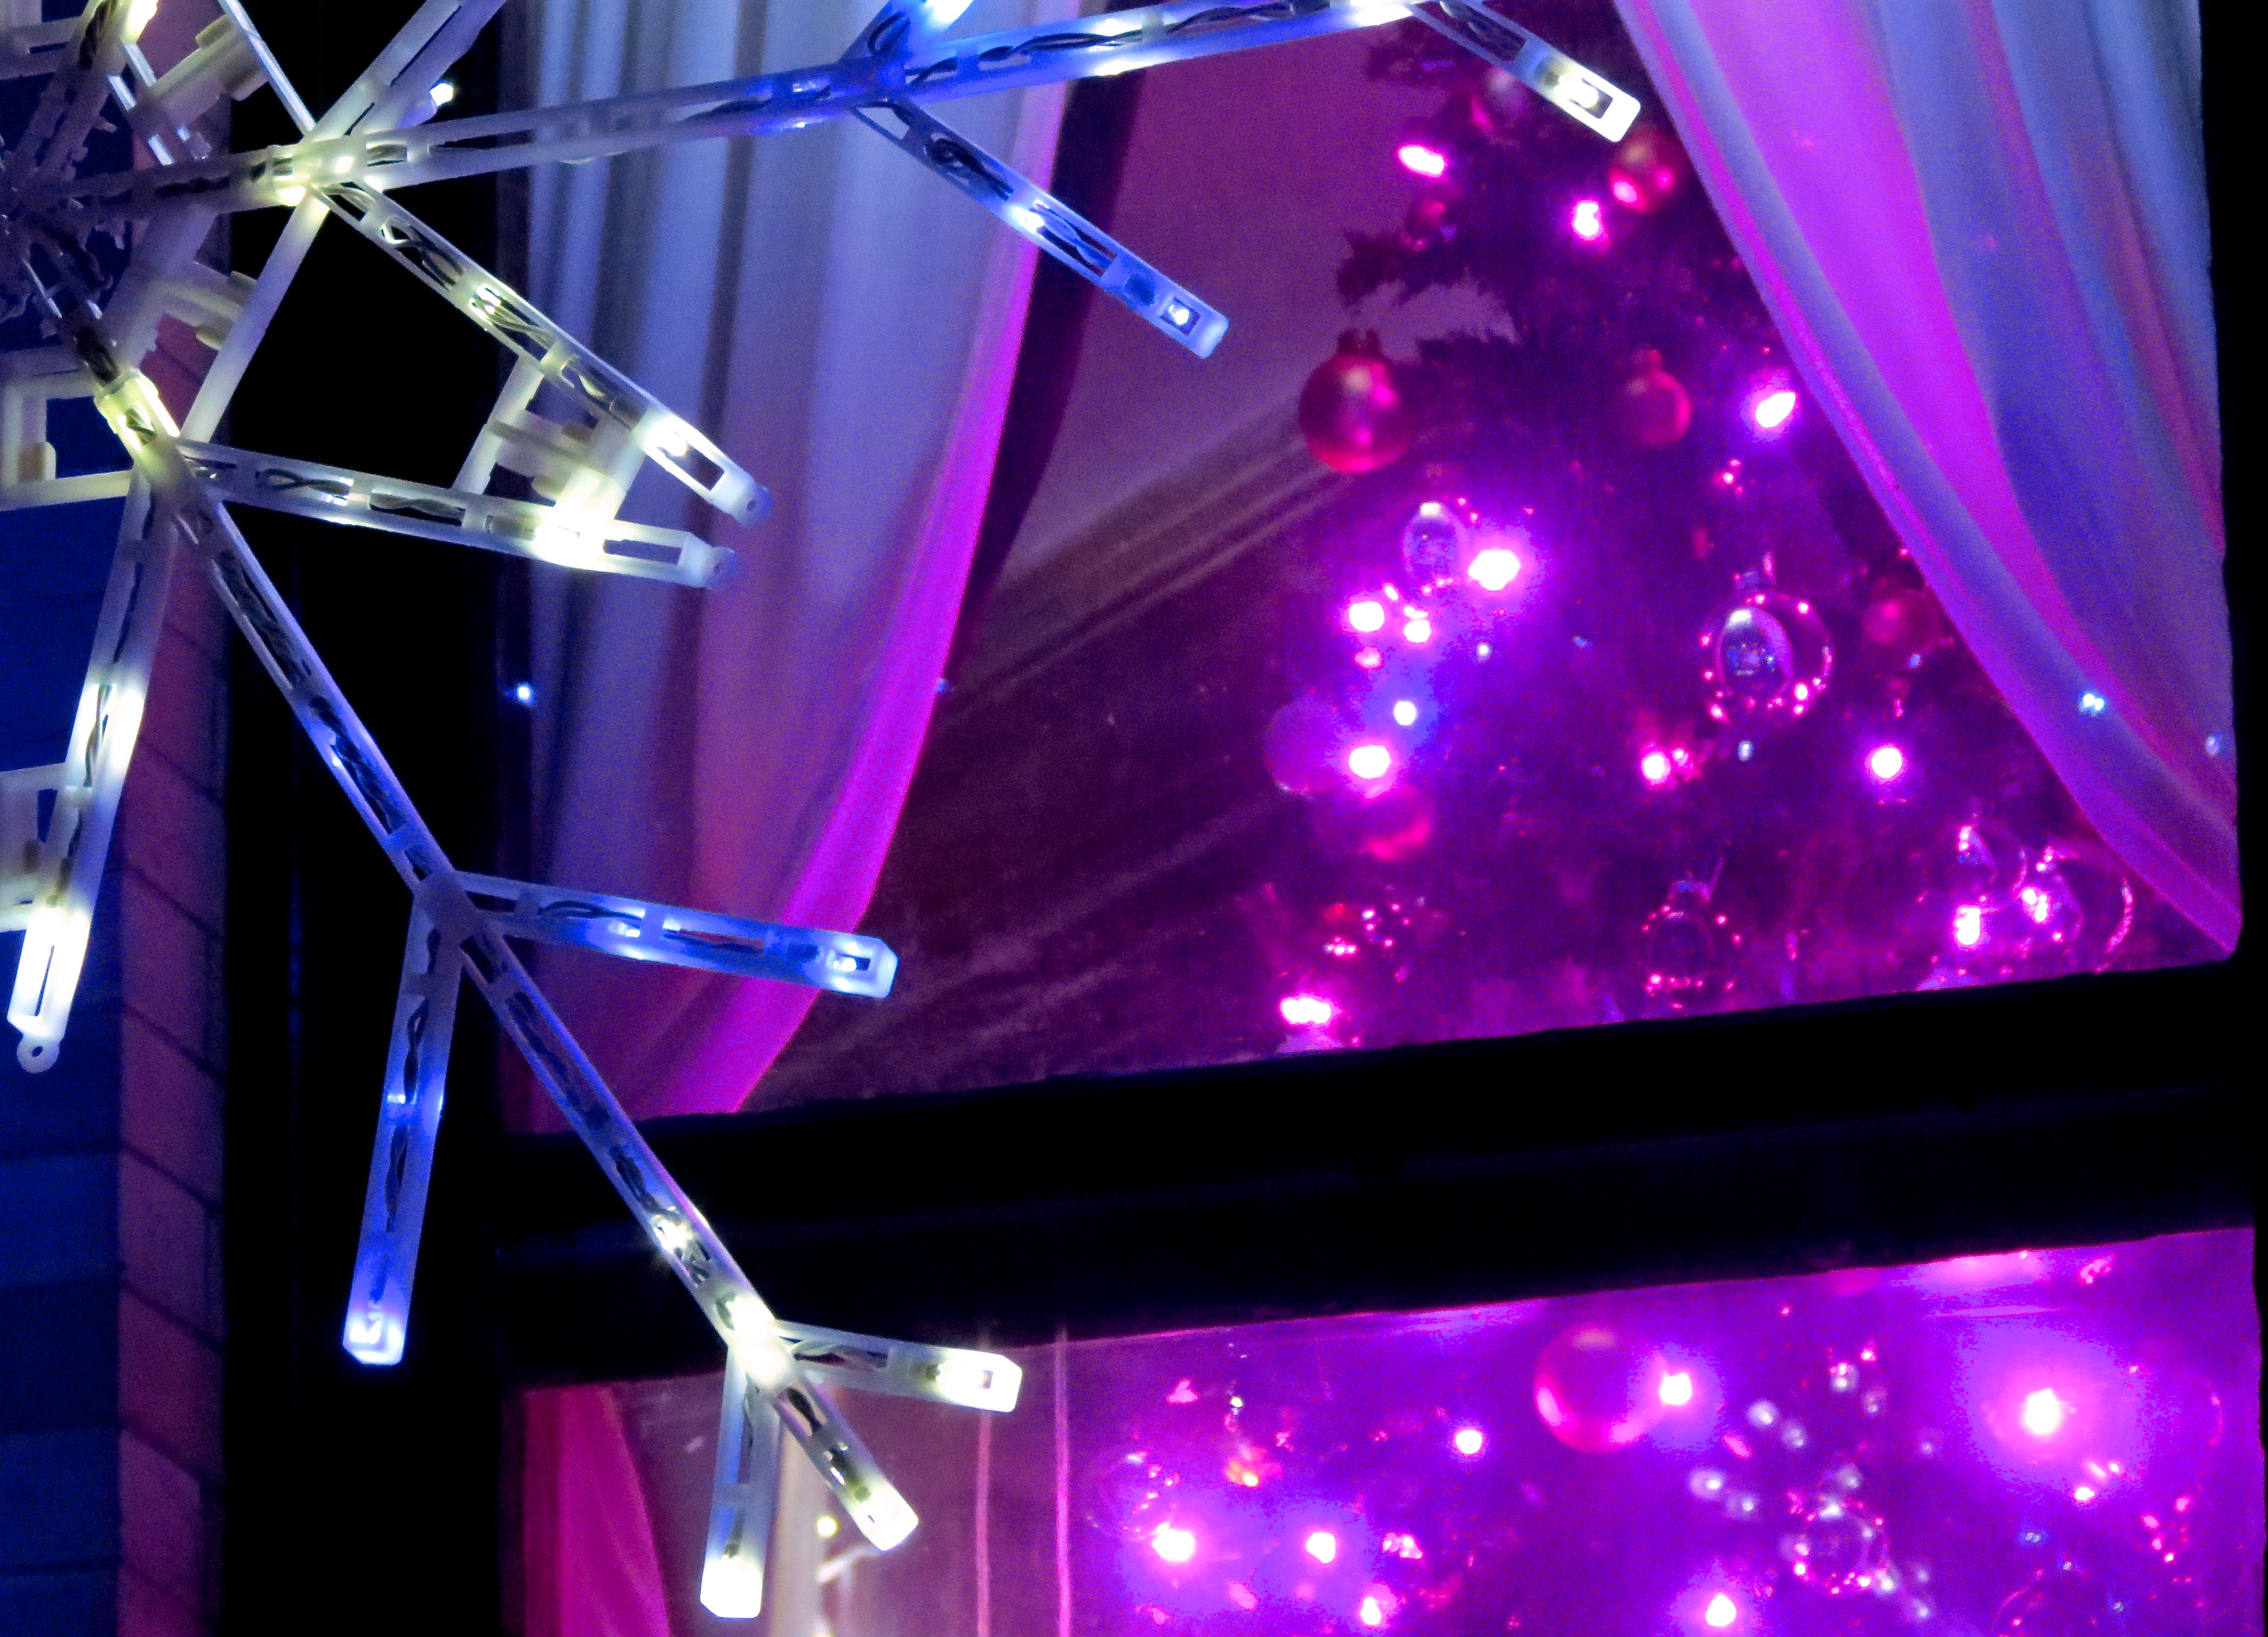
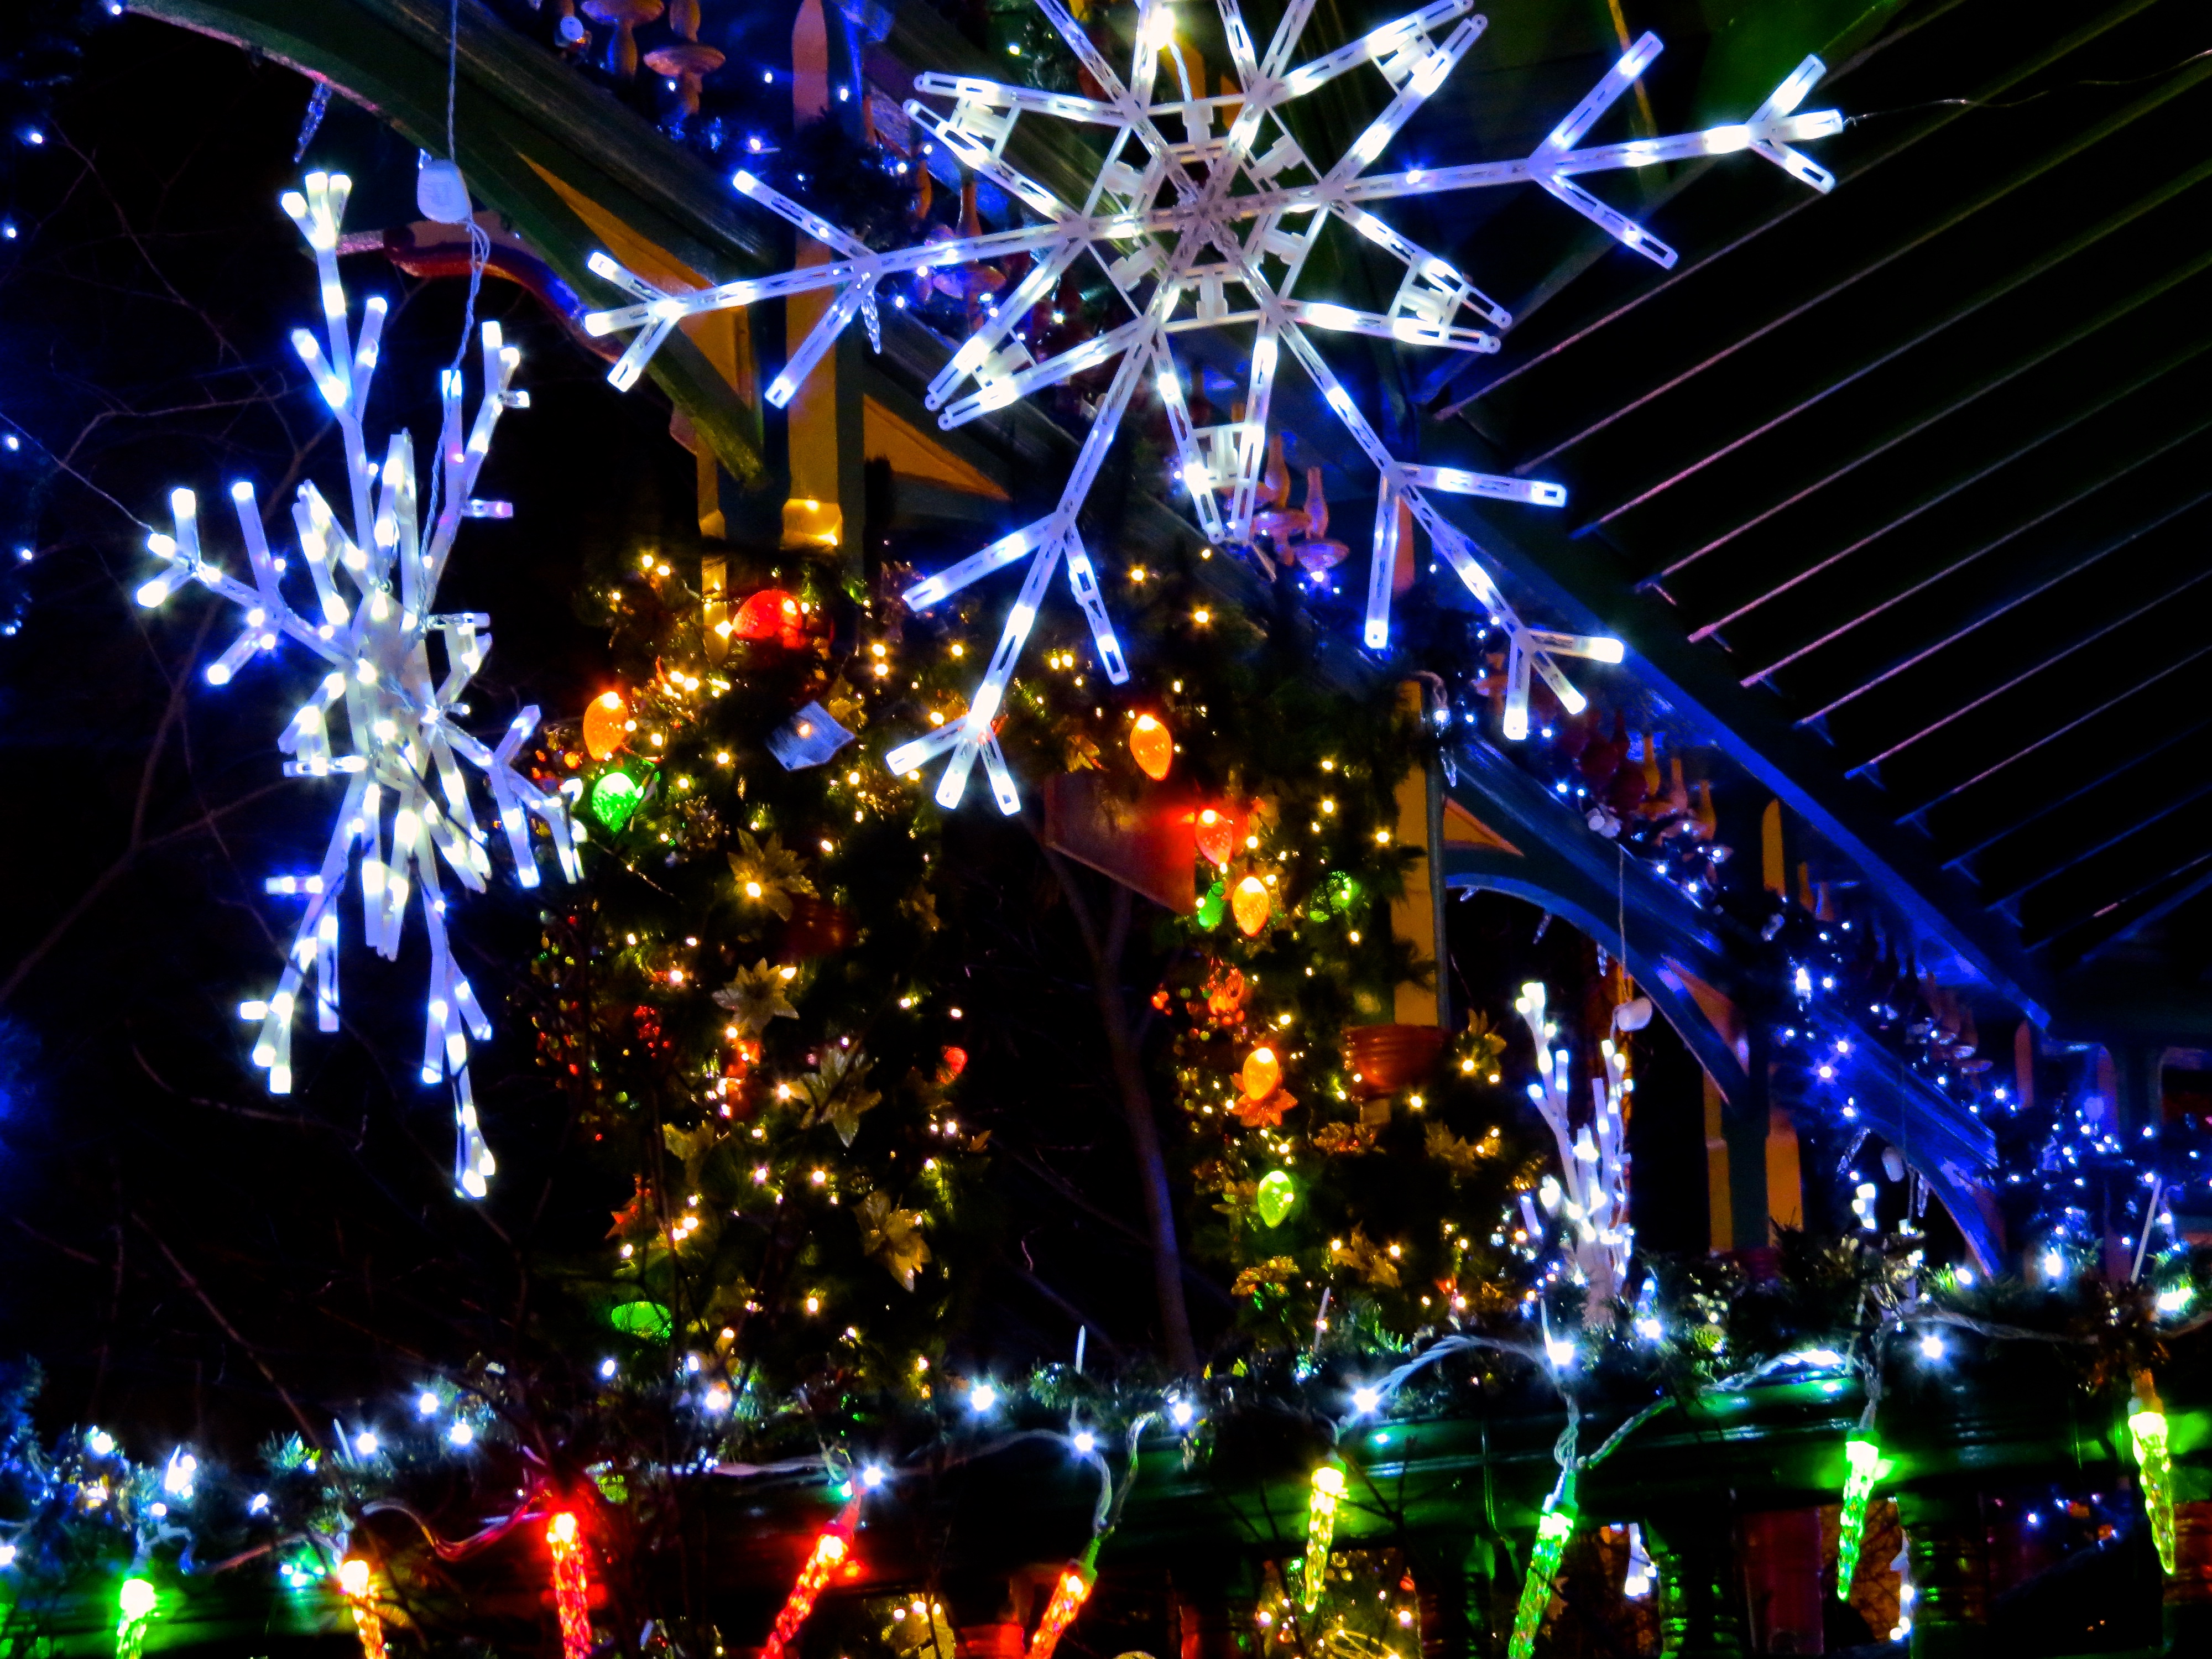
Christmas Snowflakes.

Cash, my old man.

321 Division Street, Christmas 2015.

Belle- Wondering why she couldn’t be Santa.

Dudley and Cash were not amused by the head gear.

The Christmas Day Full Cold Moon. First one since 1977.

Wishing everyone the happiest of holidays and an extra special, peaceful New Year!

Beautiful Christmas: 321 Division Street – A Peek Inside
As promised, here are a few Christmas pictures inside our house. We’re currently celebrating the house’s 125th Anniversary.
I finally finished my Department 56 Christmas in the City village yesterday even though it was the first thing I started back in November. There are approximately 80 houses and 200 accessories.
I tried to include a variety of pictures featuring some of our 12 indoor trees.

A view of the basement man cave.
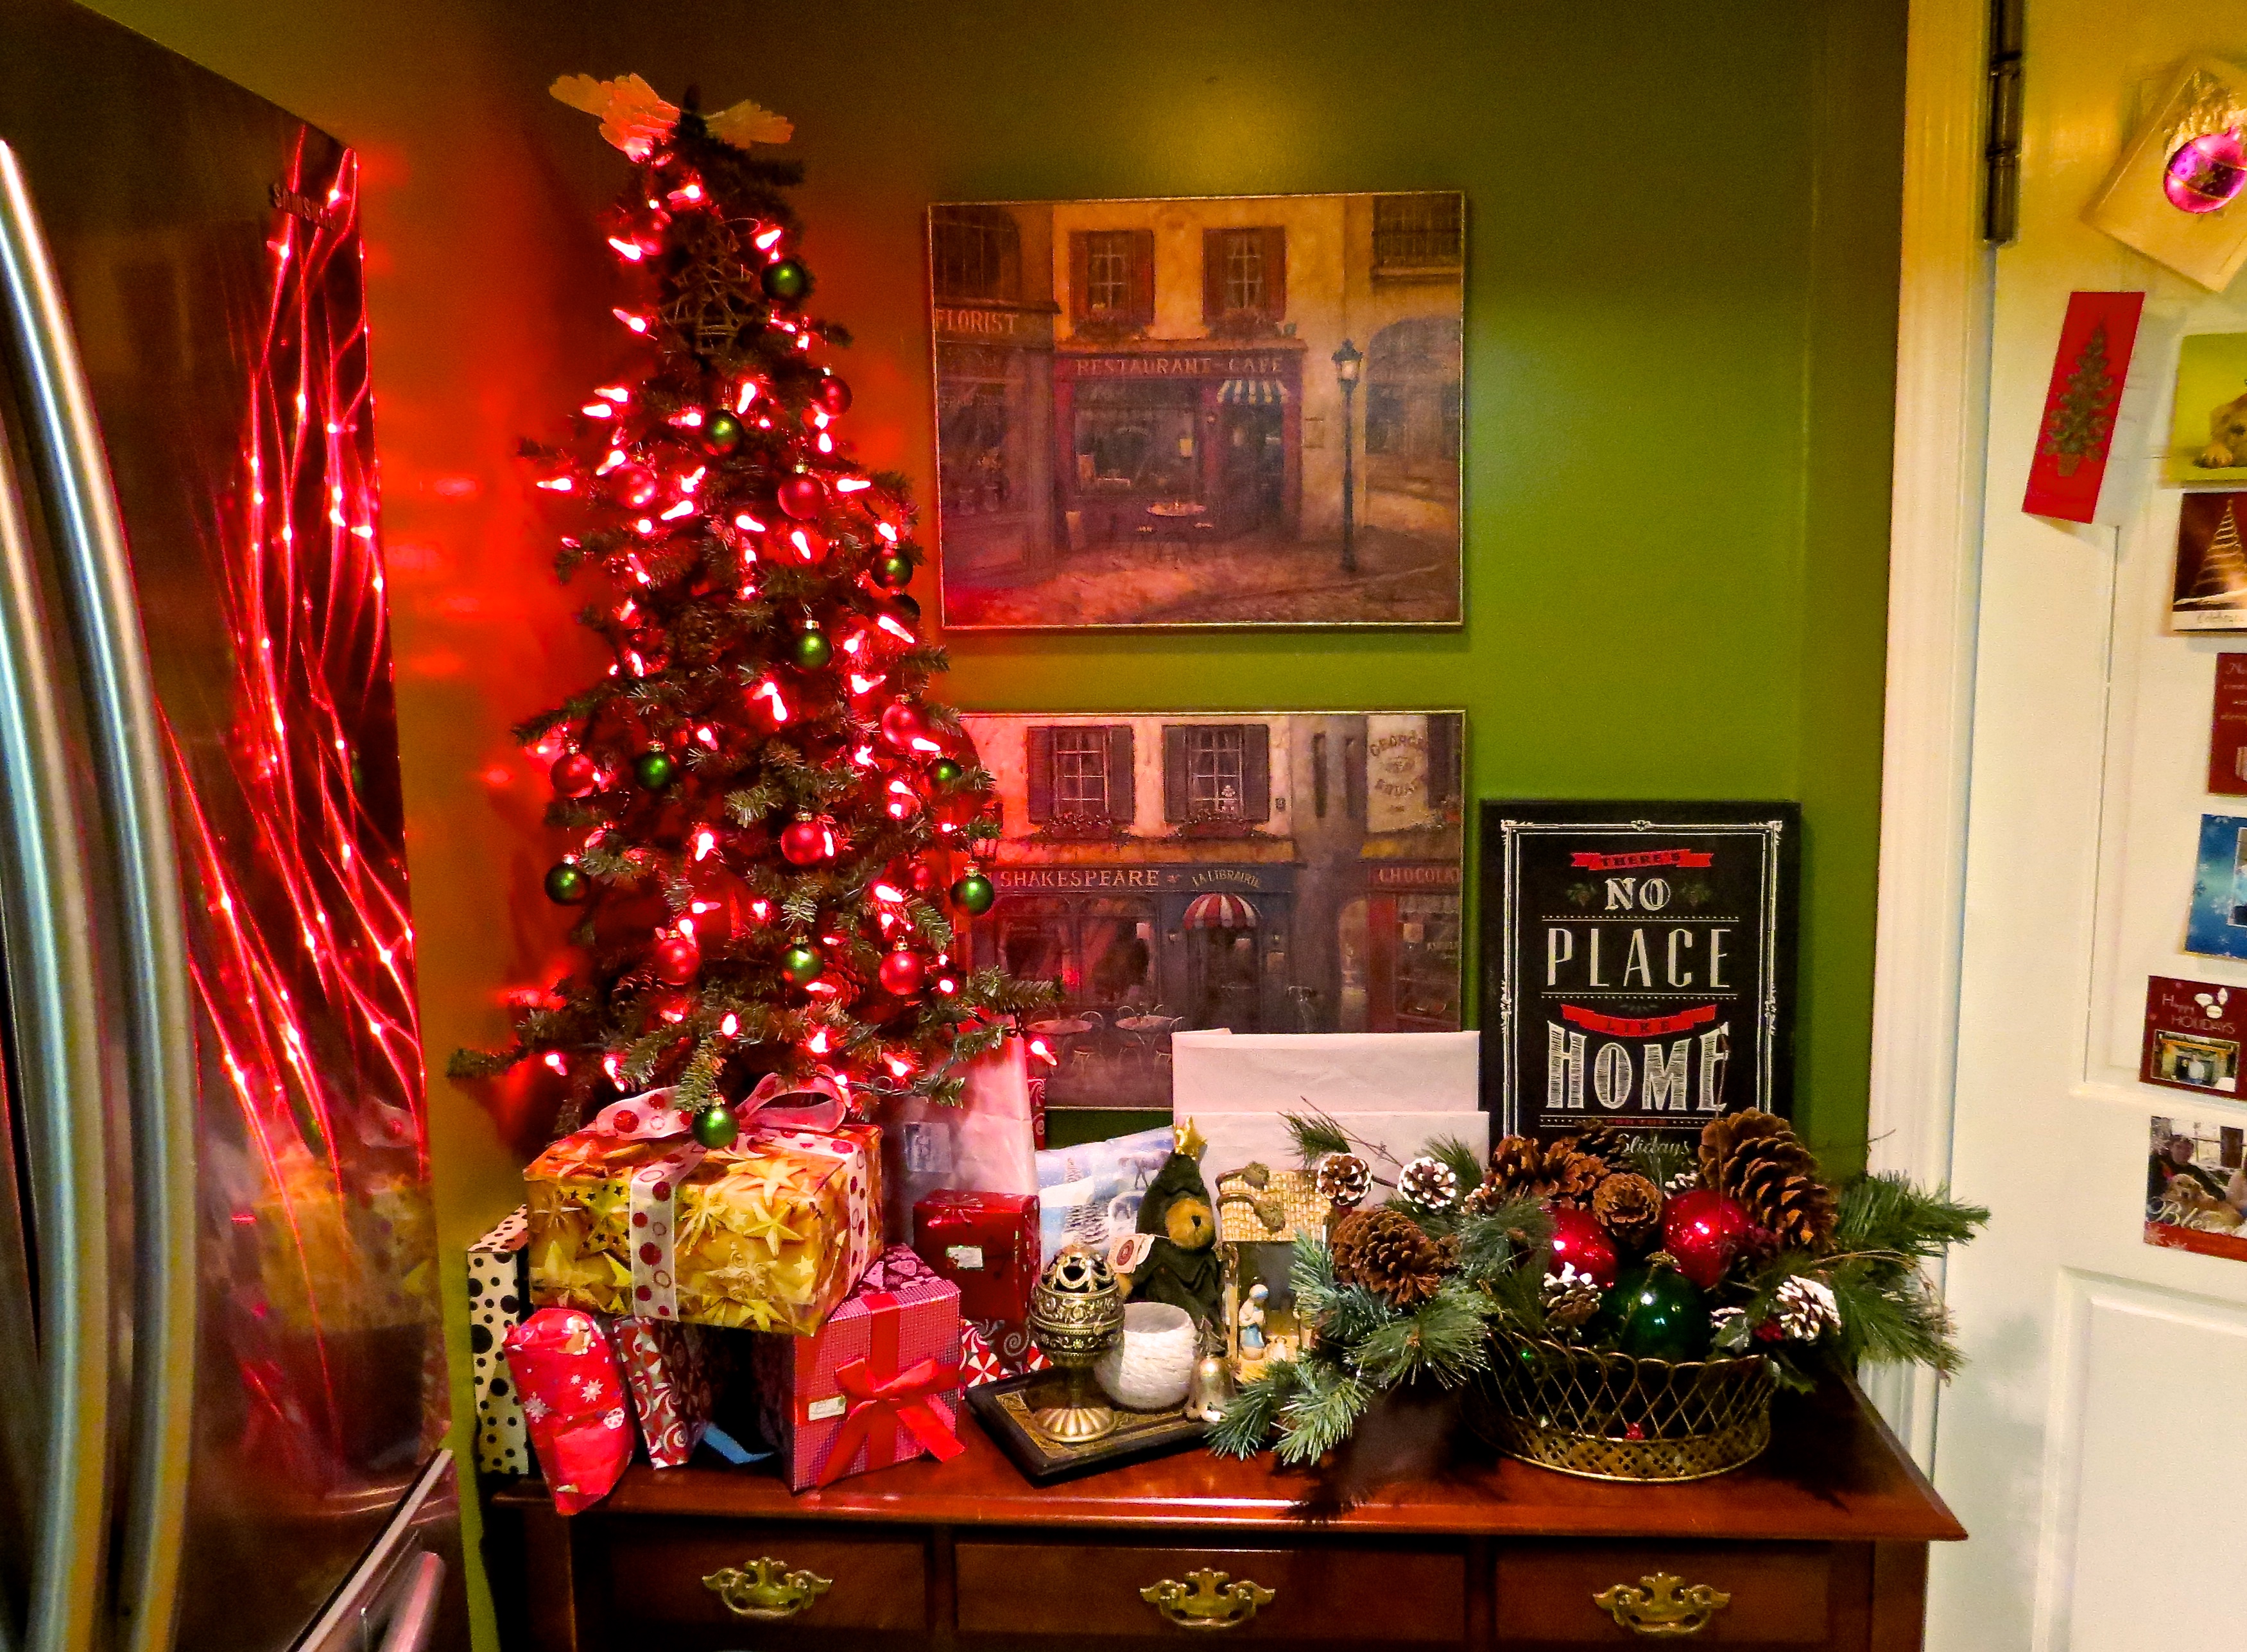
A corner of our kitchen.

The Foyer from the front door.

The Department 56, Christmas in the City village.
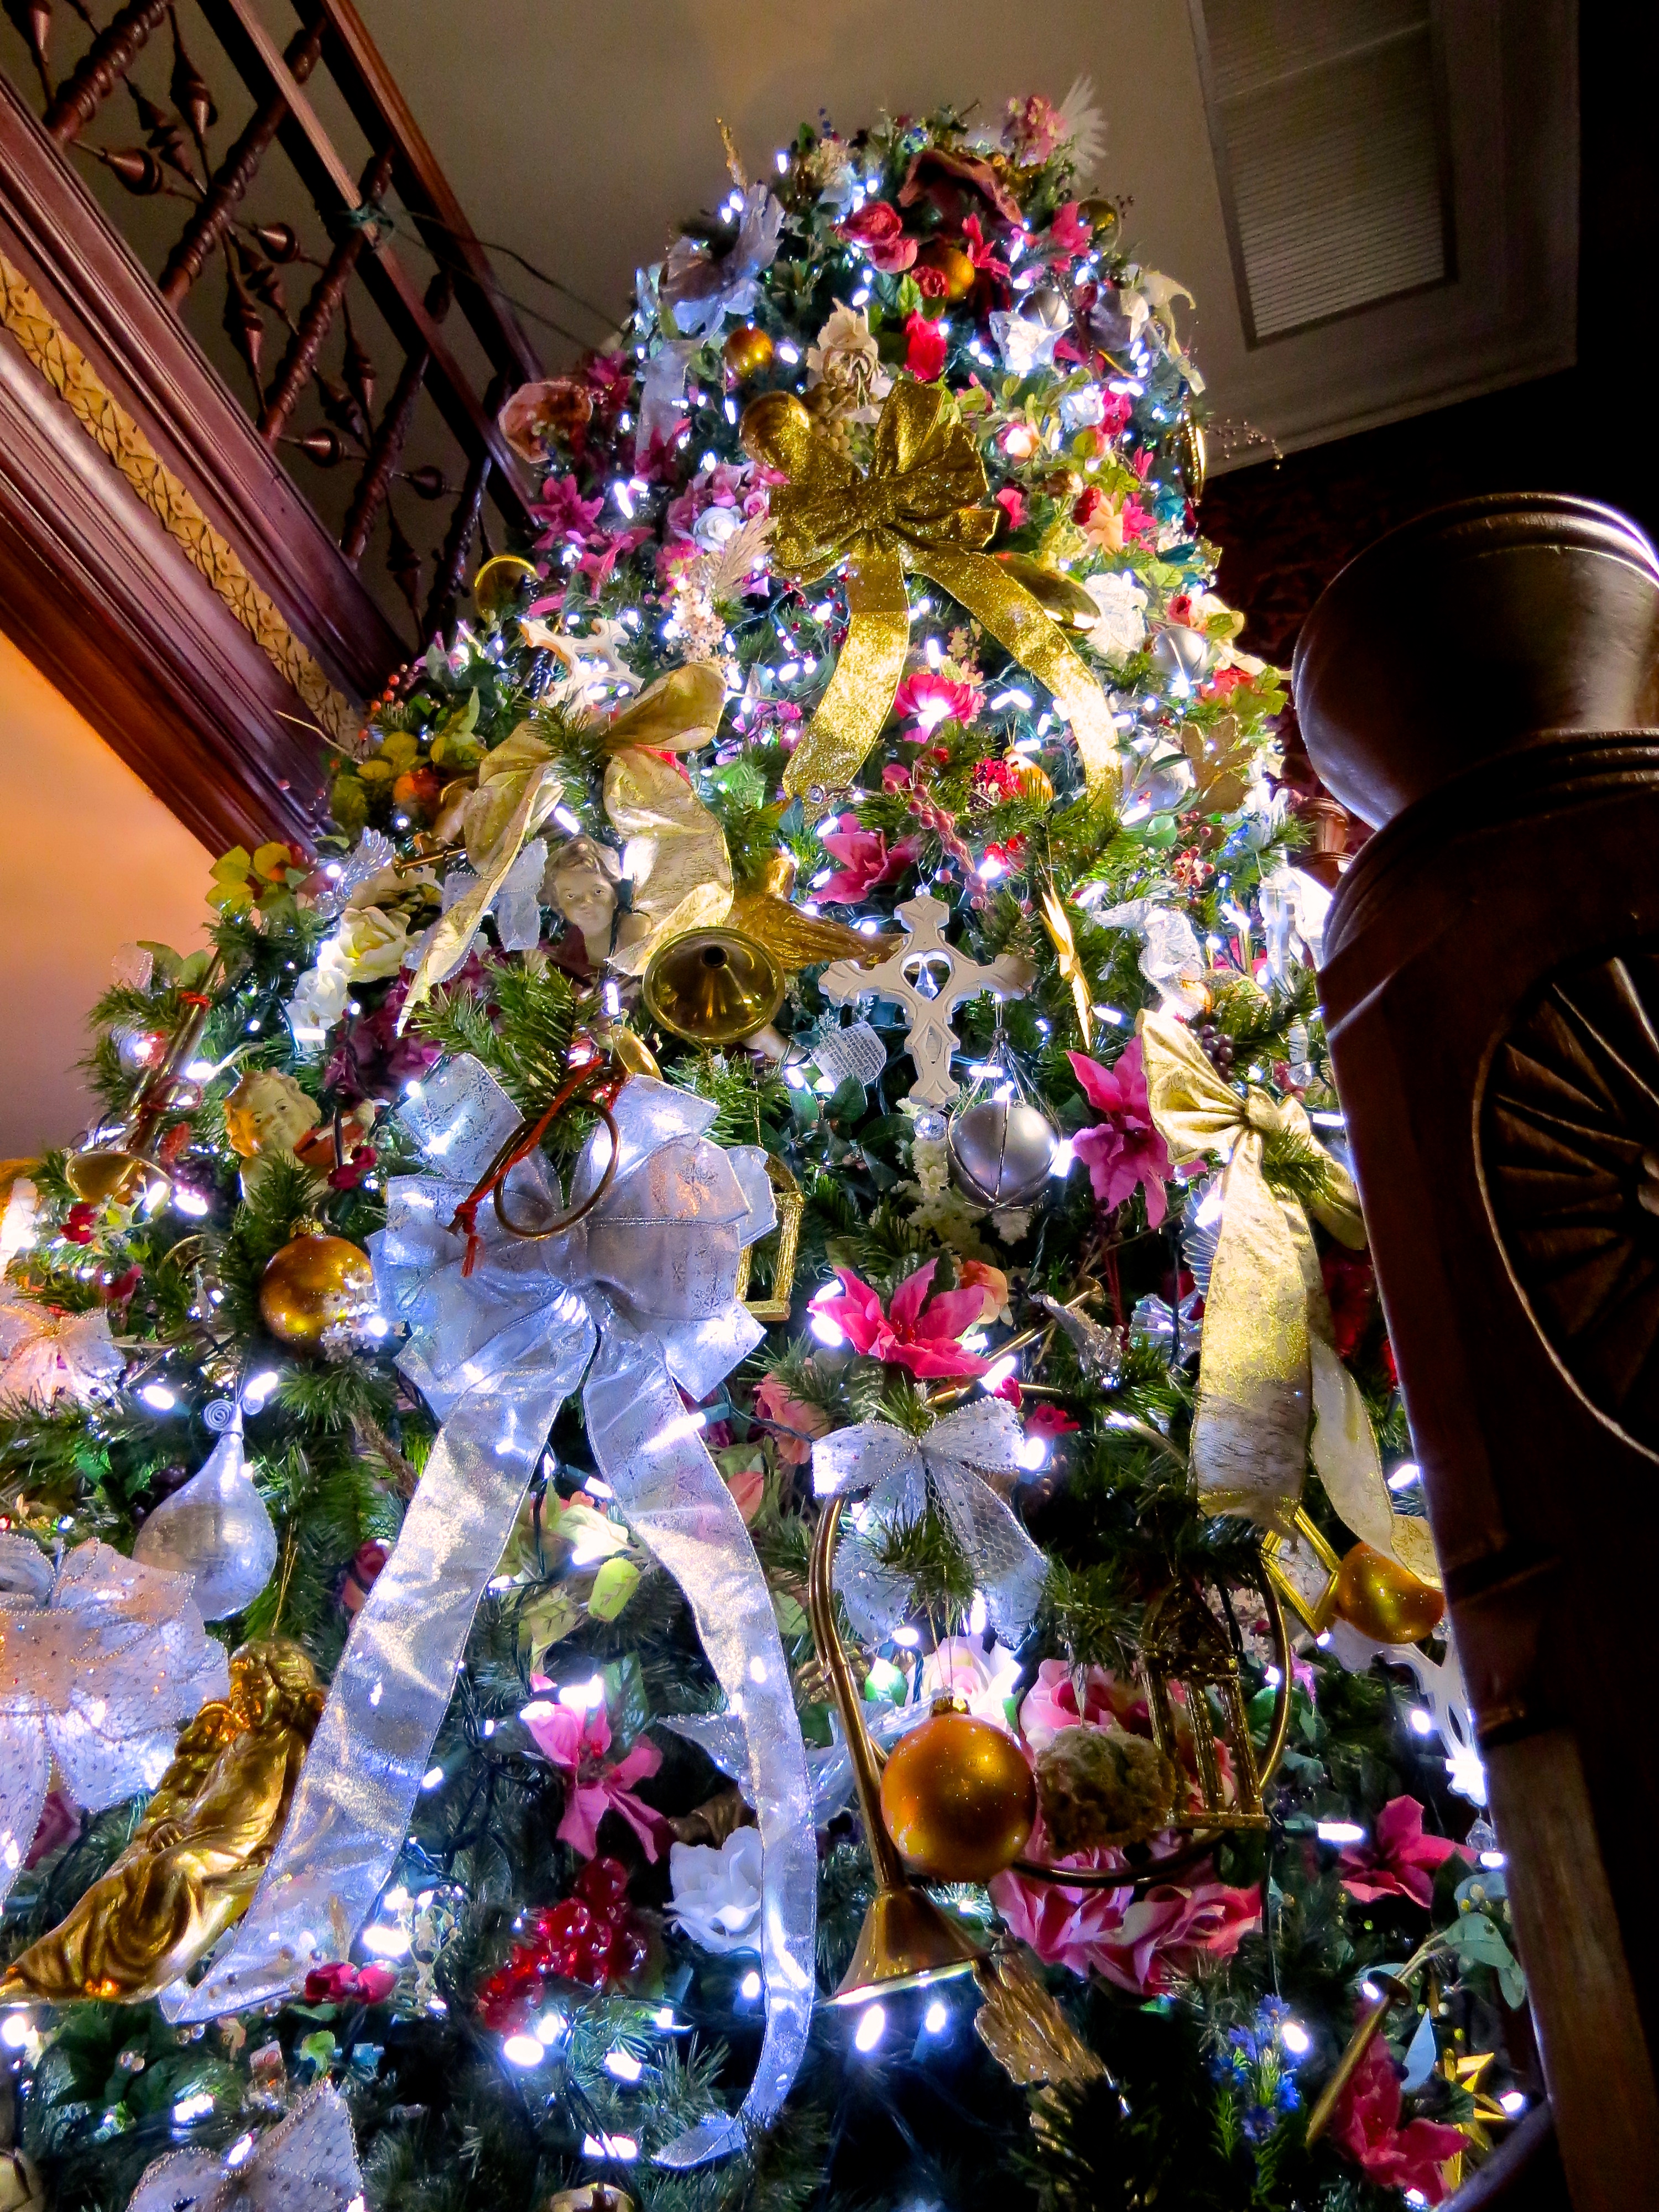
Looking up at the Foyer Christmas Tree.
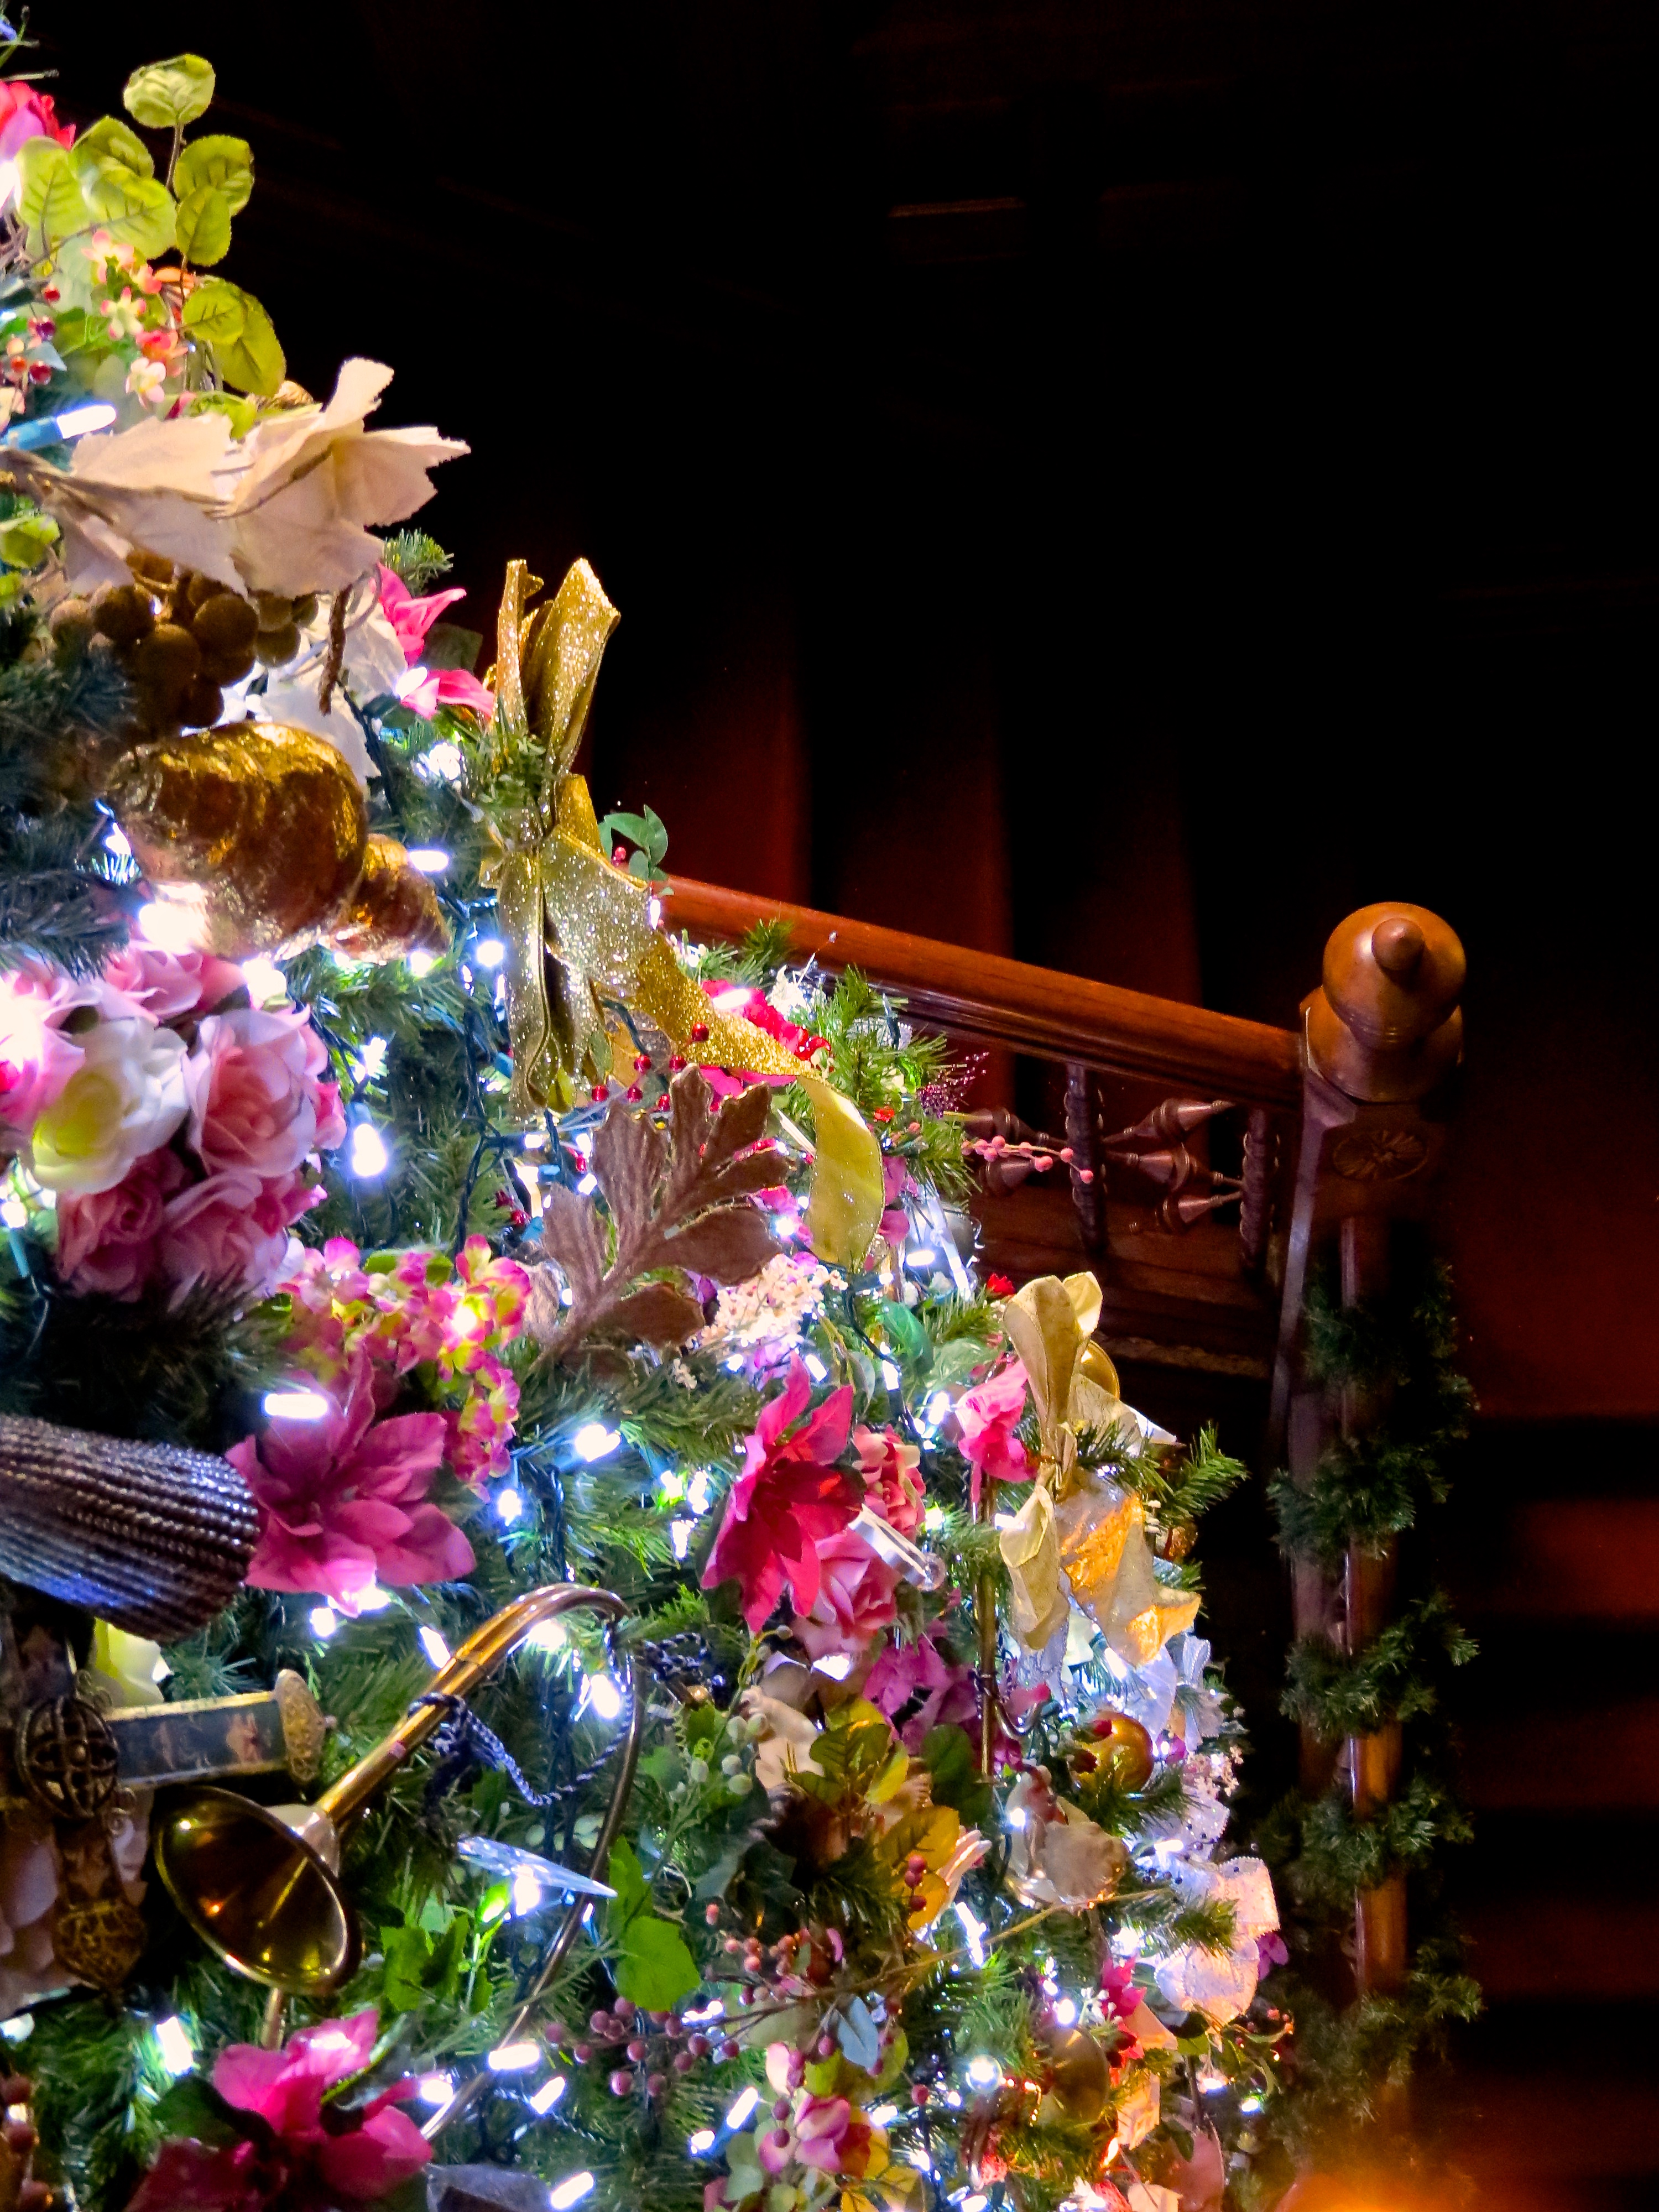
The Foyer Christmas tree from the second floor.
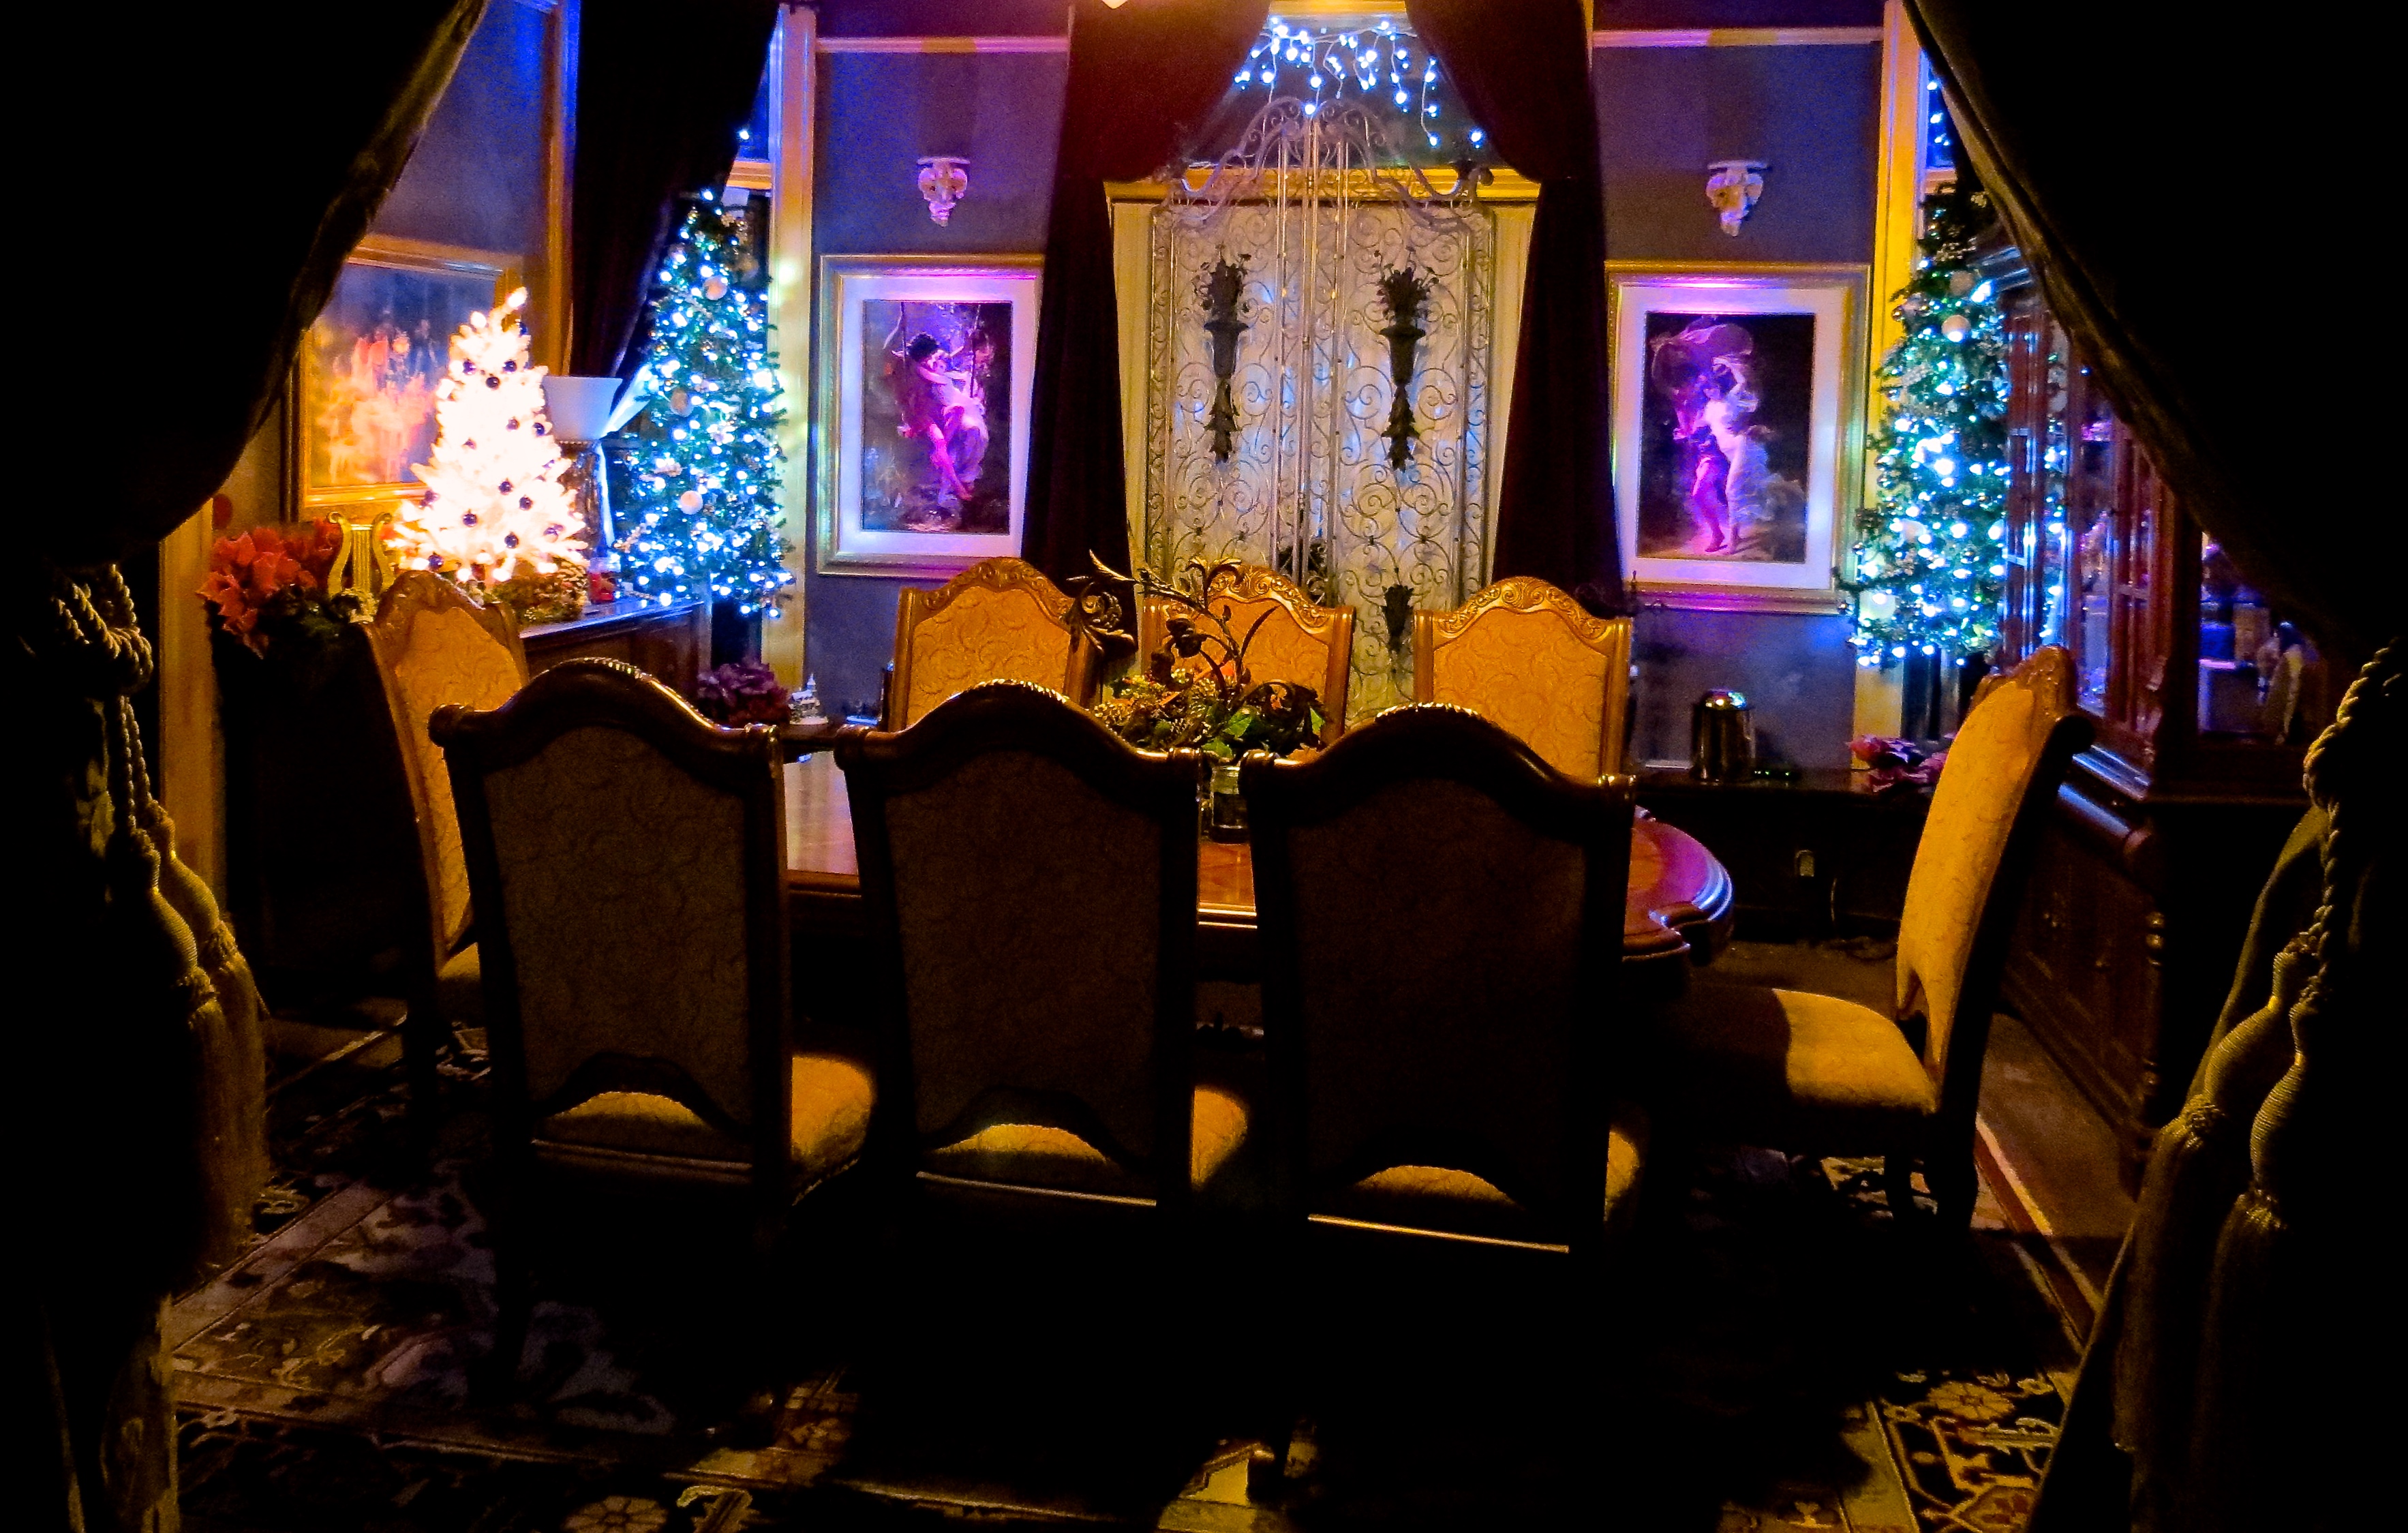
The dining room, originally the second or family parlor.

The front parlor.
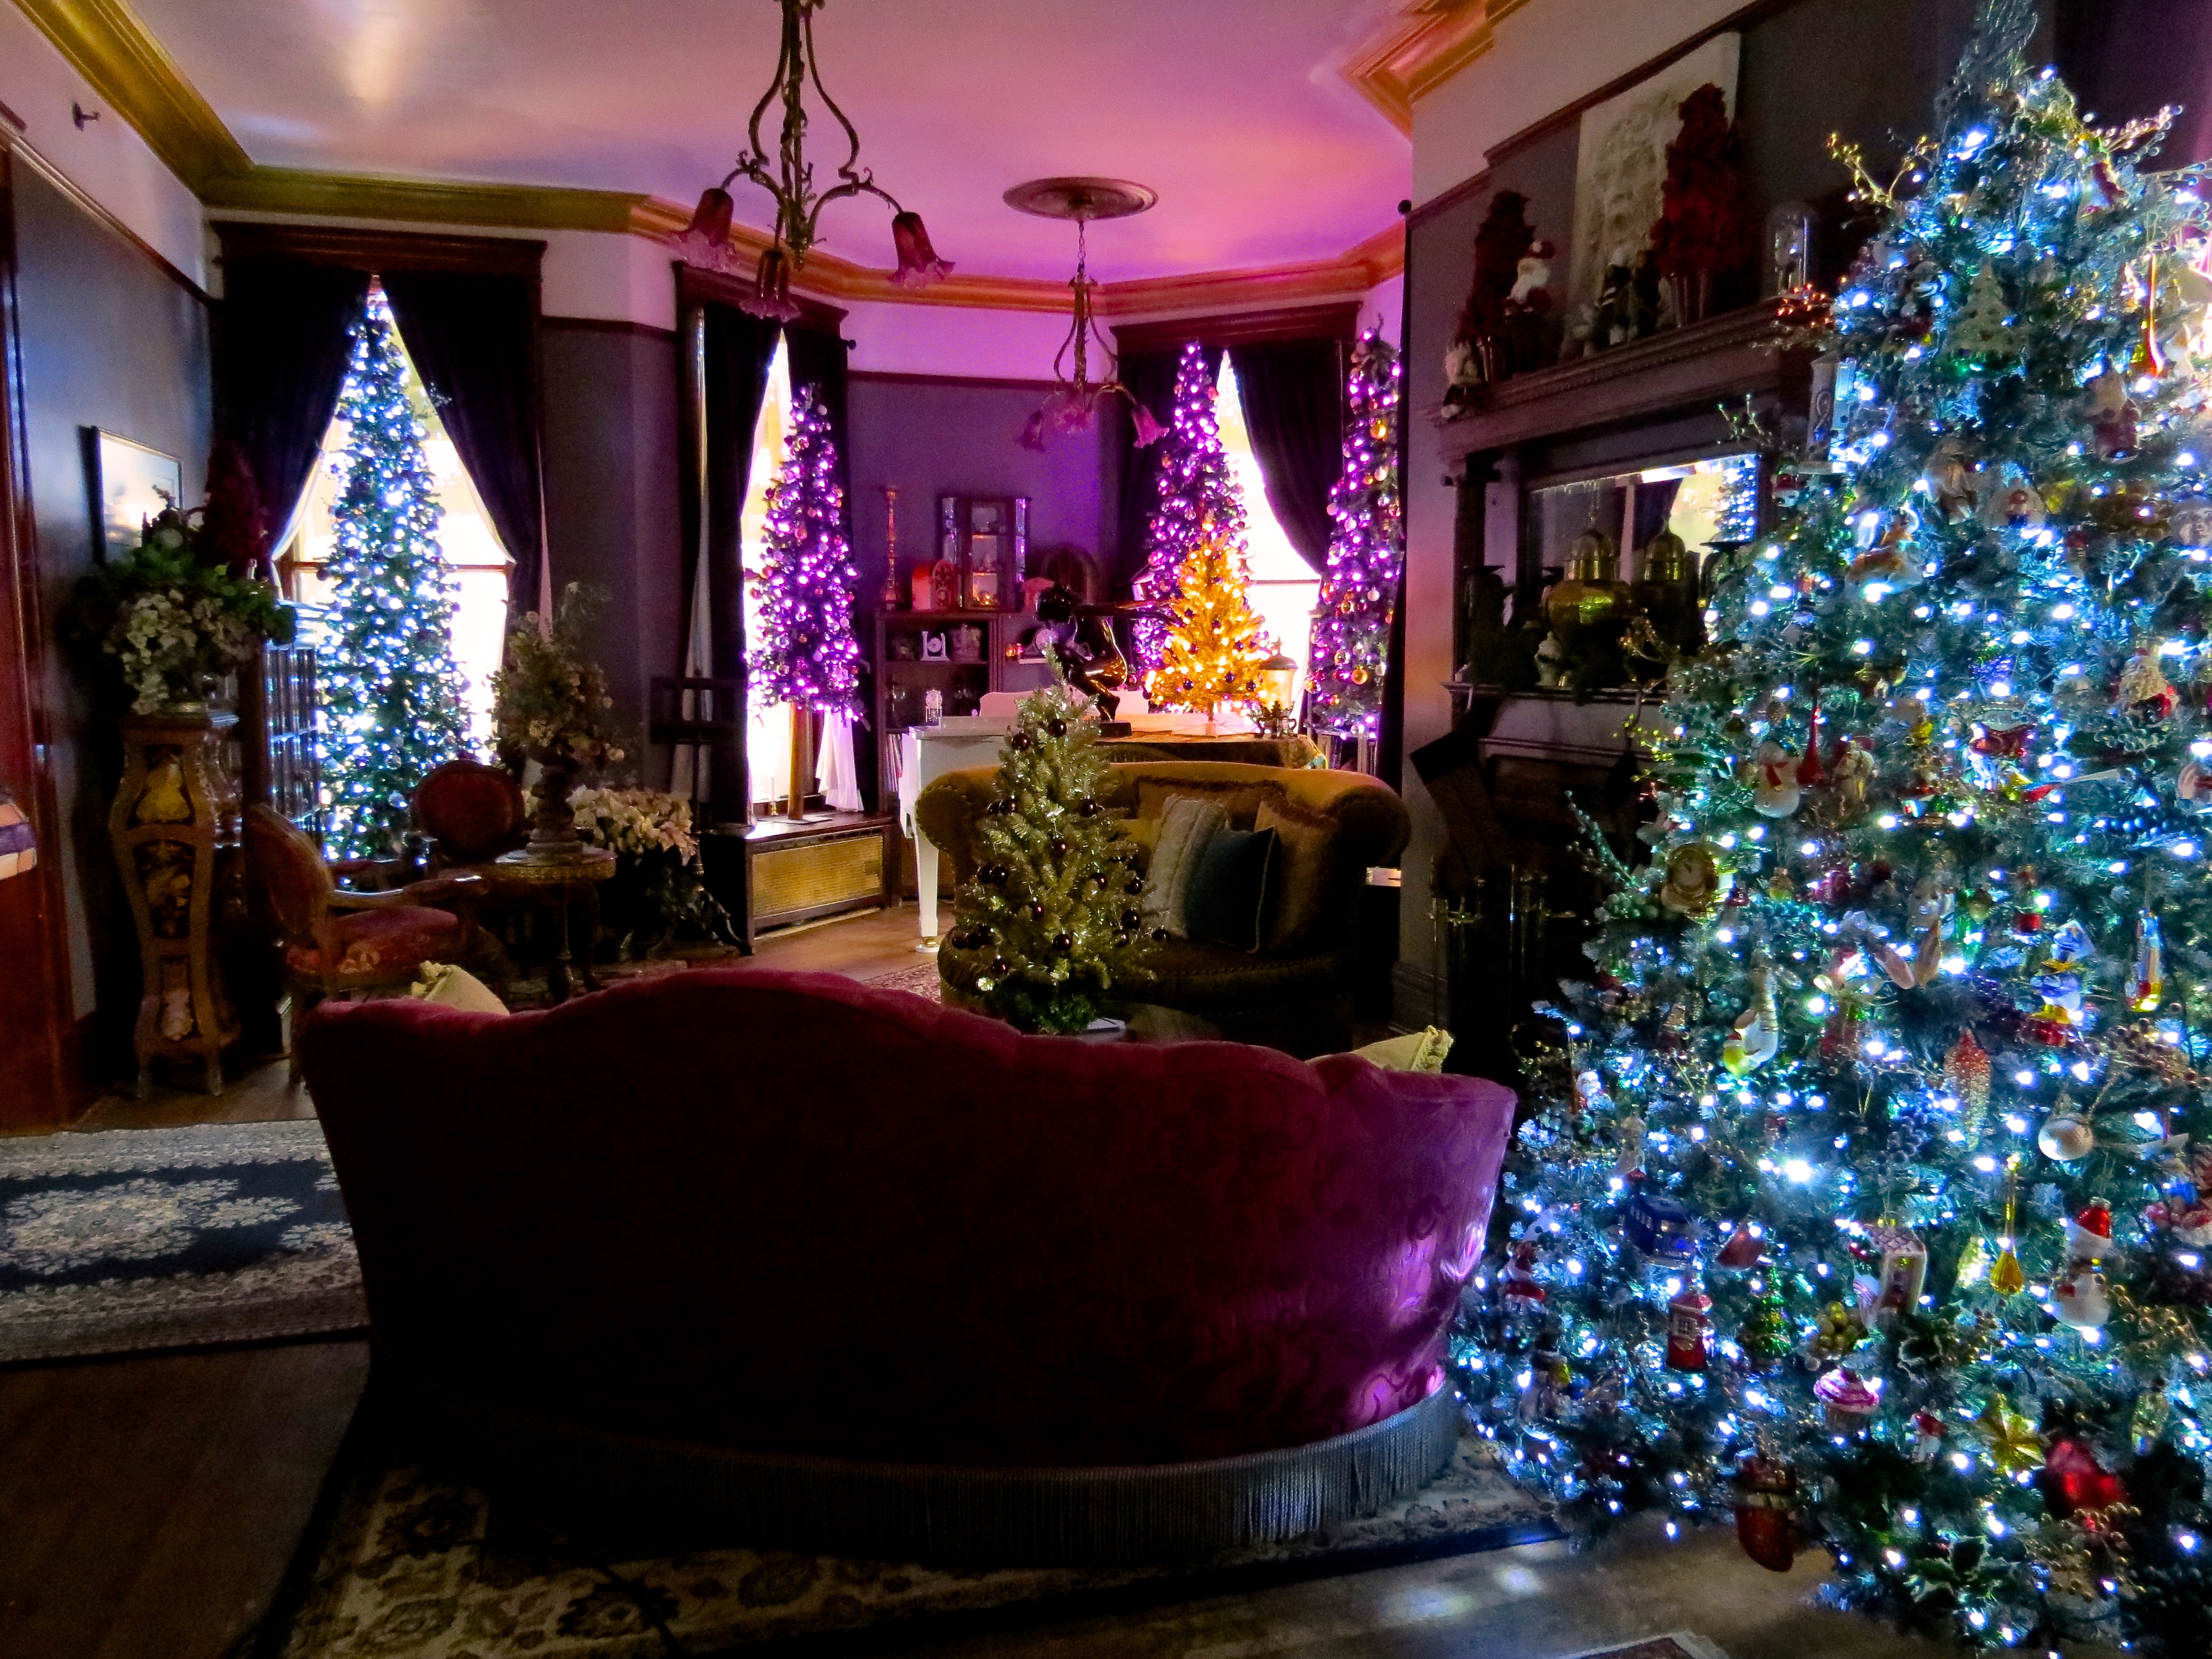
The front parlor during the day.
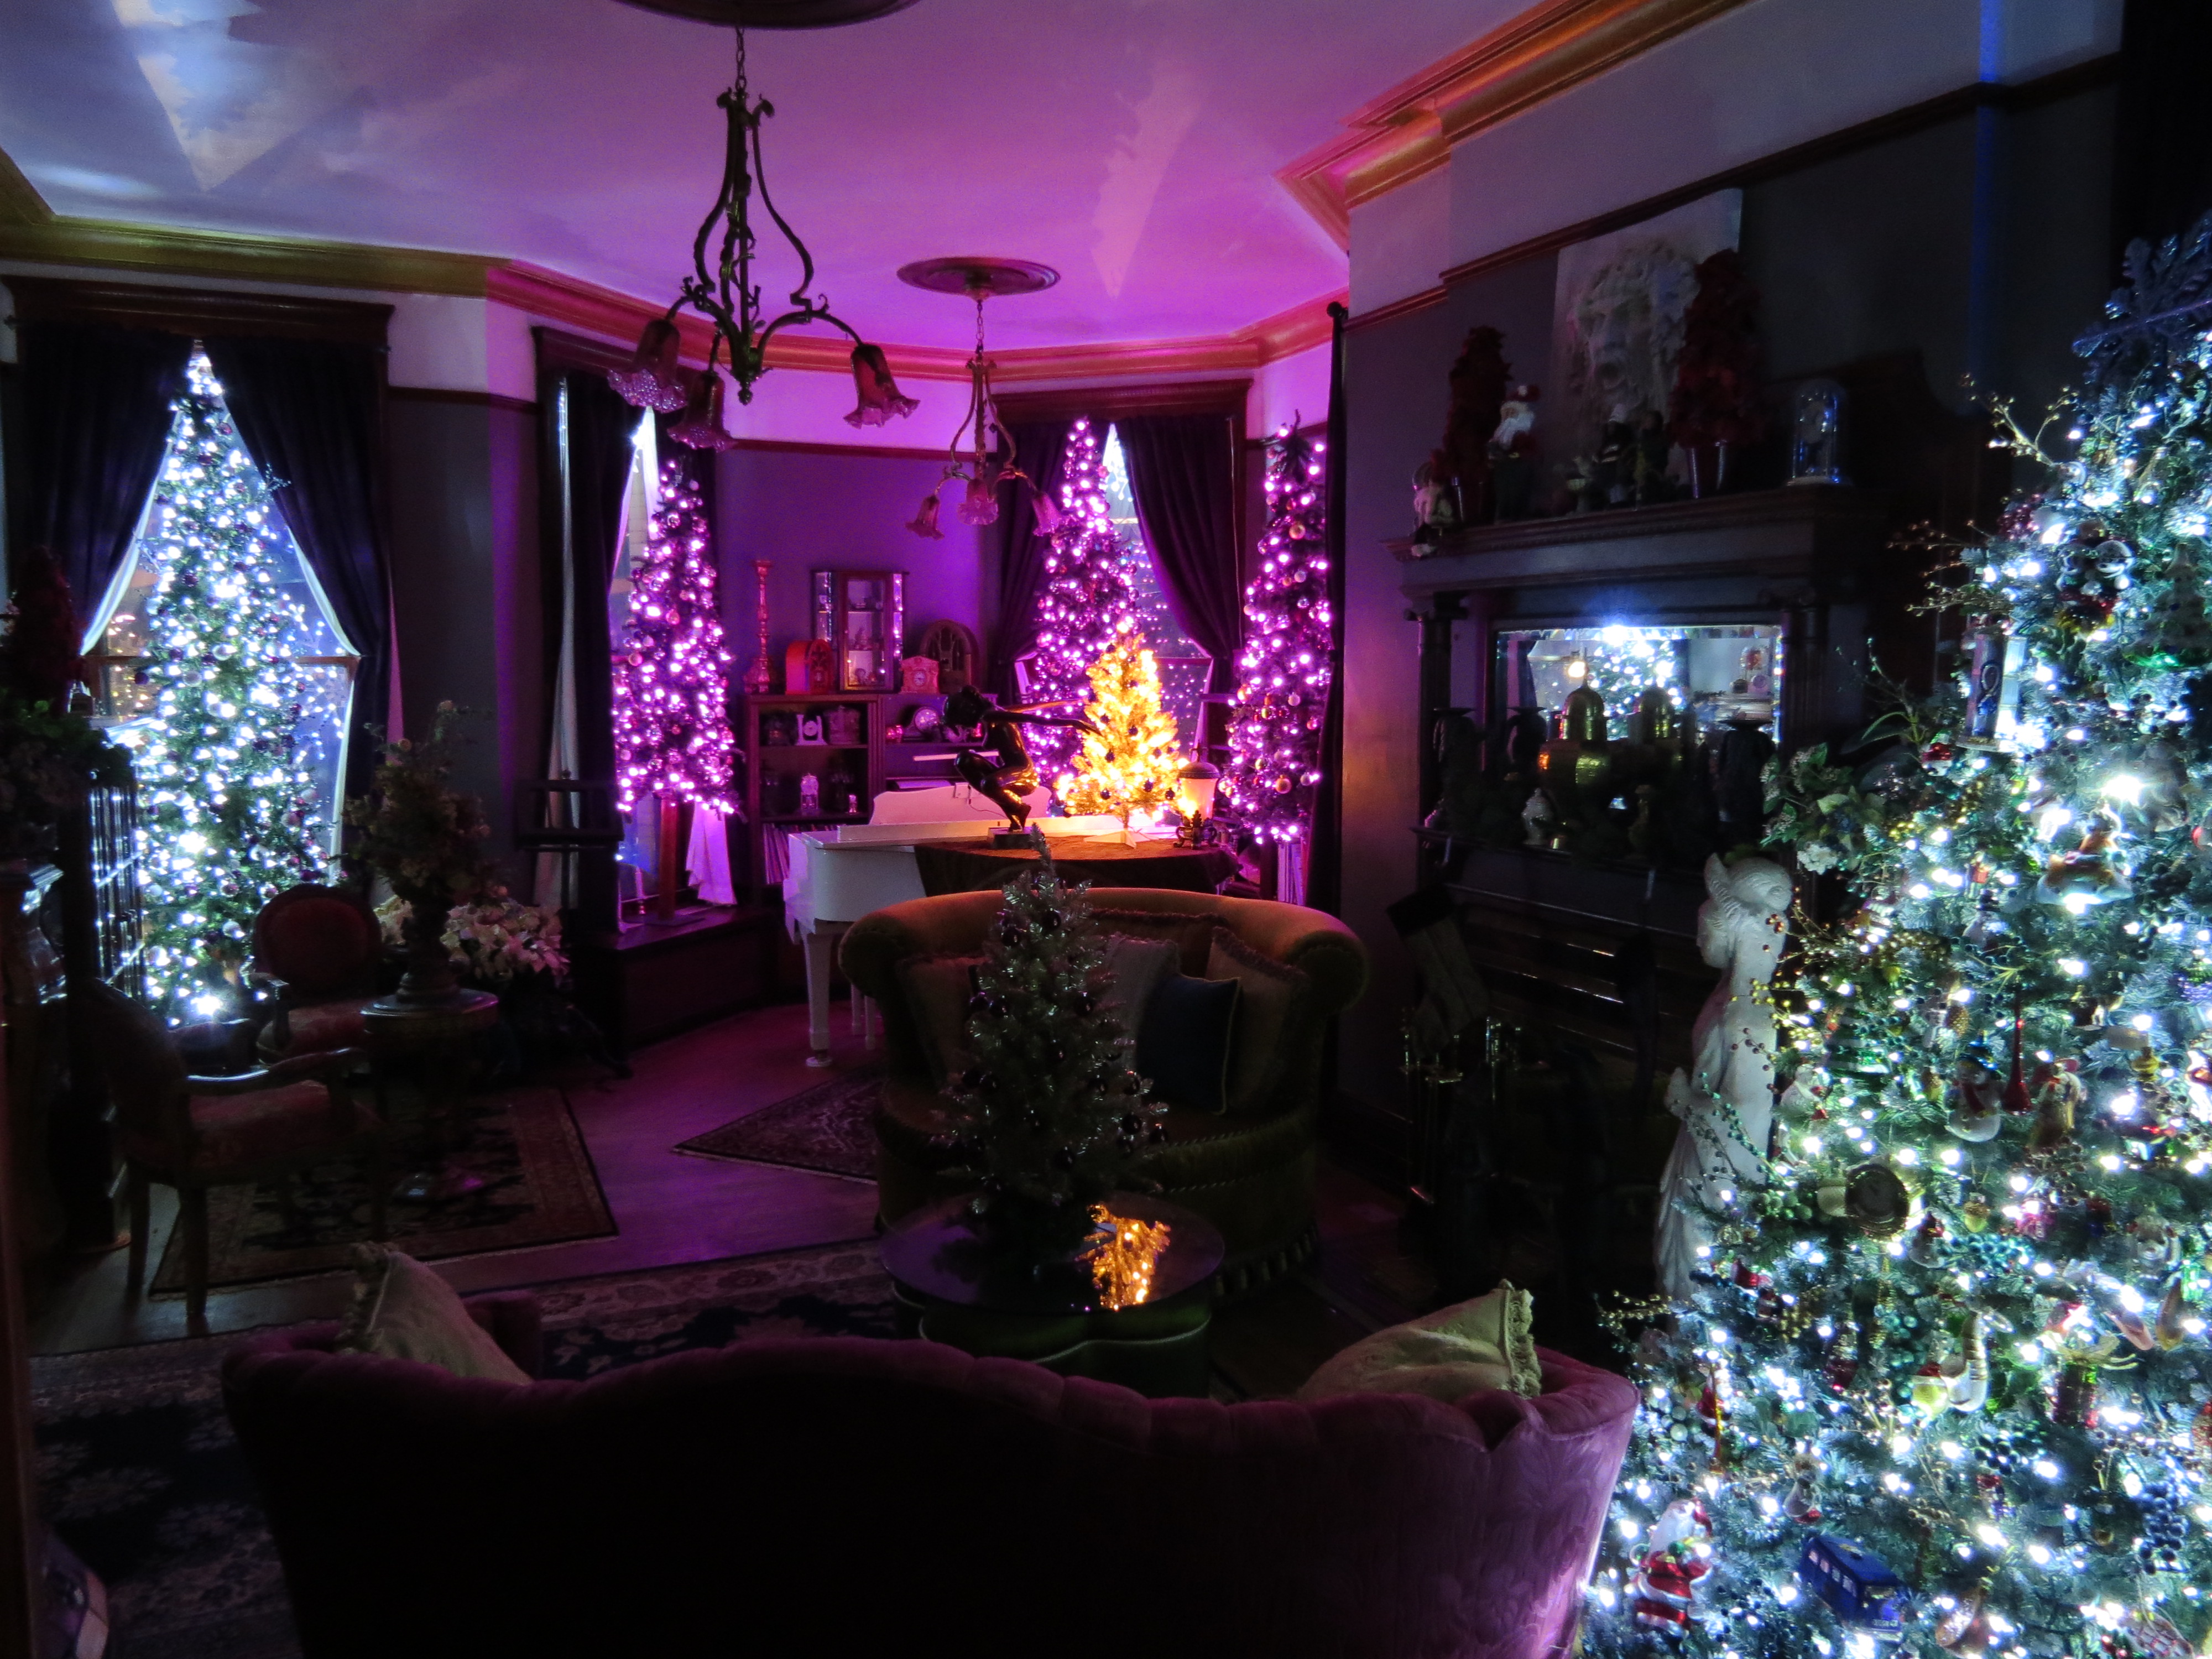
Front Parlor- Night view.
Smaller Foyer tree by the front door.

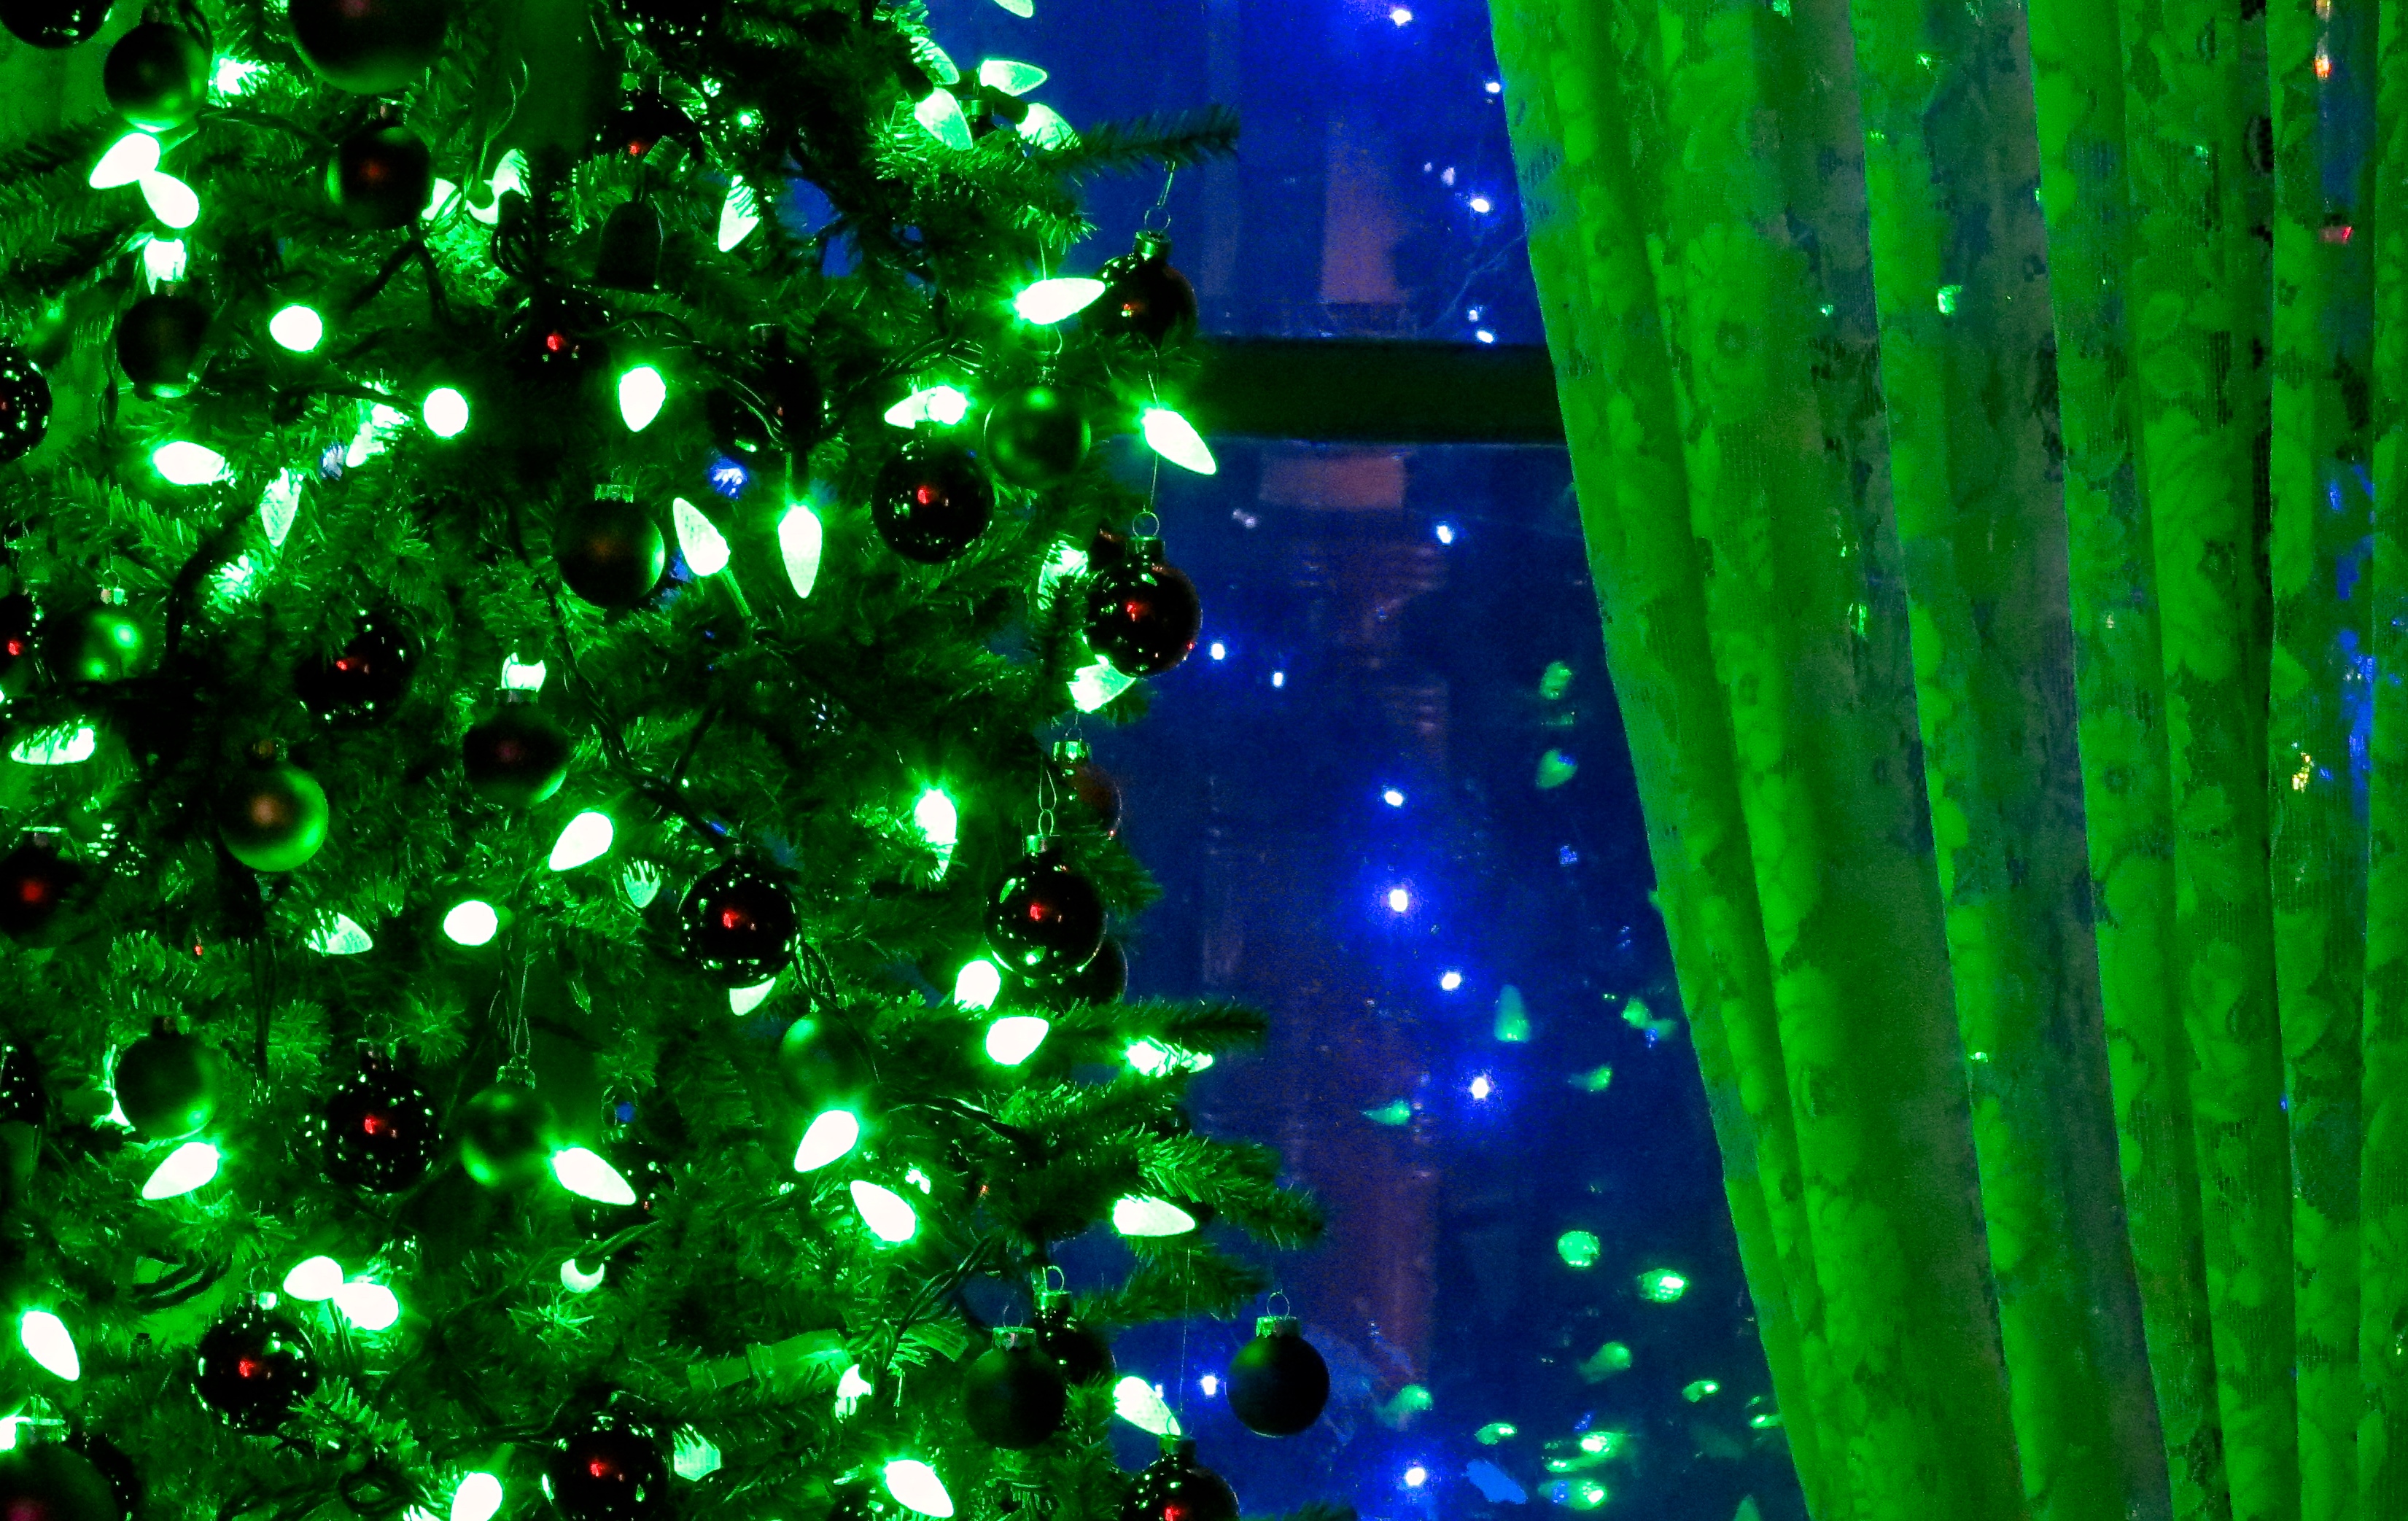
Mercury Glass Ornaments in the front Parlor.

Cherubs on the Foyer tree.

Mantle decor.

Beautiful Christmas: 321 Division Street – A Look Outside

The front gate at 321 Division Street, December 2014.
It’s the 125th Christmas here at 321 Division Street and no snow… yet. With Christmas only a few days away, I wanted to post some pictures to help you get in the holiday spirit.
Here’s what the house looks like on the outside, tomorrow I’ll share some pictures from the inside.
Just before sunset.

Front entrance before sunset.
321 Division Street, from the front corner.

Christmas at 321 Division Street.
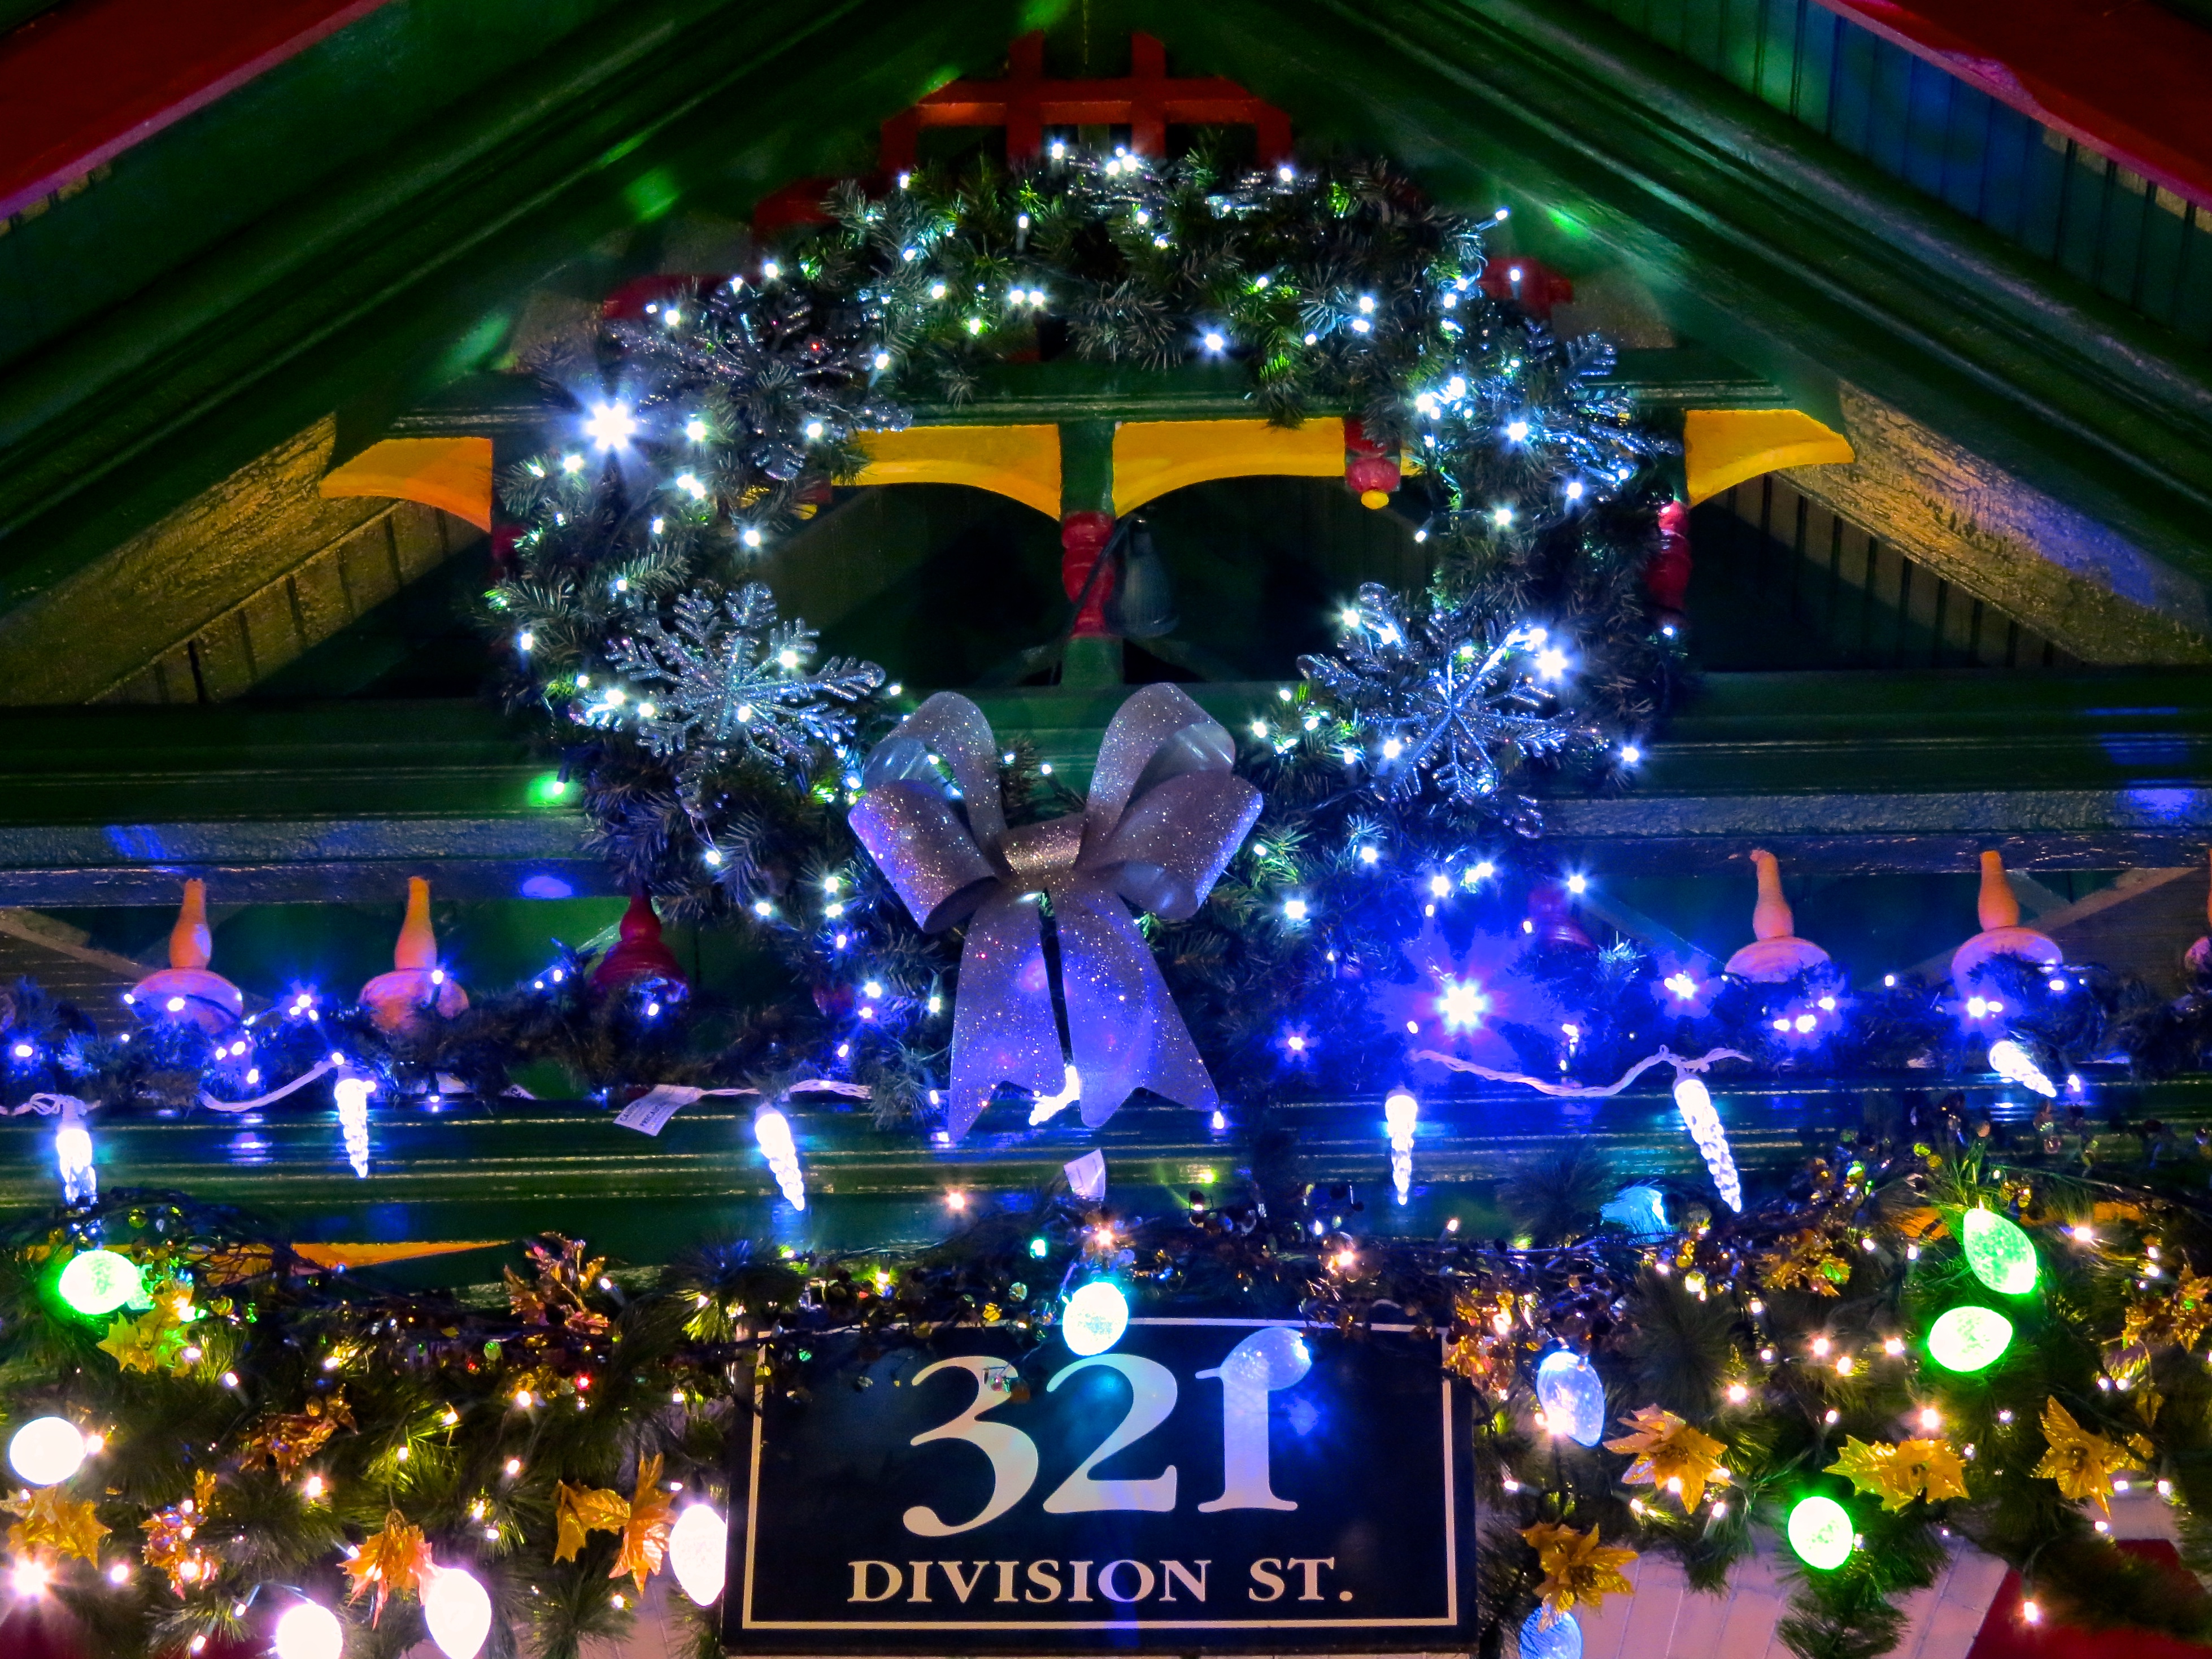
Wreath above the main entrance.

Garland and red bow drape the wrought iron fence surrounding the house.

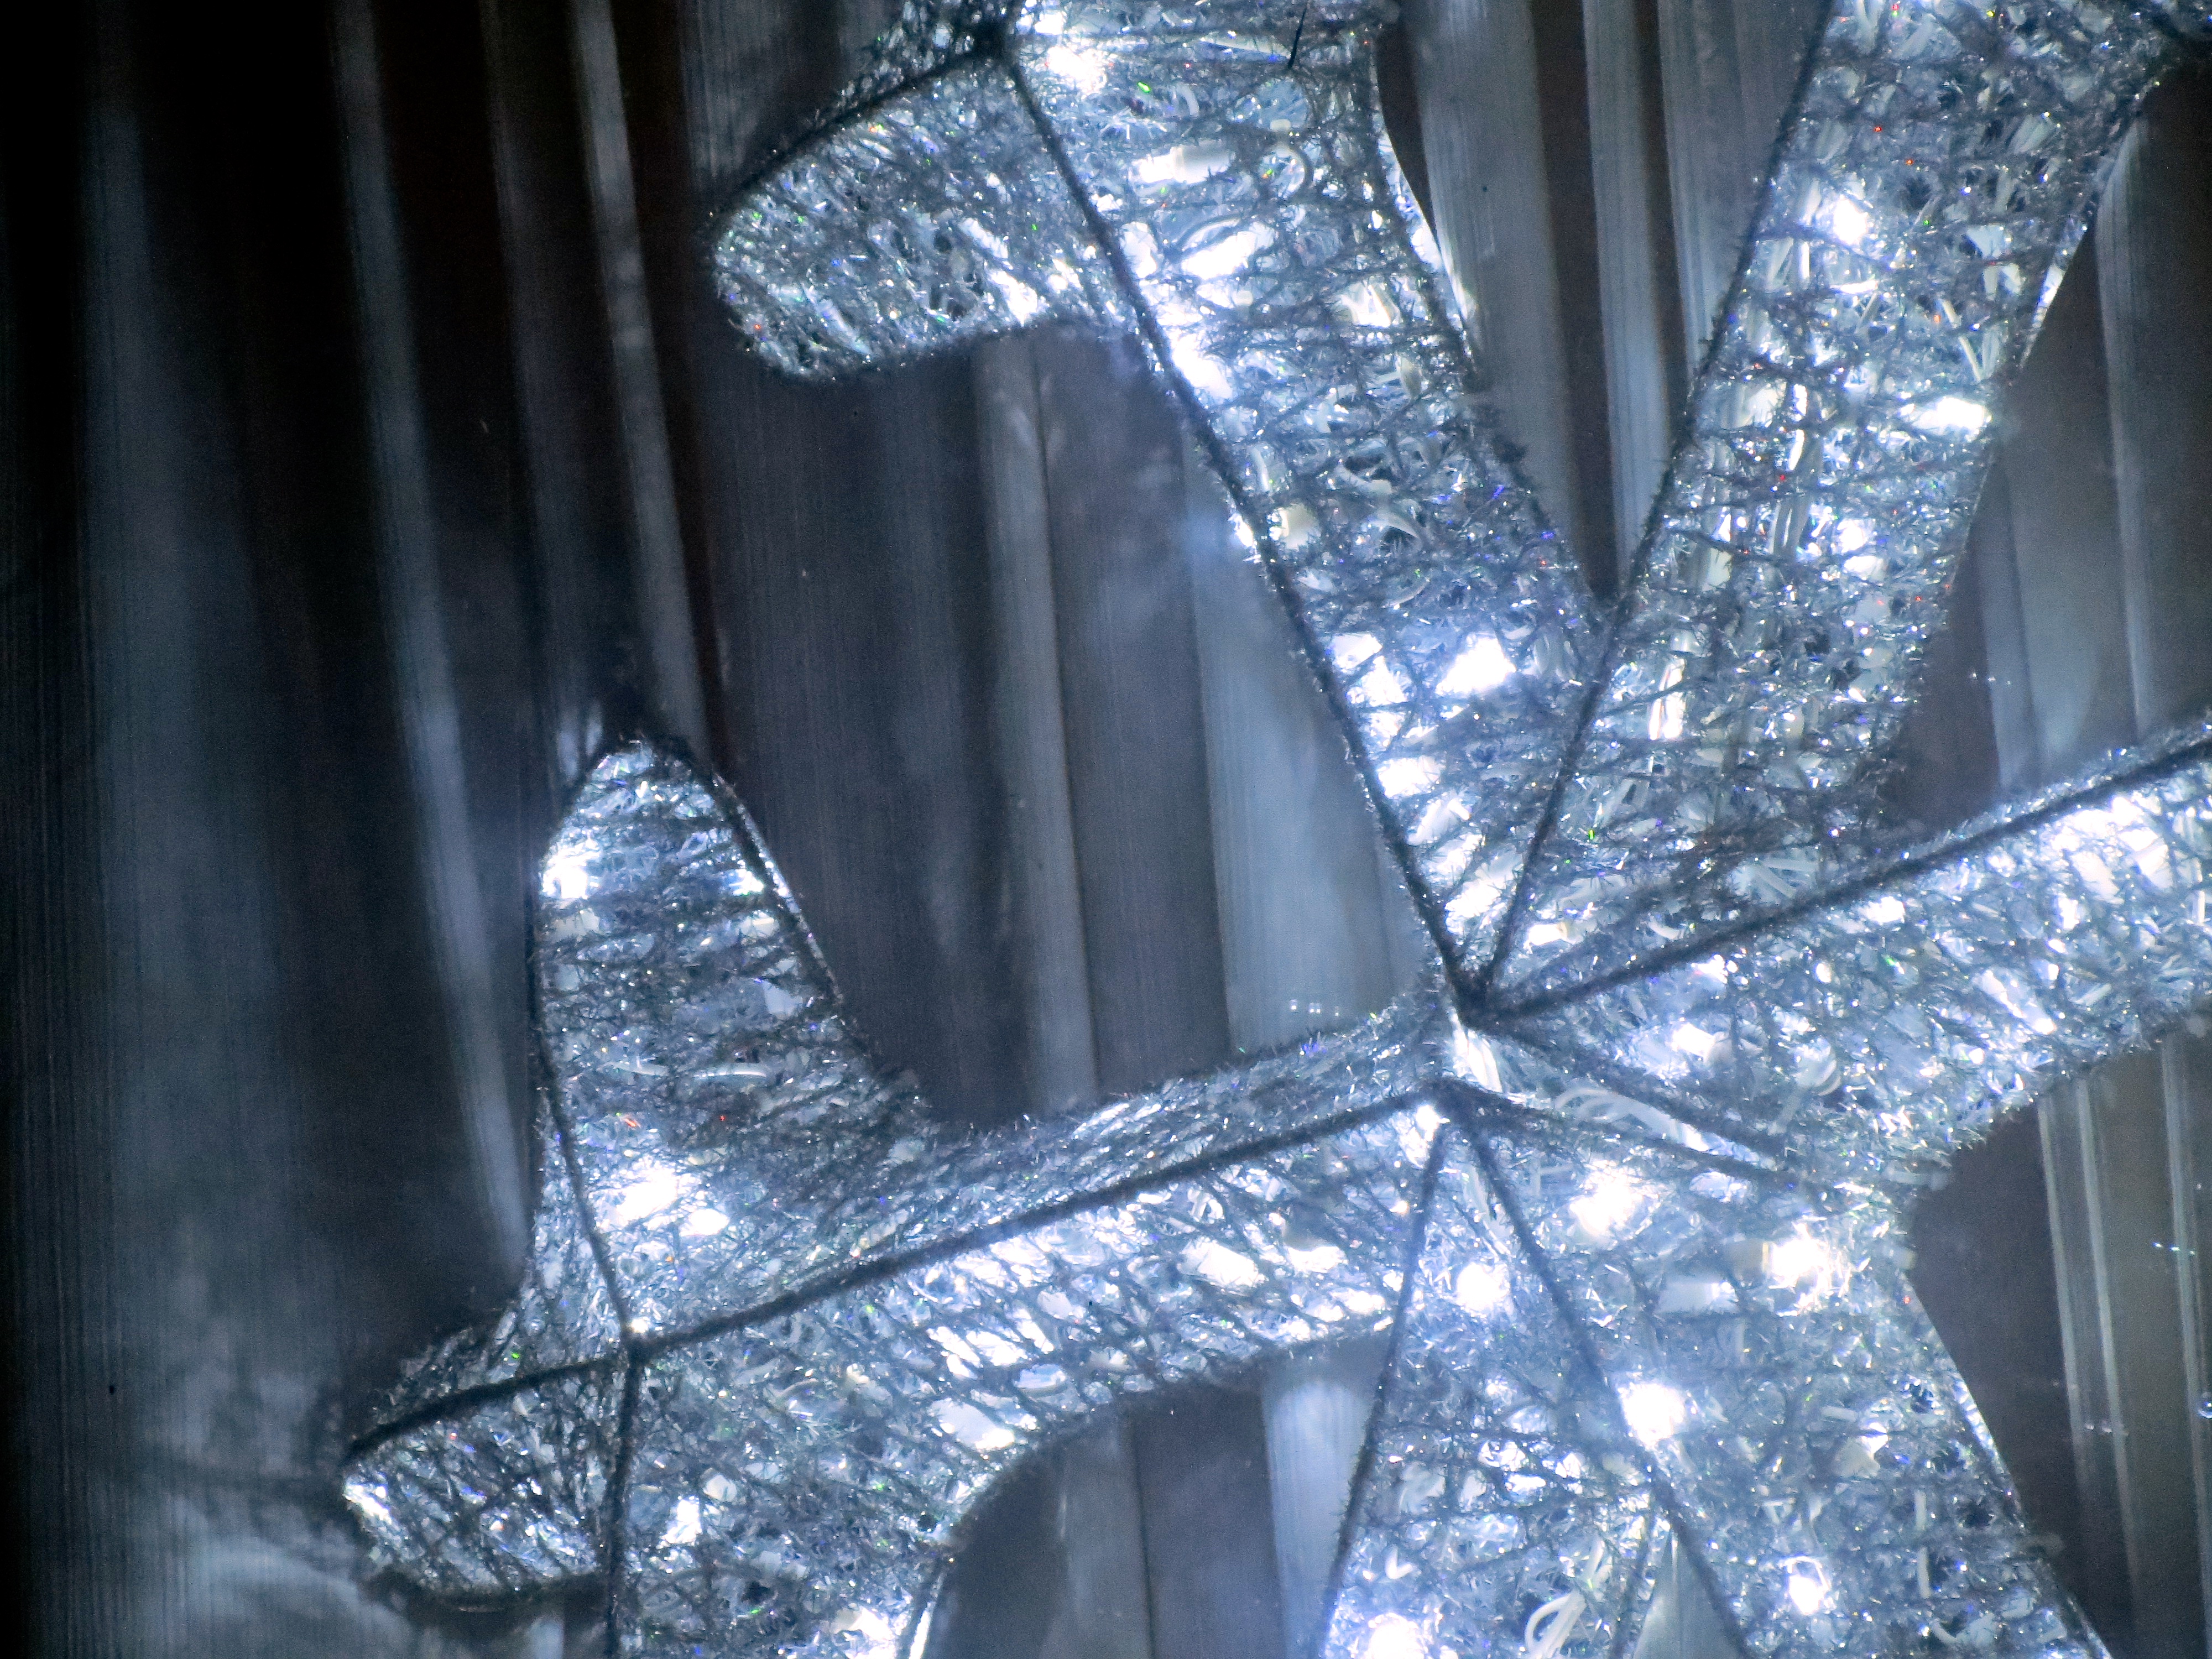
Colorful star in the side yard.

The porte cochere from the back.

Trees in the yard from the front porch.
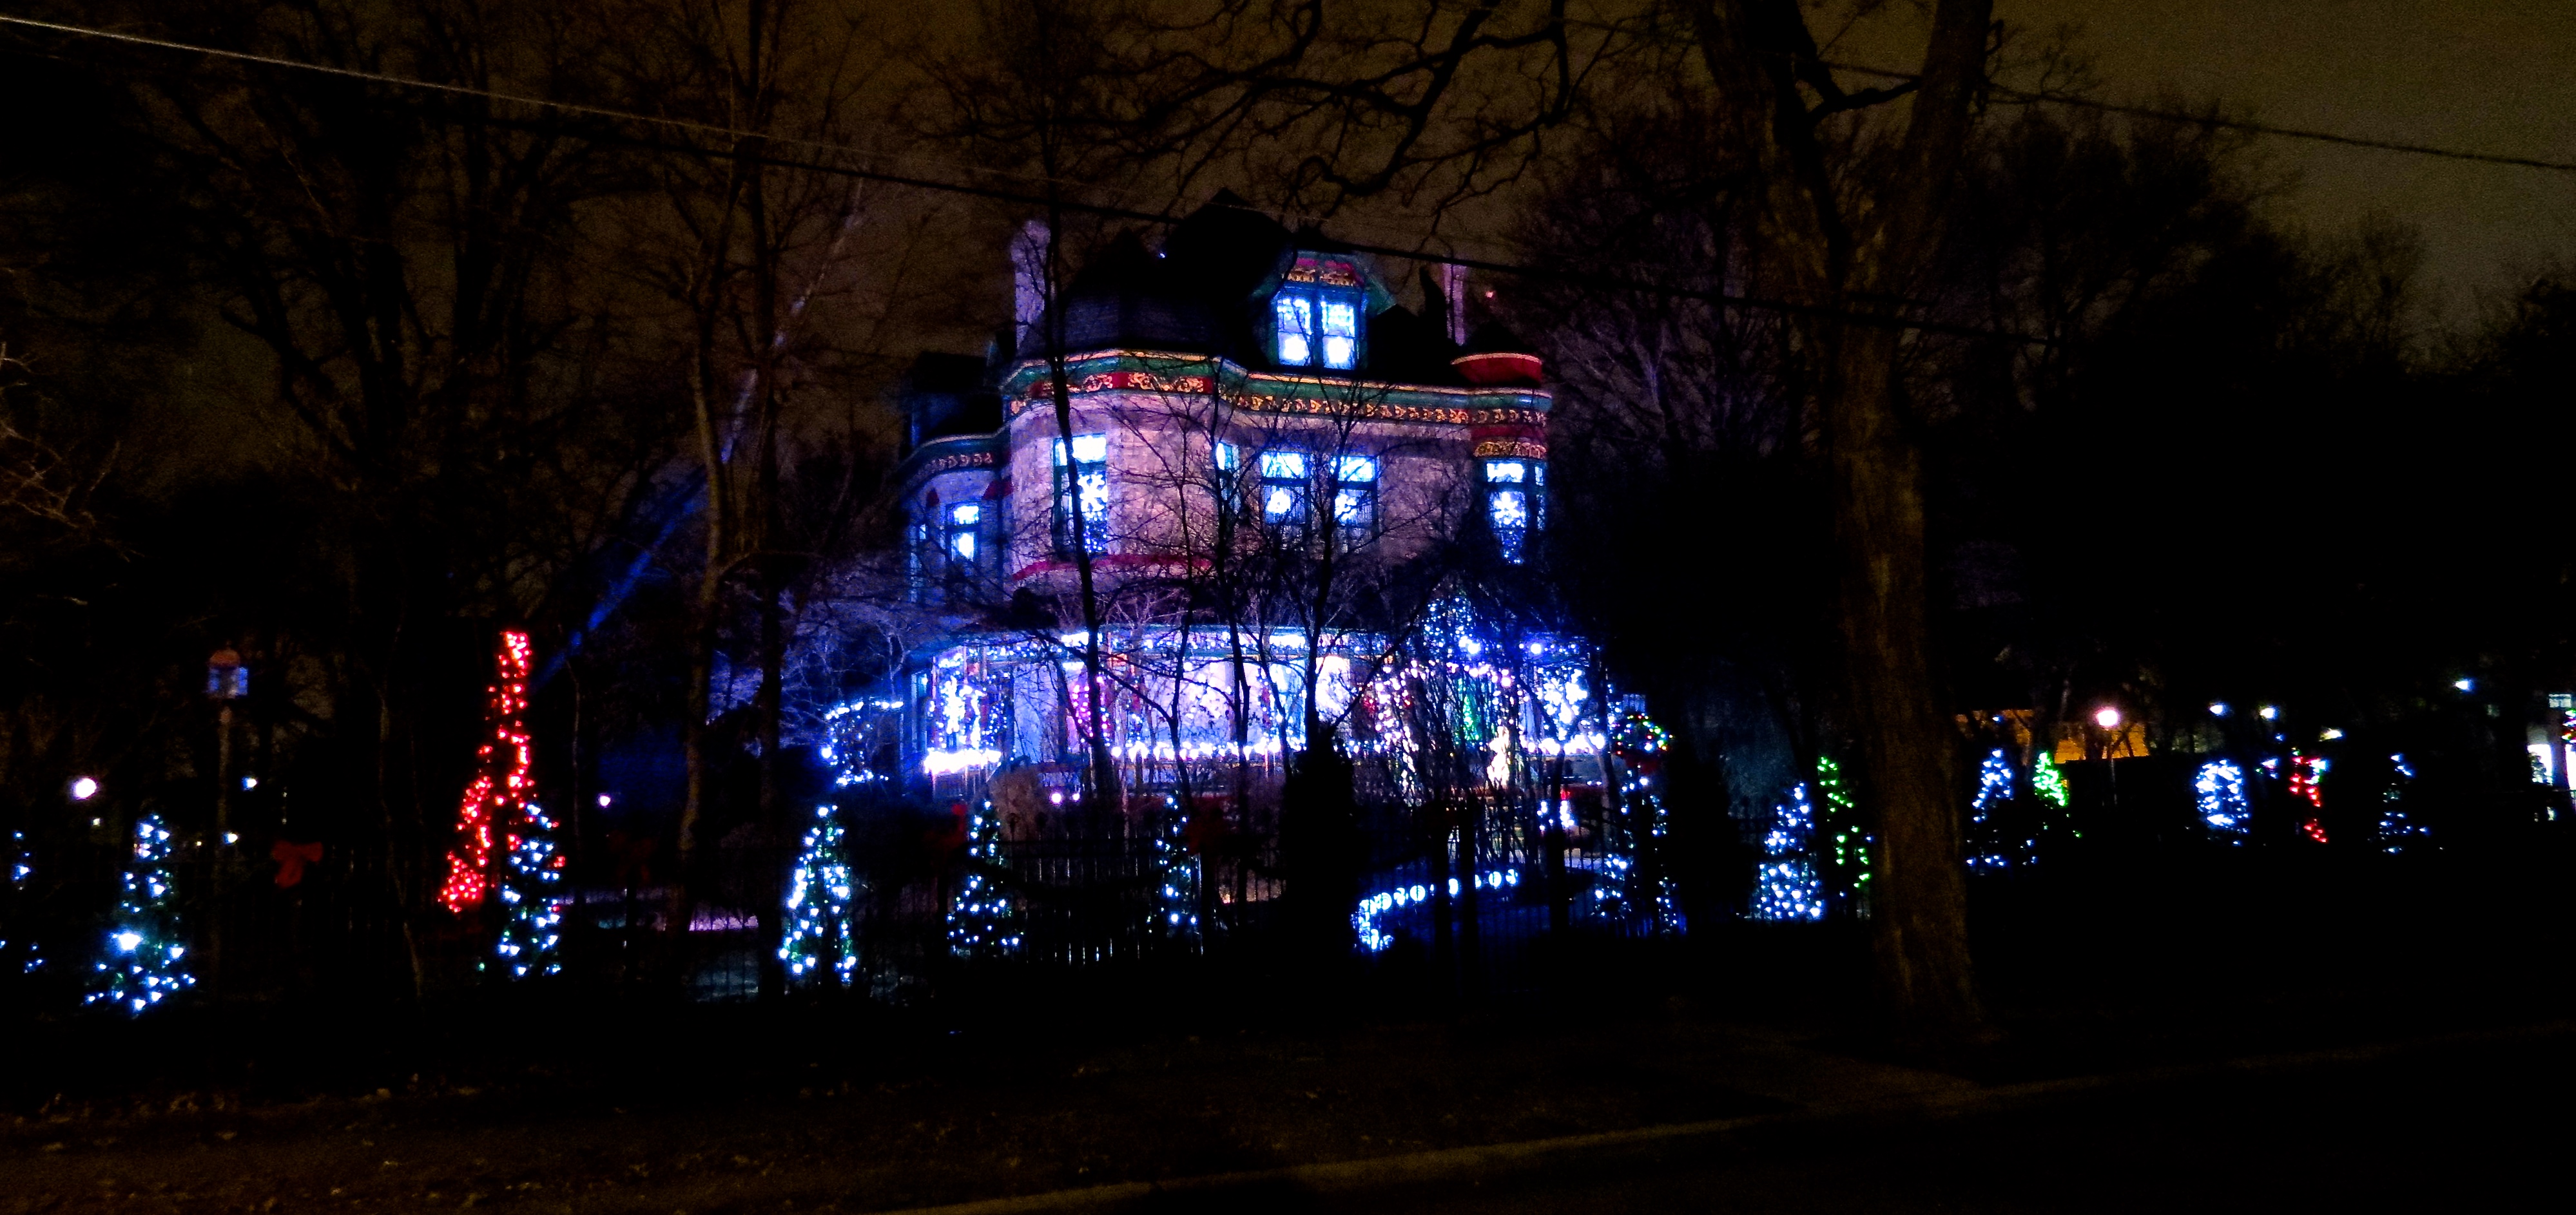
A view of the house from across the street.

Color changing lollipops line the front walk.
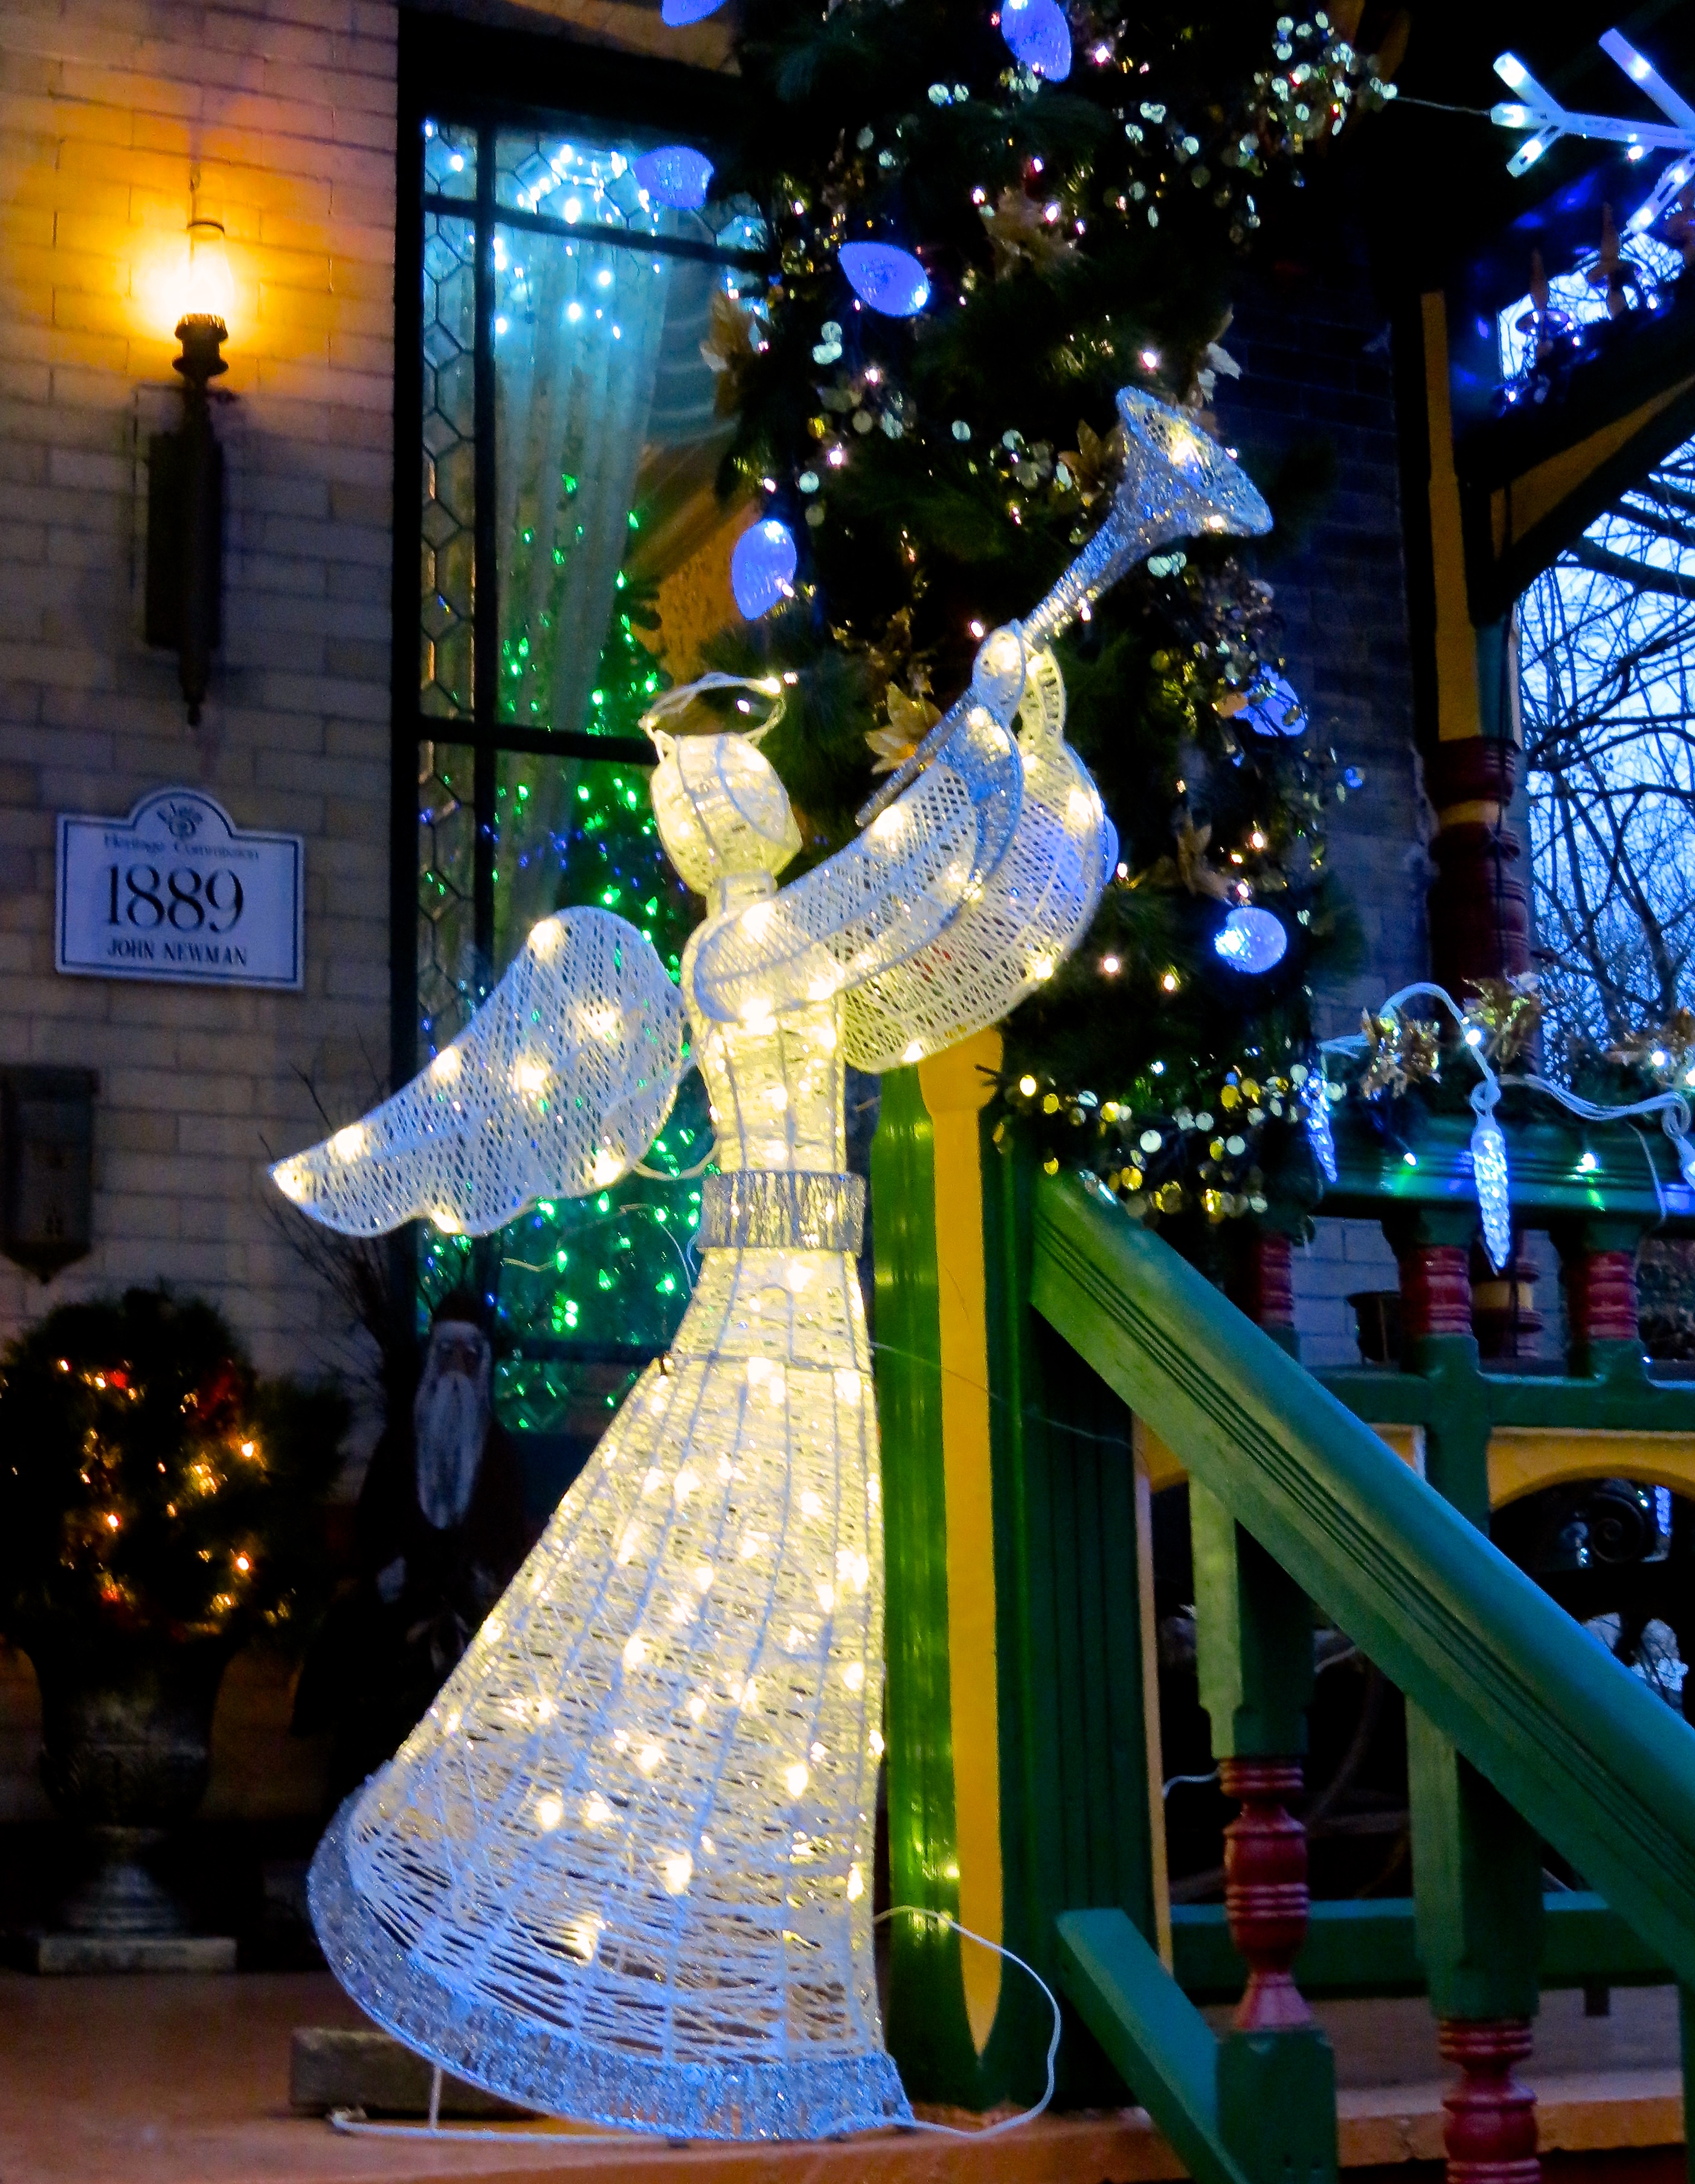
Trumpeting Angel.

Window view.
Large LED snowflake in the dining room window.
Glimpse inside from the porch.
Front porch from the side.

Of Puppies, Snowflakes and Fallen Angels
Yesterday started out simply enough: I woke up, made coffee and got my early morning grocery shopping out of the way.
The next thing I knew, it became just one of THOSE days…
 I had to wait for a train on the way home and hit every traffic light. There was no one else on the road. Michael woke up late and was rushing around getting ready, while also trying to get the dogs fed and settled– when I walked in the door.
I put the groceries away and turned around to discover Belle had learned a new trick. She had figured out how to jump up on the basement table–and she was eating the cat’s food. She had just had her own breakfast.
Yes, one of those days.
It’s too cold, too early in November with a wind chill of ten below.
Belle and Cash did not want to be outside. Dudley didn’t really seem to care. Whenever I tried to get the bigger two to go out, they’d just stare through me like I wasn’t there. Dudley really has no choice, his little bulldog puppy legs are too short to maneuver the stairs so he gets picked up and carried.
I was trying to bring Christmas decorations in from the garage, beating myself up for not putting them up sooner, while it was warm. This is what I get for trying to be a considerate neighbor by not putting them up too early.
It snowed a really fine snow, off and on, all through day with only a little accumulation. If it wasn’t cold enough already, the fierce wind made it brutal.
I’m decorating the exterior of the house, pretty much the same way I did last year, with a few minor changes here and there. I’d hung the large snowflakes on the porch over the weekend– but I hadn’t secured them and they were rocking and spinning with the wind. I was sure they were going to fly away with the real snowflakes. This prompted me to feel like I had to secure them today, despite the cold.
I rounded the corner of the house to find that not only were my snowflakes trying to take off– my two trumpeting angels had taken nose dives from the front porch, down the stairs. I’d already weighted them down with bricks– but not secured them to the railing. Apparently, the wind was strong enough to not only send the angels crashing to the ground; it also catapulted one of the bricks (as the angels went over) down to the sidewalk. Seeing the angels lying there, made me think of that horrible, current Life Alert commercial with the moaning woman and spilled clothes basket. This almost made me laugh.
Almost.
I put the angels back together, fastened them down, then secured the snowflakes before checking again on the babies.
 I went in to warm up and see if I could get them to go out… no deal. So I kept working. Every time I’d go in to check, Belle and Cash were either curled up together on the rug, or Cash was by the door (waiting for me) and Belle was asleep on a big pillow in the chair. (Dudley was sleeping soundly in his crate during all this.)
I brought some more decorations in and finally convinced the dogs to go out– that is, I bribed them with treats. They did their business, only lasting a few minutes before they wanted to go back in.
Now, I know I should have taken their lead and just stayed inside myself and snuggled with them– but I really wanted to get some of these things done so I didn’t feel like I was getting behind.
When I finally did decide to stay inside, things didn’t get much better. Belle decided to climb up on the bed, get Cash’s stuffed toy and pull as much stuffing out as possible, spreading all over the top of the stairs. Two of the window snowflakes I hung, didn’t light up after I’d run the cords and had to come down and be replaced. Dudley decided the only way he wanted to play was to chew on me; chopping down on my hand, making it bleed. And– I was making a big mess of the dining room with the decorations.
It wasn’t completely bad though…
All this time, aside from not wanting to go out– Cash was my buddy. He helps me. He stayed nearby, stayed out of trouble– watching me; content to get an occasional rub or scratch behind the ears. Always listening to me while I worked, responding to my mumbling, by cocking his head and panting.
Altering my plan, I was able to get quite a few of my lights up– Even though Belle was doing her best to distract me with her mischief. Though sometimes a handful, it’s hard to get mad at those cute puppy faces. And Cash, well, he’s my proud old man.
I didn’t even bother to try to start cooking before Michael came home and he graciously offered to do it, while Belle and Dudley wrestled around on the floor. I kept working, we ate, then Michael took the puppies back down to play while Cash and I finished up what we could on the first floor. Translation: I was up and down the ladder and he snored away on the couch.
It was after eight before I finally sat down to finish my blog post… the next thing I knew, it was time for bed.
I was working on this post this morning when everyone got up… Annnnnd……
The day ignited with crashing pet gates, Belle trying to eat everyone’s food and Dudley chewing my toes through my socks….
Suffice it to say, it’s pretty crazy around here every day. If it’s not snowing and angels are falling to earth– then there’s some new unexpected adventure in the works.
It’s just another amazing day.

Beautiful Christmas – Before You Start Decorating
I took Belle to doggie daycare for half a day yesterday and took advantage of the time to start decorating our house for Christmas. I got five trees up, including the 20 foot foyer tree; not lit or decorated– but they are up– and that’s a start!
 I want to share some of my experiences and some tips on how to make the most out of your Christmas decorating in a few posts over the coming weeks. I know it’s not Thanksgiving yet and even if you don’t plan on starting until then; it’s not too early to shop or at least begin thinking about what you want to do this season.
Whether this is your first time decorating or you consider yourself an old pro, I hope you find some ideas that will help you make the most out of your holiday decorating.
Before You Start
Especially if you are new to decorating, or looking to expand your efforts this year, here are some things you really should consider first:
- Budget. What’s your budget? Are you recycling old decorations or purchasing new for the first time? How can you save money?
- Storage. Where are you going to store all your decorations after the holidays?
- Time. How much time do you have to decorate AND take it all down?
- Size. How can you make the most of what you have? Is there such a thing as too much?
- Design. Do you have a vision in mind? Don’t know exactly where to start?
So, those are the five big things you should decide before anything else. You should consider these points in that order too. It’s great to have ideas first– but if you don’t ultimately follow these steps, you could find yourself coming up short down the line.
 Budget. If you have an unlimited budget then you can skip this step. Most of us are trying to make the most of what we have; and believe me, it’s easy to go way beyond what you intended to spend if you’re not careful. Something that may start out as a simple idea can snowball. Before you know it, you’re either out of money or over extended.
Example 1– Trees need a lot of decorations and lights. The bigger the tree, the more you need. I always find if I think I need 6 strings of lights– I end up needing 8 or else I’m taking them all off and stringing them back on the tree again. At least with the ornaments, you can re-space them if you run out. I’m not saying you can’t have a simple, elegant tree. I’m saying that it’s so easy to start and then find yourself needing much more than you anticipated.
Example 2– Garland and swags. Yes, you can measure the areas you want to hang garland and swags and you can get a pretty good idea of what you need. Don’t be surprised though, if you don’t anticipate the extra you’ll need depending on how you drape it. I reuse whenever possible but garland doesn’t last forever. I’ve also noticed you can’t always find suitable garlands readily available form season to season. Prices have also doubled and even quadrupled in some stores this year.
Three ways to save money are: 1) Start early and watch for sales. 2) Don’t forget to check dollar and discount stores! You’d be surprised at what you can find. 3) Maybe go simpler this year and then make the most of the clearance sales after Christmas for next year.
If you wait too long, most of the good stuff will be gone. Don’t expect to find the shelves are still full after Thanksgiving. Trendy items and single color lights (even red or green) tend to sell out early.
A good rule of thumb is: What ever you expect to spend… double it. What ever you can afford to spend, cut it in half and start there as your budget amount.
 Storage. Many people make the mistake of not considering what they are going to do with their decorations when they come down. You may not have room to store a large artificial tree and all the trimmings. You may have to go with a smaller, compact option. Another alternative is to use a live tree but that might not fit in your budget year after year. Know how much space you can afford to dedicate to storing your decorations before you buy– unless you expect to throw out or donate them when they come down.
Storage space isn’t so much an issue for me, the organization of it all has been a huge challenge. This past year, I actually took the time to separate out my decorations in containers and label them with the contents. This helps so much when you start to decorate the following year. Don’t skip the labeling part– You may think you’ll remember what’s in that box on the top closet shelf and a year later– your memory is gone. I label the top and at least one side of each container and make sure I store them with the label side out.
Proper storage does take a little extra time but not as much as you might think. It definitely save you time later on.
WARNING: I know it may seem obvious…. Don’t store items that can freeze or melt in an non-climate controlled area like the attic or an unheated garage. Candles and snow globes might not look the same when you open them the following year.
One more thing– when you take your tree down: It may not seem important at the time to separate out your ornaments (if you use sets of things) but do it. When you open the box the following year, you’ll be glad you did.
 Time. Last year was the first year I wasn’t still decorating Christmas Eve. Biting off more than I can chew is an art I have mastered and a bad habit to break. I highly recommend starting early if you plan on a lot of decorating and think you might run into a time crunch. Procrastinating can also create a holiday stress load you don’t need.
Same as with your budgeting: Whatever time you think it will take, double it. Whatever time you have available, cut your time expectations in half. Start there and if you complete everything, you can always add more later.
We used to host the same group for Thanksgiving and Christmas and Michael always preferred that Christmas wasn’t up for both holidays. This created a big time crunch because of the amount of decorating I do every year. Some years I waited and some I started early depending on what the schedule looked like. My preference is to have everything up by Thanksgiving so the time before Christmas is open for holiday fun.
By all means, allow yourself enough time to enjoy decorating! For me, it’s one of my favorite parts of the holiday season.
Don’t forget, you have to take it all down! This is my least favorite part. It takes time. You may want to leave it all up a few extra weeks to enjoy, run out of time– and then find you’re still taking it down before Easter. Yes, that’s happened to me.
Size. This directly relates to the other four considerations. How big do you want to go? How much room do you have for storage? How much can you afford to spend? How much time is it going to take?
I love a fully decorated house, inside and out. But simple and elegant or warm and homey is great too. Know and stick to your limits!
 Design. Here’s a chance to show off a little of your personality. Your ideas and creativity here, are your only guide. I highly recommend considering 1) colors and themes and 2) whether your design will vary from room to room or encompass the whole house. Make sure, what ever you decide, compliments the everyday design of your living space. Complimentary or contrasting colors and be very effective. Using one or two primary colors can also give a very elegant and designed feel to your decorating.
I love Christmas decorations so much, I’d be hard pressed to say I’ve seen a really ugly, tree, house or room. Christmas is the one time that I think its perfectly acceptable to be completely gaudy if you want to… It’s really your choice.
Christmas decorations can completely transform a space either good or bad. A tree that’s too big can make a room unlivable and hard to navigate. One that’s too small can look dwarfed. To compensate here, especially if storage is an issue: consider using a tabletop tree as room accent as opposed to a 4 foot tree stuck in a corner or behind the couch.
Colored lights are great — keep in mind you might not want blue or purple lights next year. White is classic, multicolored lights can be more casual and whimsical.
Last year, for the first time in many years, I used the inexpensive glass ball ornaments (that have been around for ever) on several trees. By limiting them to a few colors, (gold and white, silver and white, etc.) and using a couple different sizes; I was surprised at how really beautiful they looked. It’s a very cost effective way to decorate, you can use them in groupings and arrangements as well, and if you have to get rid of them because you can’t store them– they are cheap to replace.
I also love a traditional family ornament tree. Not only is it totally unique to your family but the sentimental value is priceless. That can be included in other decorating elements in your house as well. Saved treasures from your children’s, or your childhood, can be used for a warm, sentimental touch.
 Go For It!
I hope this helps some of you in getting the wheels turning! I’d love to hear from you and have you share your own thoughts and ideas. I’ll be posting more though the season. If you’re new to my blog, check out the archives from last November and December for some easy ideas and suggestions.
Happy Decorating!
Decking the Halls For The Holidays: Part Four- The Easy Holiday Centerpiece
 Accenting the home for the holidays can be as much fun as decorating the tree. It can also be challenging if you aren’t sure what to do. You can always go out and buy a floral arrangement, accent or centerpiece but I find so many items available are overpriced for their marginal quality.
Why not create your own?
You can add charm and warmth to a room with a few small groupings of holiday accents. It’s real simple to create a beautiful centerpiece for your dining table, fairly inexpensively and in a matter of minutes. I’m going to walk you through the steps to creating one simple arrangement and then I’ll share some additional ideas and suggestions to get your creative juices flowing.
I always recommend that you start with an idea and with items you already have on hand. Then purchase only what you need to complete your project. It’s easy to re-purpose bowls, baskets, greenery and other accessories with just a little thought and imagination.
The Easy Holiday Centerpiece
I didn’t purchase anything specifically for this project. All the items I used are inexpensive and easily attainable if you decide to duplicate it for your own home.
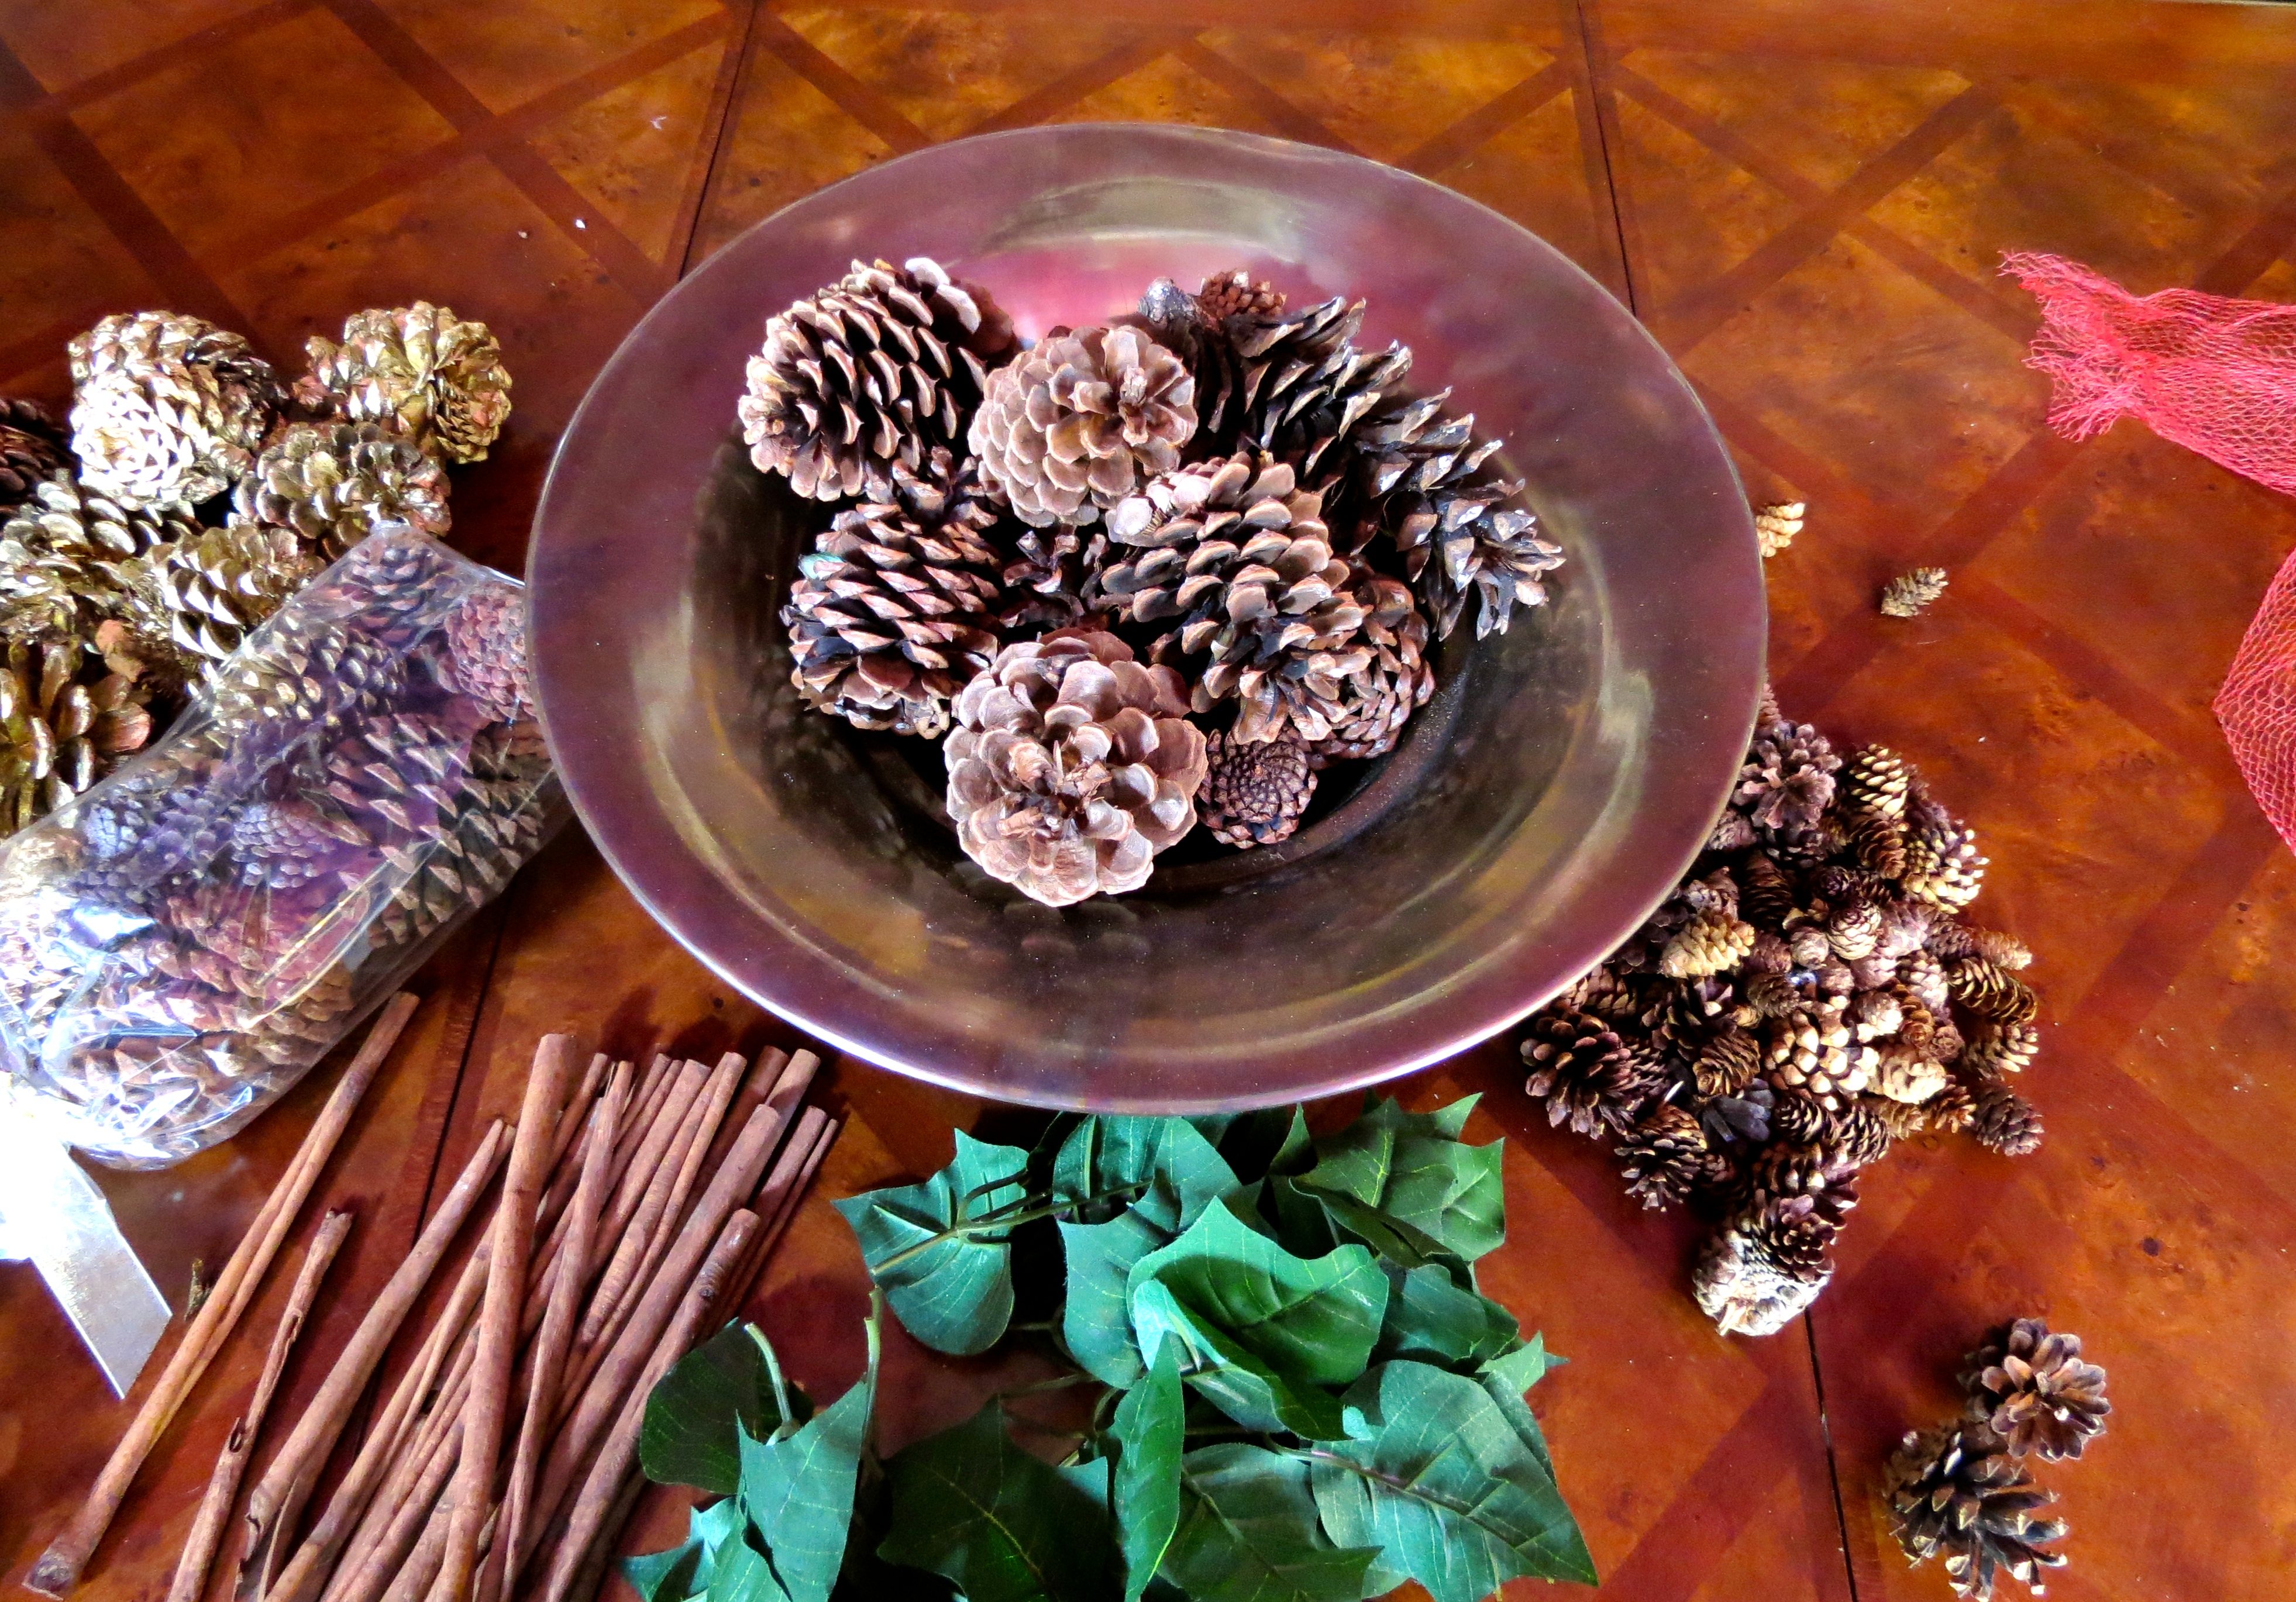
Material List:
A Decorative Bowl
Pine Cones (assorted sizes)
A Small Bundle of Cinnamon Sticks
Assorted Artificial Fruit (floral picks)
Artificial Leaves
A Floral Berry Pick
Wire cutters
Your bowl can be as plain or decorative as you want. A basket would also work for this project.
I actually used three bags of pine cones I had on hand, in three sizes (S, M, L)– some of which were painted gold. Of course you can use pine cones you find outside; or they are available, by the bag, at most craft and home stores. (Home Depot has big bags of scented pine cones for under $5, as an example.)
You can use any kind of artificial fruit you’d like. They are available in a wide variety of types, colors and finishes to choose from. I used 2 pears, an apple and 4 pomegranates for this one.
For the leaves, I had used the flowers from an artificial poinsettia bunch for another project; then, cut the leaf stems off and used the leaves for this one. I didn’t have any wire cutters handy so I used an old pair of pruners to cut the stems. You might also find that an old dull pair of scissors will do the job just as well.
I only used one berry pick (stem) as the final accent. The stem was easy to separate and pull apart in sections but could also be cut apart. Again, different sizes, colors and finishes are available and can work well here.

First. lay out your materials so they are all visible and within reach. Remember, there is no wrong way or right way… just your way.
Next, dump your large pine cones in the bowl. Arrange them loosely. As you continue, you can arrange them any way you like.

If using painted pine cones, add the large ones and you can mix them slightly with the unpainted ones or group them on top. Adding them separately gives you the ability to make sure they are visible accents and don’t become buried in your arrangement.

Add all your medium pine cones to the mix. I literally just dump them on top and move a few around to balance them out among the larger ones already in the bowl.

Add the fruit to the bowl. You’ll want to start paying attention to the shape of your centerpiece at this time. Also, make sure you mix up the colors and kinds of fruit you are using for balance.

The cinnamon sticks are next. I randomly placed mine, sticking them in between the pine cones. If you want a more formal look to your arrangement, you may want to start placing things in your arrangement, more symmetrically.

Add the leaves or greenery. You may choose to use more or less, depending on your taste. Use just a few to accent or more to blend all the elements together.

Now, add your small pine cones. let them fill the gaps and voids and make sure to allow some to lay on the leaves and fruit.

At this point, you may want to rearrange some of your elements and get them exactly where you want them. Make sure to look at your project from all angles so it looks good from anywhere in the room. You can always add or subtract items as you go. The final step is to add the pieces of your berry stem as the final accents to your centerpiece.
You’re done! Congratulations!
Here are a couple other examples you may want to try. (I used the same style base bowl in all three examples here.)
For this next centerpiece, I used a large pineapple finial as the center, placed in the bowl, surrounded it with artificial evergreen picks and then accented it with smaller berry and fruit picks.

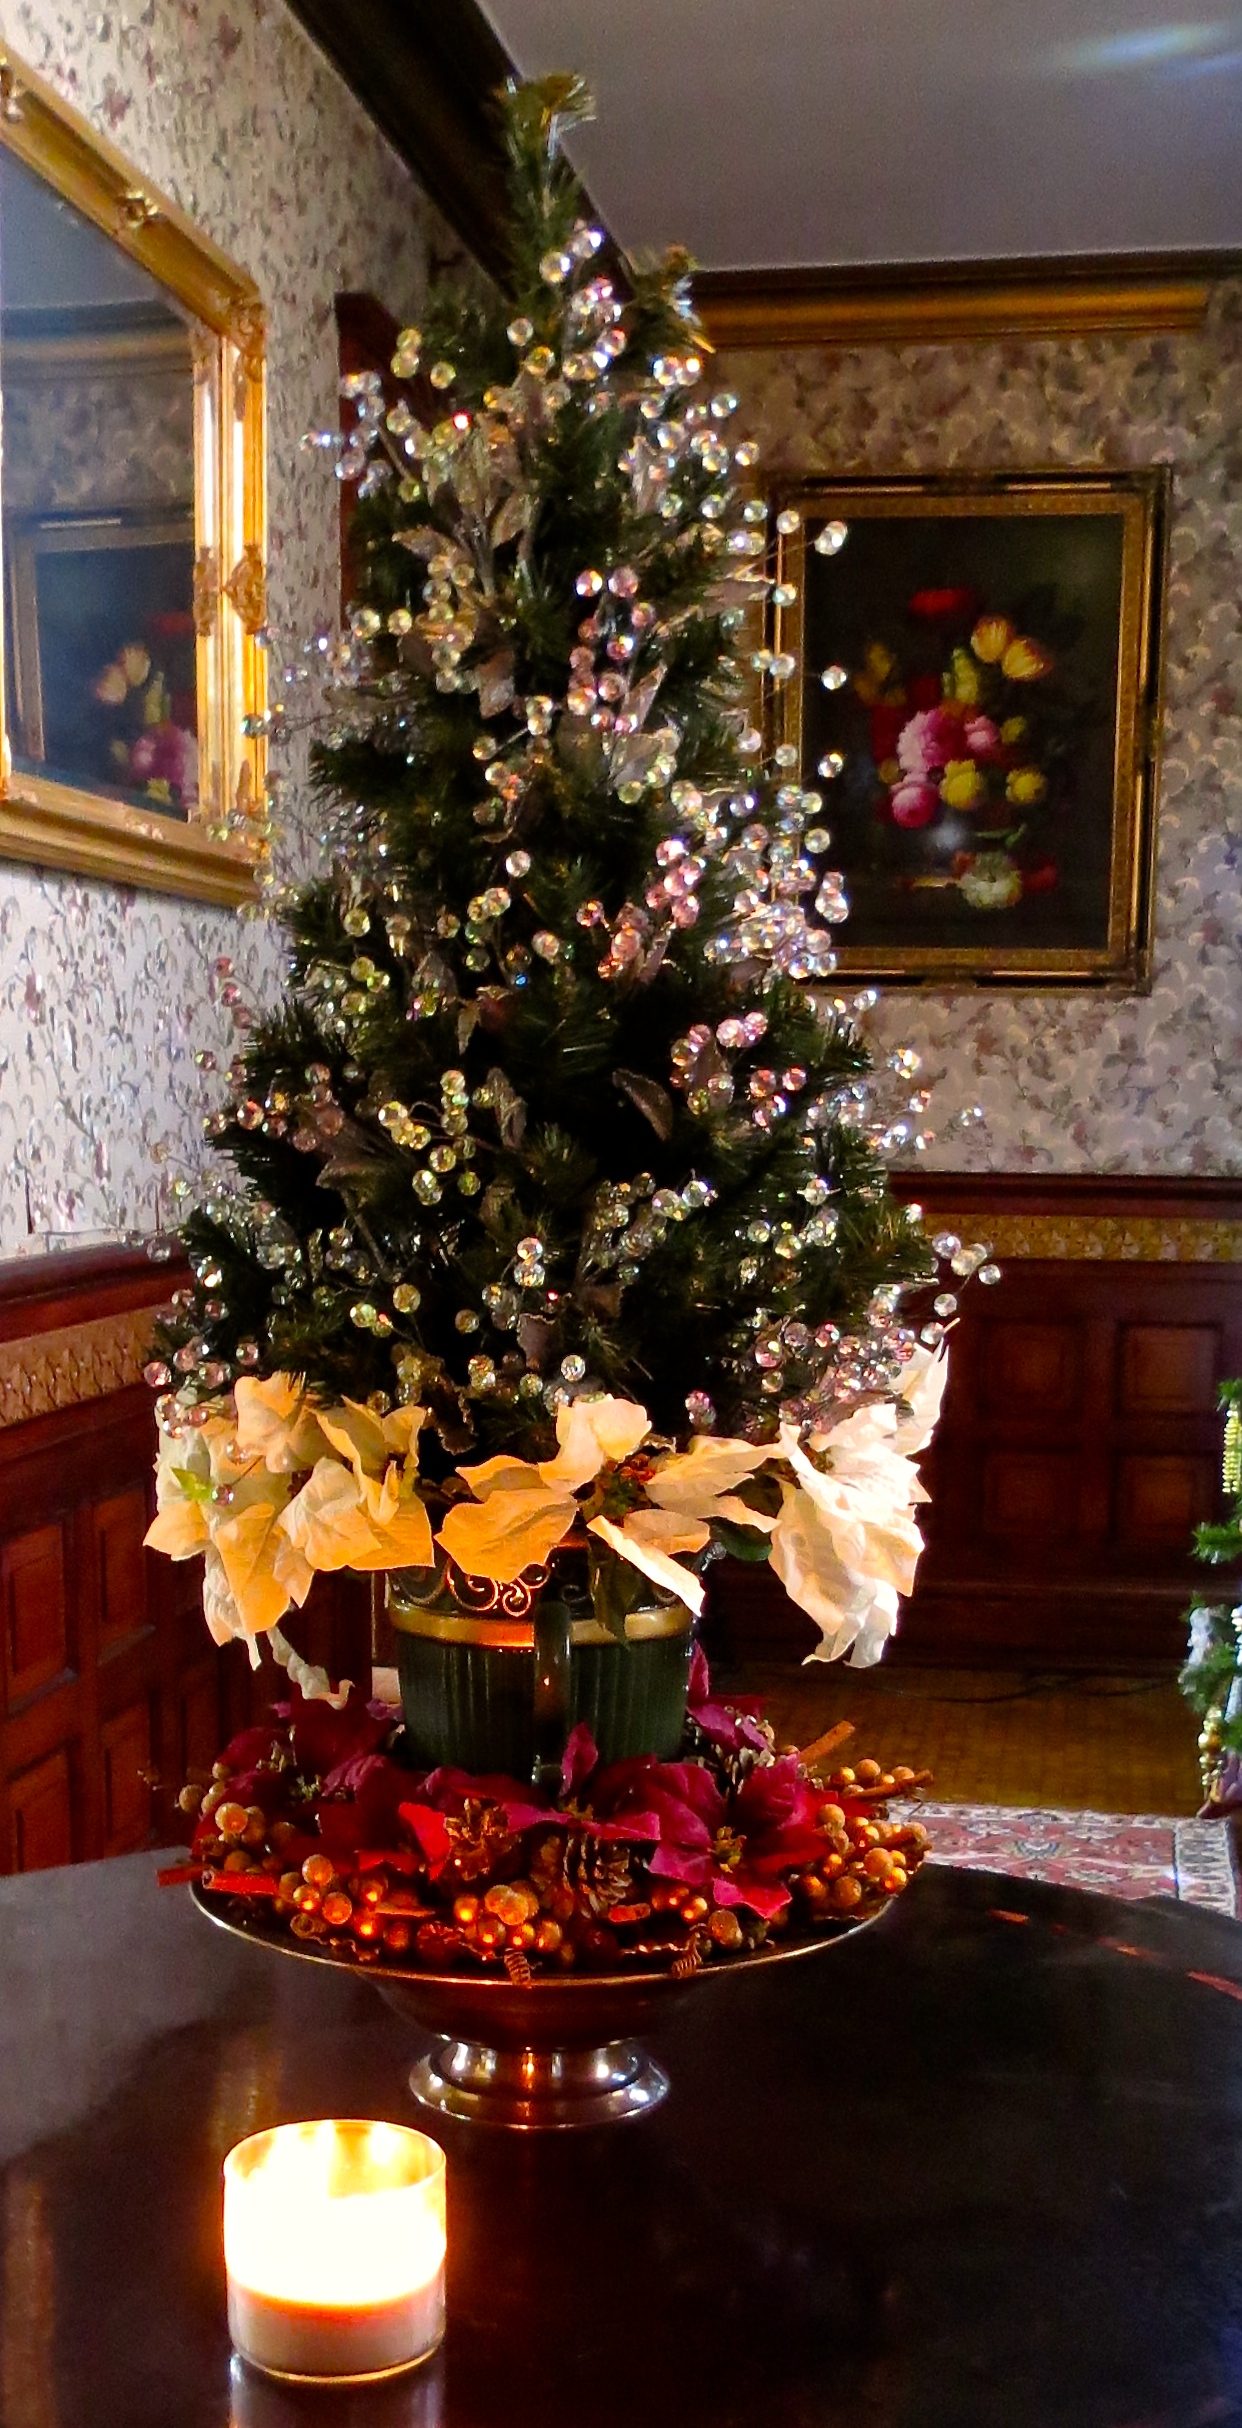
For my foyer table, I used the same general idea, placing a small tabletop Christmas tree in an urn and sat it in the center of a bowl, then added pine cones, topped them with grape clusters (evenly spaced) and then inserted cinnamon sticks between the grapes. On the tree, I used a large number of crystal berry picks inserted throughout the tree with white poinsettias around the base of the tree in the urn.
I hope you’ll find these ideas useful. If they inspire you to create your own centerpiece, please share them with me. I’d love to see your unique creations!
Decking the Halls For The Holidays: Part Three- Decorating the Tree
Ornaments Galore!
I love Christmas trees. Of the fourteen Christmases we’ve spent in this old Victorian house, this year it will probably see the fewest number of Christmas trees– with a total of seven if I stick with my plan. In past years, I’ve put up as many as thirty two trees. One in every window and then some. Sounds a little crazy– okay, a LOT crazy– but it’s something I really enjoy.
You can imagine, with that many trees, you have to be a little creative when it comes to decorating all of them. I thought I’d share some general Christmas tree decorating tips, as well as some of the imaginative solutions I’ve come up with over the years to make them unique.
First off, I can’t say I’ve ever really seen an ugly Christmas tree. (Alright, maybe a couple.) Christmas trees can be a personal and unique statement of who you are. It can also be a nostalgic trip through the past. Especially, if you’re one of those people that collects a few new ornaments each year or has ornaments made for, or by members of your family. Displaying them can be fun but also a challenge.
So let’s get started with some general tips and things to consider when planning to decorate a memorable tree. (I’ll be referring to all tree decorations, generally, as ornaments.)
- Know what you have. Before you start your tree, take a look at the ornaments you’ll be using to refresh your memory. Size, color and quantities of similar ornaments, all play a part in the final outcome of your tree.
- Start with an idea. Is there a theme to your tree? Will it be certain colors or highlight certain shapes or ornament styles? You may want to add to subtract certain ornaments from your plan if you have a vision for the final look.
- What element(s) will be your constant to achieve your theme or idea? Several dozen ornaments of a specific color or style? Depending on the size of your tree, you’ll want to make sure you have enough to establish your design element covering the tree.
- Are you decorating the tree by yourself or will this be a family activity? If you want your tree to have a certain overall look and decorating it is going to be a family affair… you may want to pre-decorate with your base ornaments (or design element) before letting the family go to town with the rest. It’s also a good idea to keep fragile ornaments out of the hands of small children.
Example- You have may have lots of unique family ornaments but you want your theme to be red. In order to make sure your tree has an even balance of red ornaments, you may want to space them throughout and then let the family add all the rest.
- Ornaments don’t have to be expensive or necessarily holiday-related if they help achieve your look. Just make sure you have enough ornaments that will specifically carry your theme.
- If you want to highlight or feature a collection of special ornaments– you will probably want to adopt the less is more philosophy or else your special ornaments are likely to get lost.
- Make sure you balance the weight of your heavier ornaments on the sturdier branches and all around the tree. Too much weight on one side can make your tree tip over! Larger, heavier ornaments being concentrated towards the bottom is fine but you should still have a sprinkling throughout as you move towards the top.
- Be creative and be flexible. Don’t be afraid to add another color or style if, through the process, you discover you need something more. There is no wrong or right look– it’s your tree!
Christmas Tree Themes

Mercury glass ornament tree, accented with berry picks.
I’ve done many different themed trees over the years including Victorian trees, floral trees, mercury glass ornament trees, Santa and angel-themed trees, color based trees… Yes, even Beanie Baby trees. I know friends that do sports, hobby, Disney and occupation-themed trees as well. The possibilities are endless here. To be successful, you’ll need to have enough ornaments representing your theme– to stand out and cover your tree in balanced proportions.
Example- If you want to decorate a snowflake tree but you only have four snowflake ornaments, your theme isn’t going to be obvious. Even a dozen or so ornaments of a specific kind, can get lost on your tree if the other elements over power them.
I love mercury glass ornaments. Really nice ones can be quite expensive and I only add a few new ones each year. In order to fill out my themed tree, I’ve added other types of ornaments like painted glass, to be able to fully decorate my tree but still stick to my theme. I also add floral berry picks that add color and fill space without overpowering my featured ornaments.
Stuffing and Filling Your Tree
Try ‘stuffing’ the branches to fill gaps in large trees.
Large trees present a number of challenges including the spacing of the branches. Lower branches are frequently farther apart and if you don’t address them, can leave larger empty spaces that ornaments can’t always fill. A few years back, I adopted a method I call stuffing the tree to help solve that problem. This fills the void between branches and gives the tree a fuller look.
One of my favorite ways to stuff a tree is to use floral bunches or bouquets. The first step in decorating my tree is to stuff the voids with the bouquets, deeper in the tree. Spacing is still important. I try to fill the largest spaces first, while still spacing the bouquets throughout the tree for balance, which means also adding them where they may not be needed to fill a hole but are needs to give the tree a consistent look.
Another great inexpensive stuffing is netting or tulle. I cut or tear random-sized pieces and bunch them, stuffing the interior of the tree. It’s easy to use and manipulate between the branches, adding a soft effect to the overall look. This also might be a good solution for someone considering a flocked or specific colored tinsel tree. Tulle is available in a rainbow of colors and it’s not permanent so you could change the color of your tree every year, if you wanted– without breaking the bank.
I’ve also used pinecones, raffia and other everyday greenery to give a fuller, more natural effect.
NOTE: If your tree is especially thin, you may want to stuff your tree before you add the lights.
Though stuffing your tree may not add to your initial design or theme, it does play an important part in the final outcome. It can be subtle or dramatic, depending on what you use and how much of it.
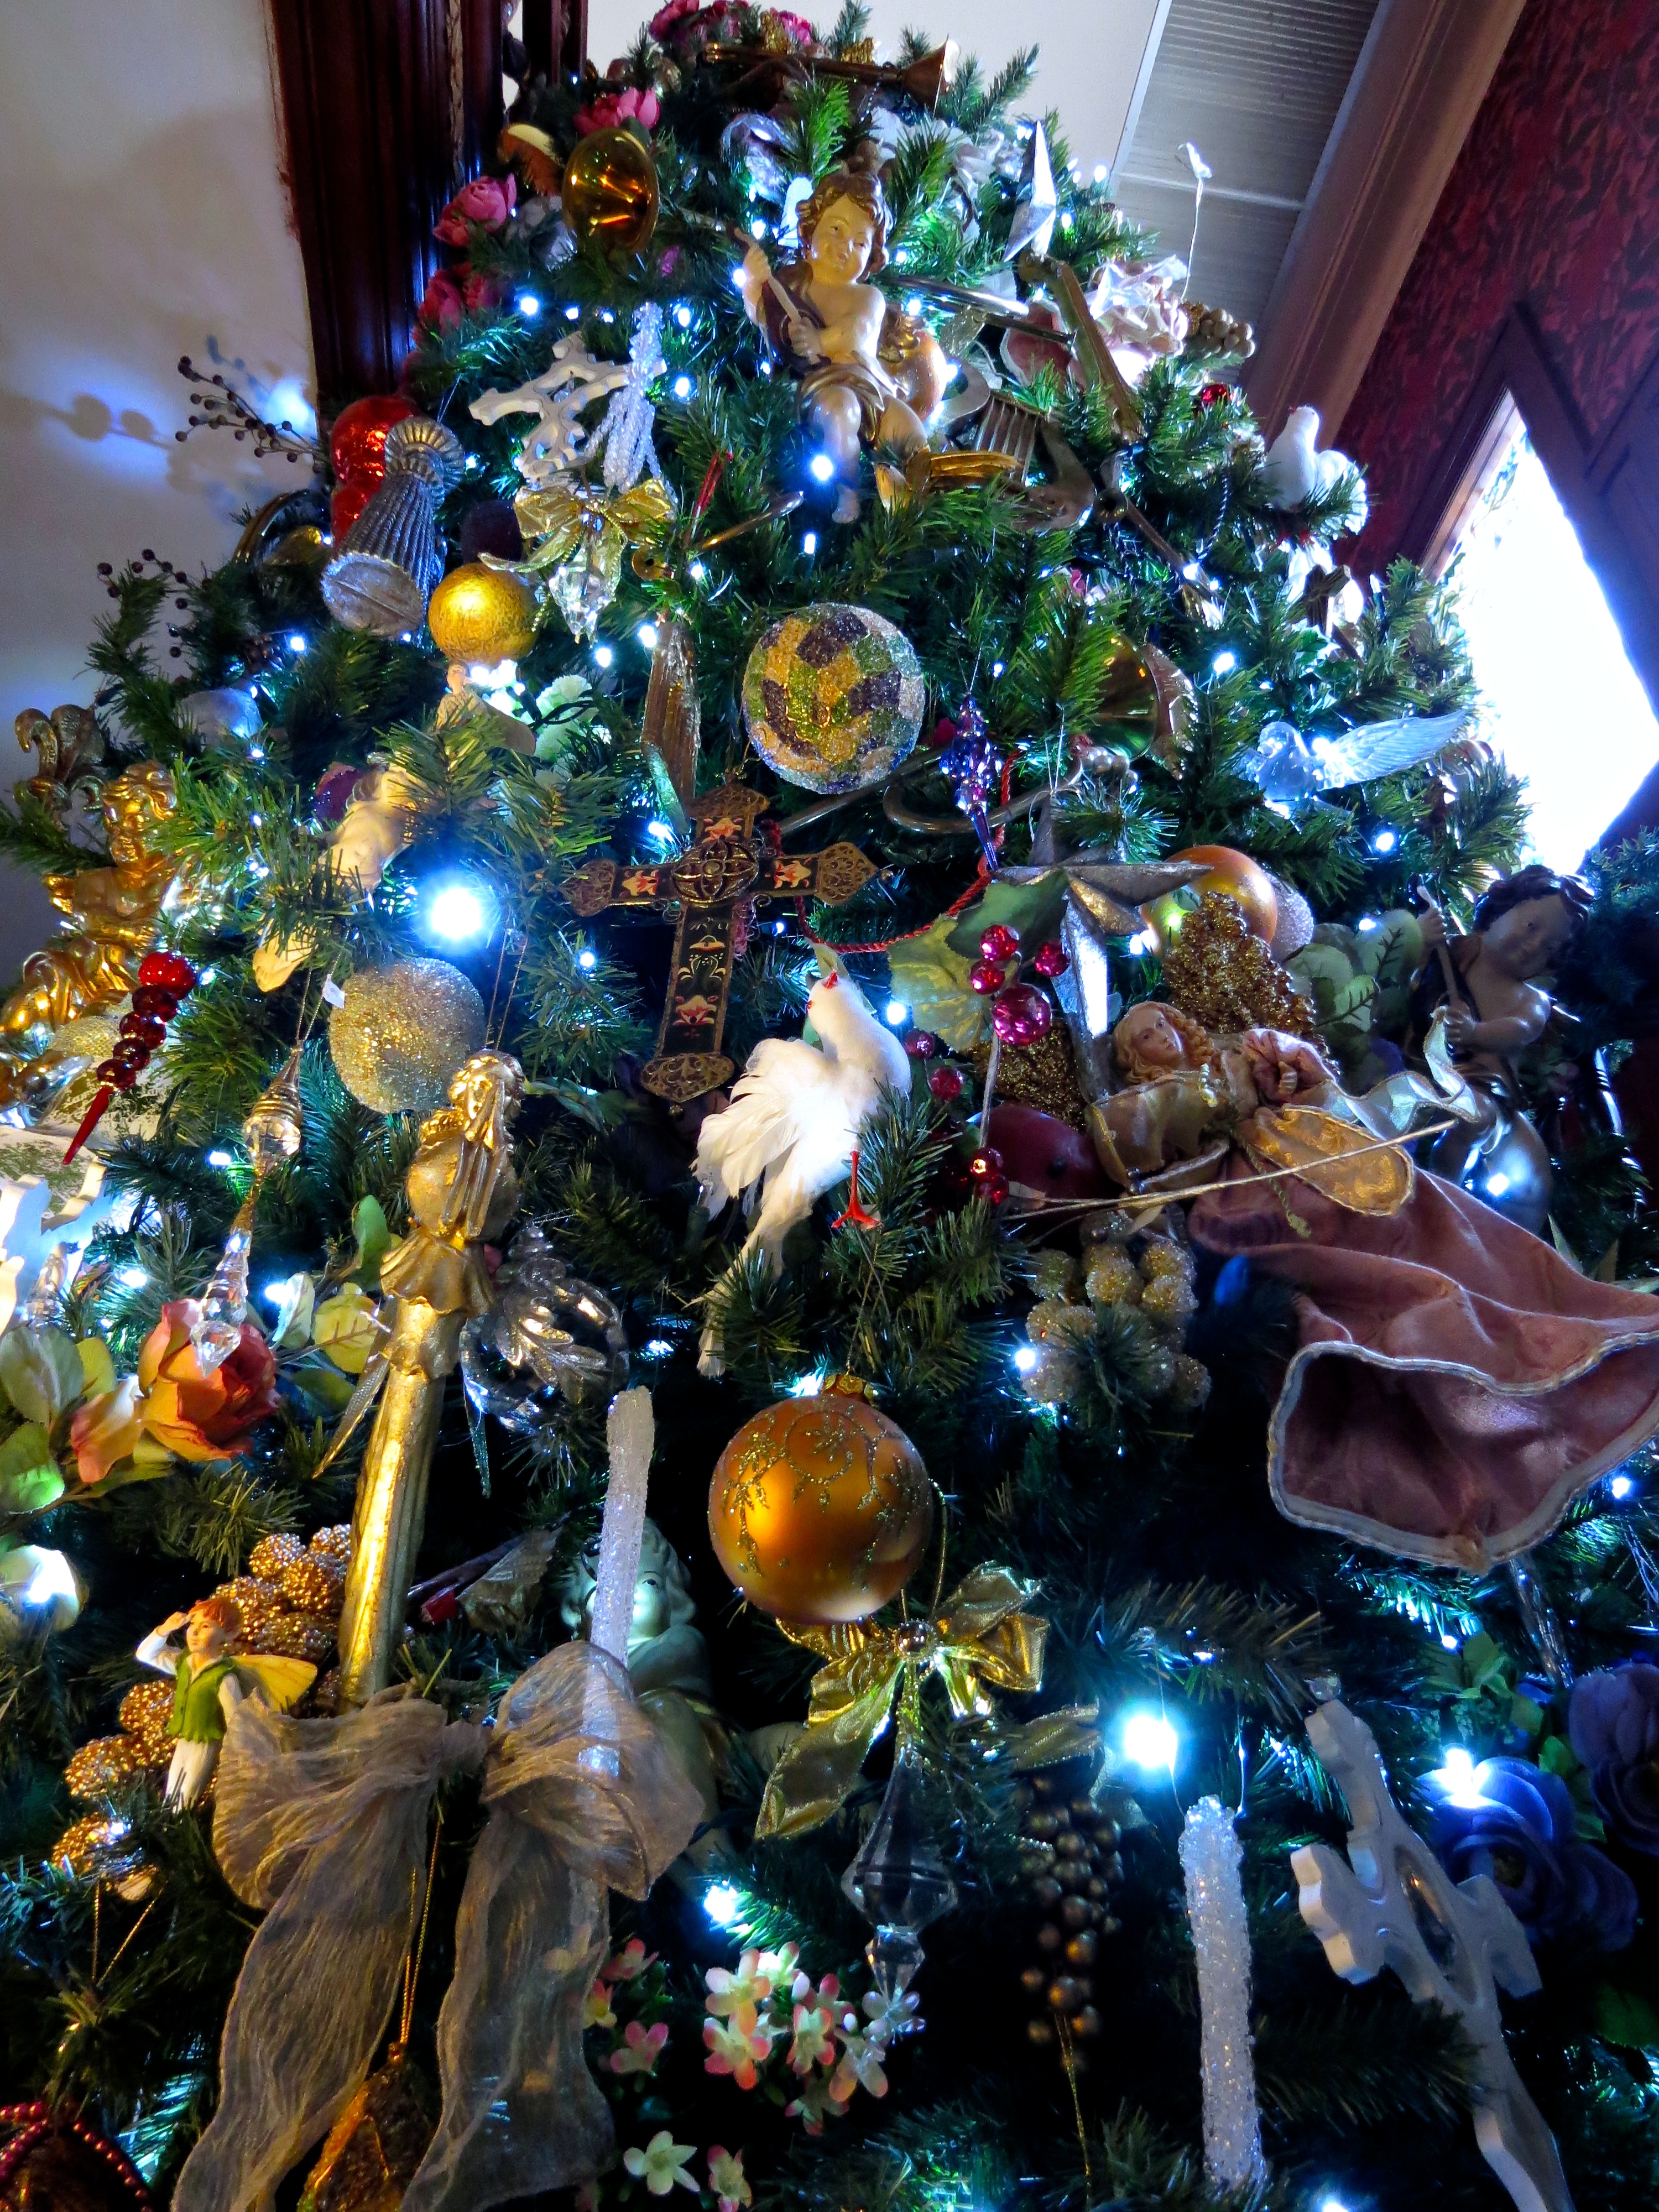
Decorating Your Family Ornament or ‘Everything’ Tree

Family tree with only the ornaments creating the base. design element.
Since I decided to put up fewer trees this year, that leaves me with an abundance of ornaments to either use or put away.
I decided I wanted to use as many of my favorites as possible but still wanted to have a relatively designed look. Here was my solution.
This might help what many people will find they are facing when decorating the typical family Christmas tree.
- I gathered together some red and white ornaments, threw in a few silver ones and used them as my base colors. I inherited a collection of gold laser-cut ornaments (Danbury Mint) that I added next. I could have stopped right there and my tree was looking great. All the ornaments were spaced out with color, shape and style– balanced throughout the tree.
- Next I added all those favorite ornaments I love, again, paying attention to spacing. Always make sure that you don’t let one area get too heavy or unbalanced (too many, too grouped together.)
- I took a step back and made sure my tree still had a good balance of color, shape, etc. Moving a few ornaments, as necessary.
- I finished the tree, accessorizing it with berry floral picks as the finishing touch.

The finished family tree.
One of the main reasons I use a lot of floral picks in my trees is that it really helps to blend the overall tree. If you prefer a cleaner or more dramatic look, use picks sparingly or not at all.
Tree Garland or “Who Tied Up Your Tree?”
The use of garland on your tree can make or break your final designed look. Garland isn’t the easiest thing to use. I’ve seen too many trees that look like they were tied up and being held hostage as opposed to adding to the tree’s design element.
Christmas tree garland can take many forms. You rarely see the traditional popcorn and cranberry garland anymore– and personally, I’ve never had any luck stringing it together successfully. There are the metallic tinsel garlands (thick and thin), bead garlands, floral garlands, even grape vine and rafia can be used.
Do you drape the garland around the tree? In a spiral? Hang it Vertically? Do you swag it? All choices you can make depending on your skill and taste. Keep in mind that the way you hang the garland on your tree will also affect the quantity you will need.
My 7 ft. ‘natural’ tree with grapevine garland.
You can add garland at any point in the decorating process but I prefer to add it first, if at all. When you wait until the end, moving and re-spacing the garland to get it just right can tangle with your ornaments and cause a big mess. You would also have to move a number of ornaments that would be hidden behind the garland. Adding it first allows you to adjust it until it’s just right, before hanging all your precious ornaments.
Christmas Trees and Pets (Children Too!)
You want to make sure you protect your loved ones, whether thay have two tiny feet or four furry paws.
- Cats climb trees! They also like to bat their paws at dangling ornaments. I’ve know more than one person that has come home to find a toppled tree due to a kitty-climber. Make sure your tree is weighted properly and keep an eye out for felines that show too much interest in your tree.
- Ornaments are not dog toys… or are they? My Boxers, even at ten years old, pull ornaments off my tree. I have to keep watch to make sure they leave them alone. It doesn’t matter whether they are round (like a tennis ball), plastic or stuffed (like a chew toy), or long (like a stick)– they all look like toys to them. Dogs being dogs, will chew and possibly swallow even glass ornaments so take precautions to avoid that emergency trip to the vet.
- The rules that apply to toys with small parts should apply to your Christmas decorations. Try to avoid sharp or small ornaments that might be swallowed. Keep the more fragile ornaments out of reach. By all means, supervise small children around your Christmas tree. As hard as you try, no tree is completely childproof, so be safe!
Finally, a word about our foyer tree. We had talked about eliminating many of our other trees and getting one tall tree that would climb through the stairwell from our foyer to the second floor. I decided to experiment this year and found I could combine tree sections from two of our 12 ft. trees and created a 20 ft. tree! The poles of the trees were the same size allowing them to be interchangeable. By bending and manipulating some of the branches, I was able to combine them pretty convincingly.
Best Tip of the Day: With a little thought and creativity– and a focus on color and balance– you can create your most beautiful Christmas tree ever!
Victorian Foyer Tree. I created this 20 ft tree from two 12 ft trees we already owned.

Next Up: Tabletop Centerpieces
