Home » Christmas (Page 2)
Category Archives: Christmas

Beautiful Christmas: Twenty One Trees- Decorating Outside
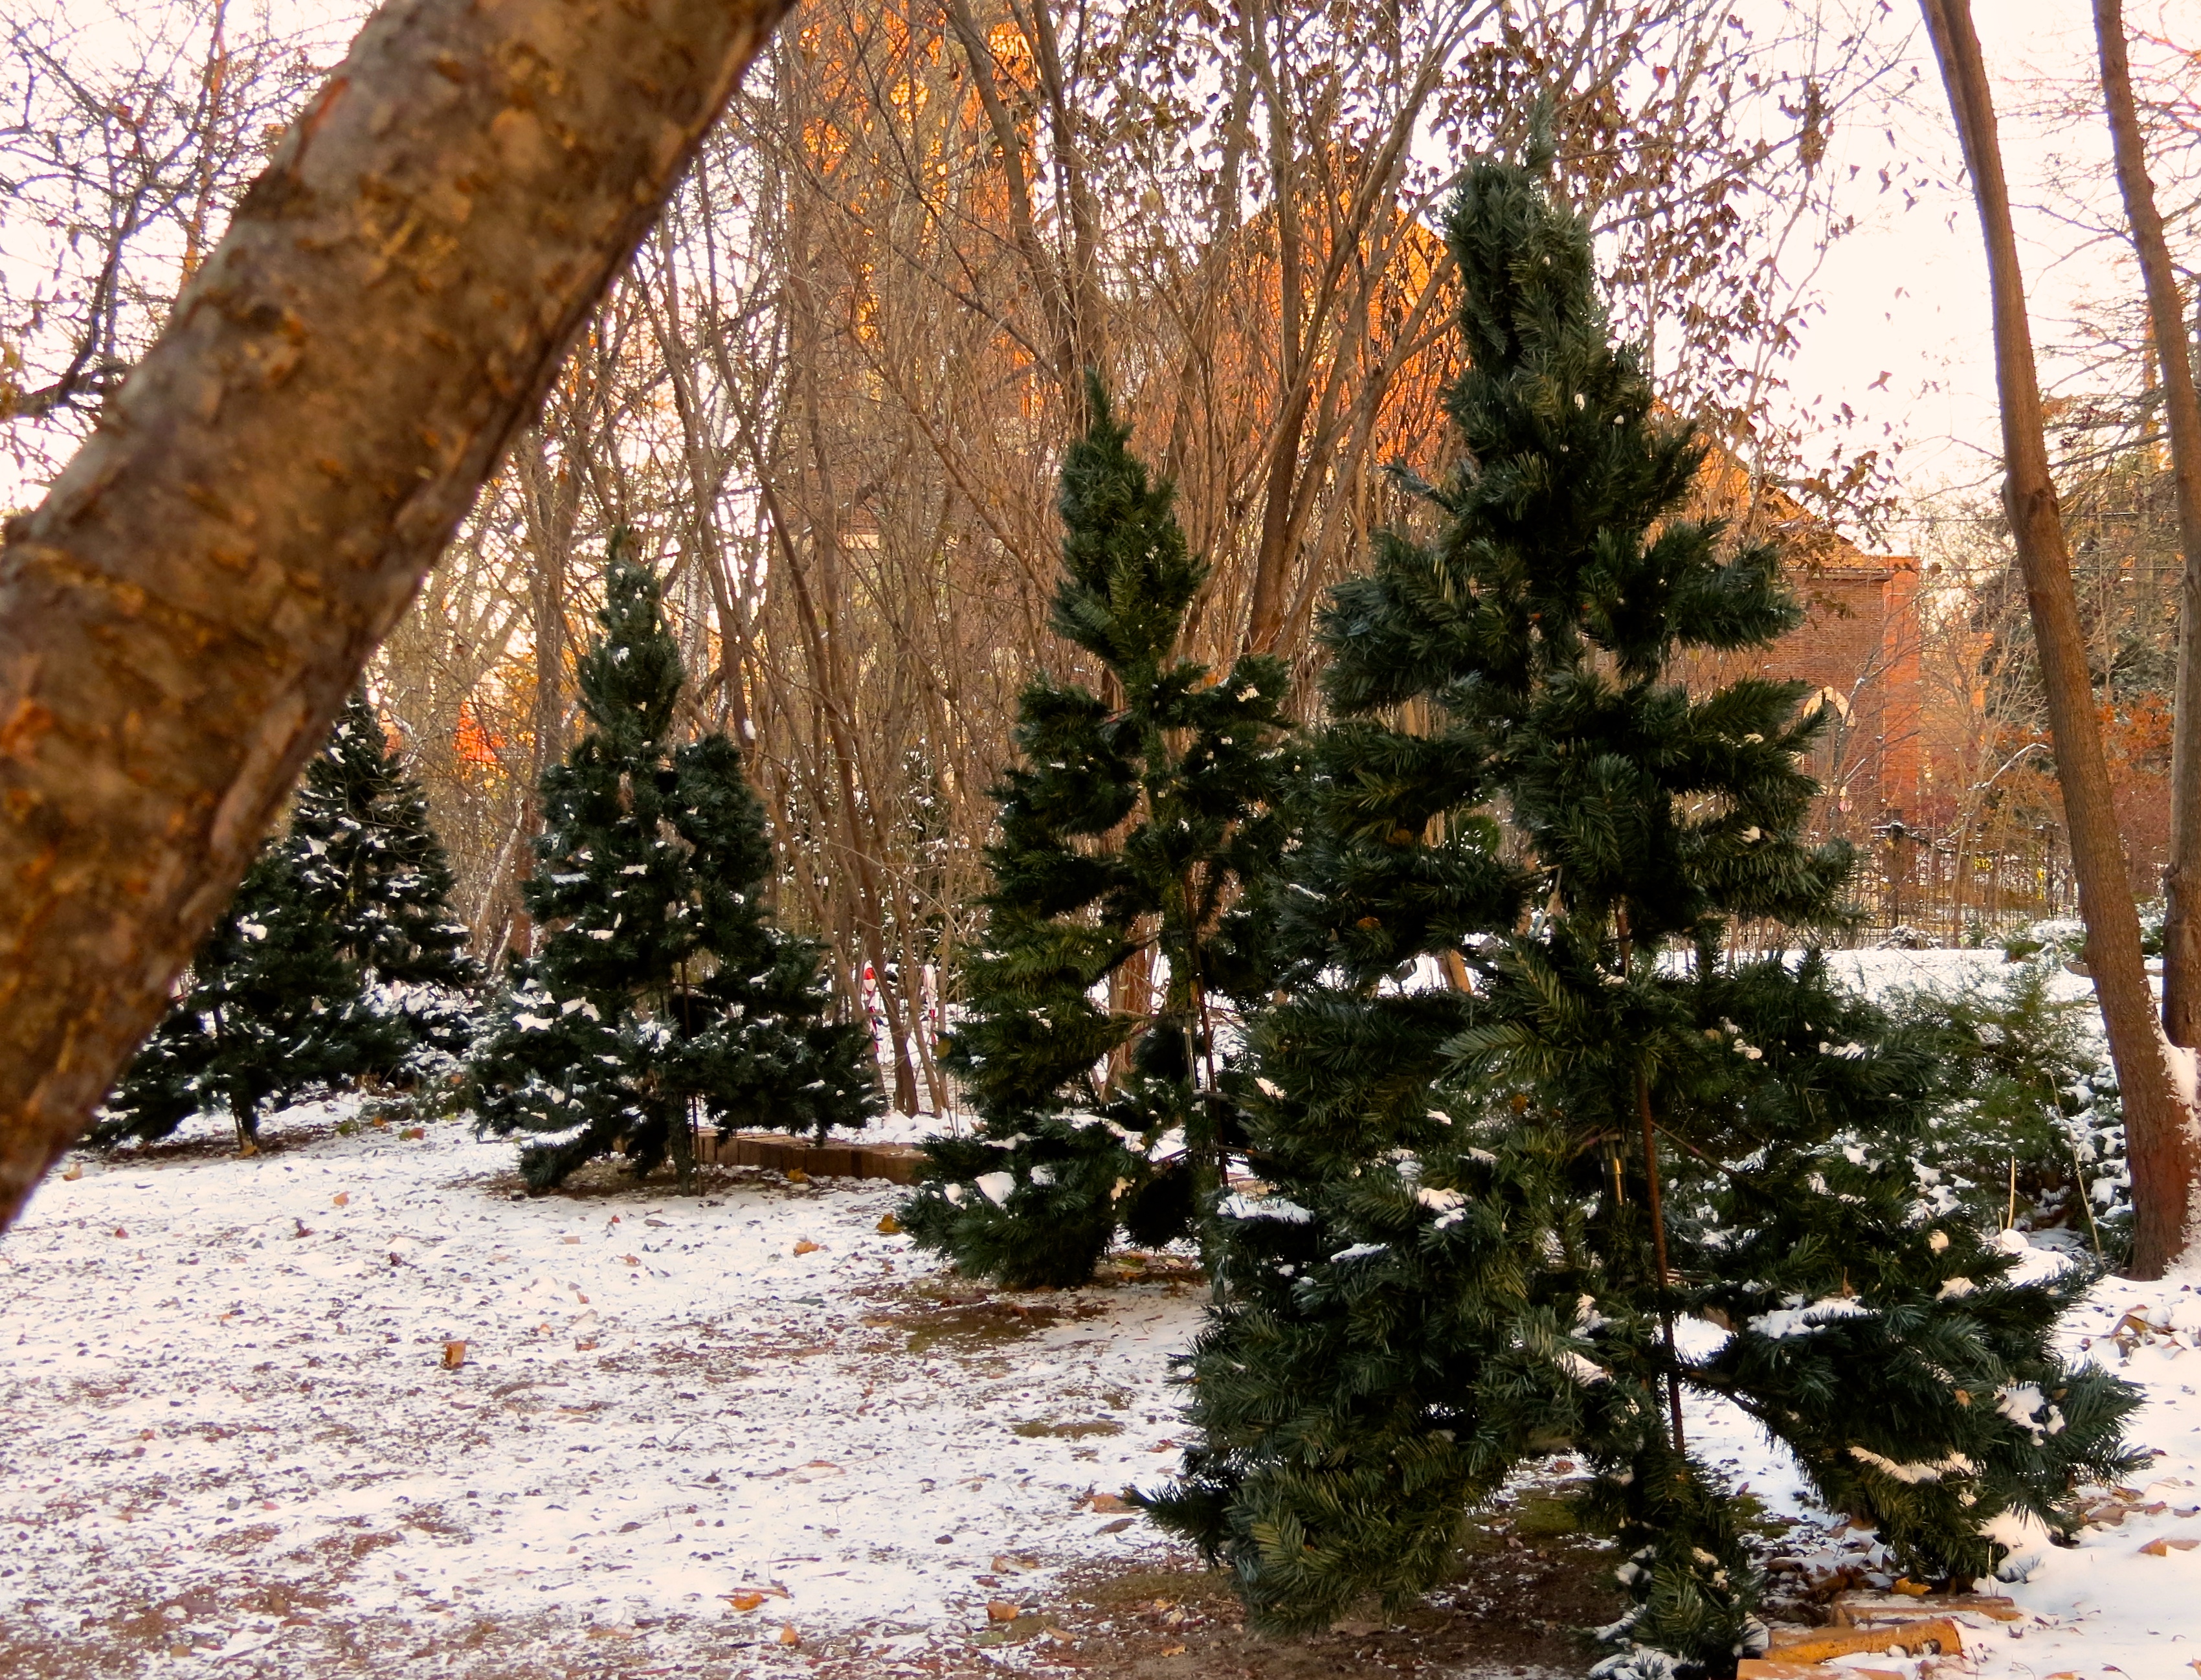
Some of the 21 trees I put up, waiting to be fluffed and lit.
Twenty-one trees. No big deal. (Ha-ha!)
We had a bit of a warm up two weekends ago, so I took advantage of it and got my trees and stakes in the ground. Then we froze again. I’m glad I started early so I wasn’t forced to work on them in the low teens.
This past weekend I was able to finish fluffing the branches, running the power and lighting the trees. The temperature was in the 40s so it wasn’t too painful. Now we’re back in the low 20s again.
Depending where you live, the weather can play a huge factor in your plans to decorate outside.

Fluffed and lit. Here are some of my 21 trees at dawn.
I had told myself I was going to keep it simple (like that EVER happens) and decorate the same as last year, but—- I never seem to be able to do that.
First off, I got some new lights on clearance, last year after Christmas, that I wanted to use. (I got some of those expensive synchronizing lights at 80% off!) The next thing I knew, I was making additional changes here and there. Most of those new lights are on the front porch but one thing affects another.
I decided to spread out the trees instead of the big circle I did last year. I have three groups, two of six and one of nine trees. They are all set away from the house, creating more depth in the yard and making it more fun to walk around.
You might wonder why I put out artificial trees instead of decorating the landscape itself– simple answer: squirrels! Anytime I’ve tried decorating my live trees, the squirrels chew the cords. It’s not only annoying– it’s expensive. (I’m using all LED lights.) Aside from hiding their scavenged treats in them once in a while, the squirrels tend to leave the fake trees alone.
Some of the trees I use are more than 15 years old, dropping needles pretty bad and no longer suitable to use inside. A dozen of them I got at Home Depot after Christmas for $4 each one year. It might look expensive, but it was a whole lot cheaper than what a lot of people spend for a much smaller display.
I’m not quite done with my windows yet and they play a big part in the exterior display. My house is too tall and the porches create another obstacle (as well as visual highlight) to decorating; making it difficult to decorate the upper extremes. The icicle lights and snowflakes in the windows, not to mention the trees; contribute to the overall finished exterior look.
Front porch entrance, almost complete.
The windows also create the challenge of coordinating the exterior look with the interior look. This is mostly affected by color. One thing I realized this year: I’m probably never going to have an exterior display that looks expertly designed. Simple looks better from a distance, but all the extras are so much more fun and atmospheric to walk around and through.
Last year I used blue and white lights on the porch and windows, with only a couple color accents on visible trees in featured windows. This year, I’m using a little more color, though my base colors are still blue and white.
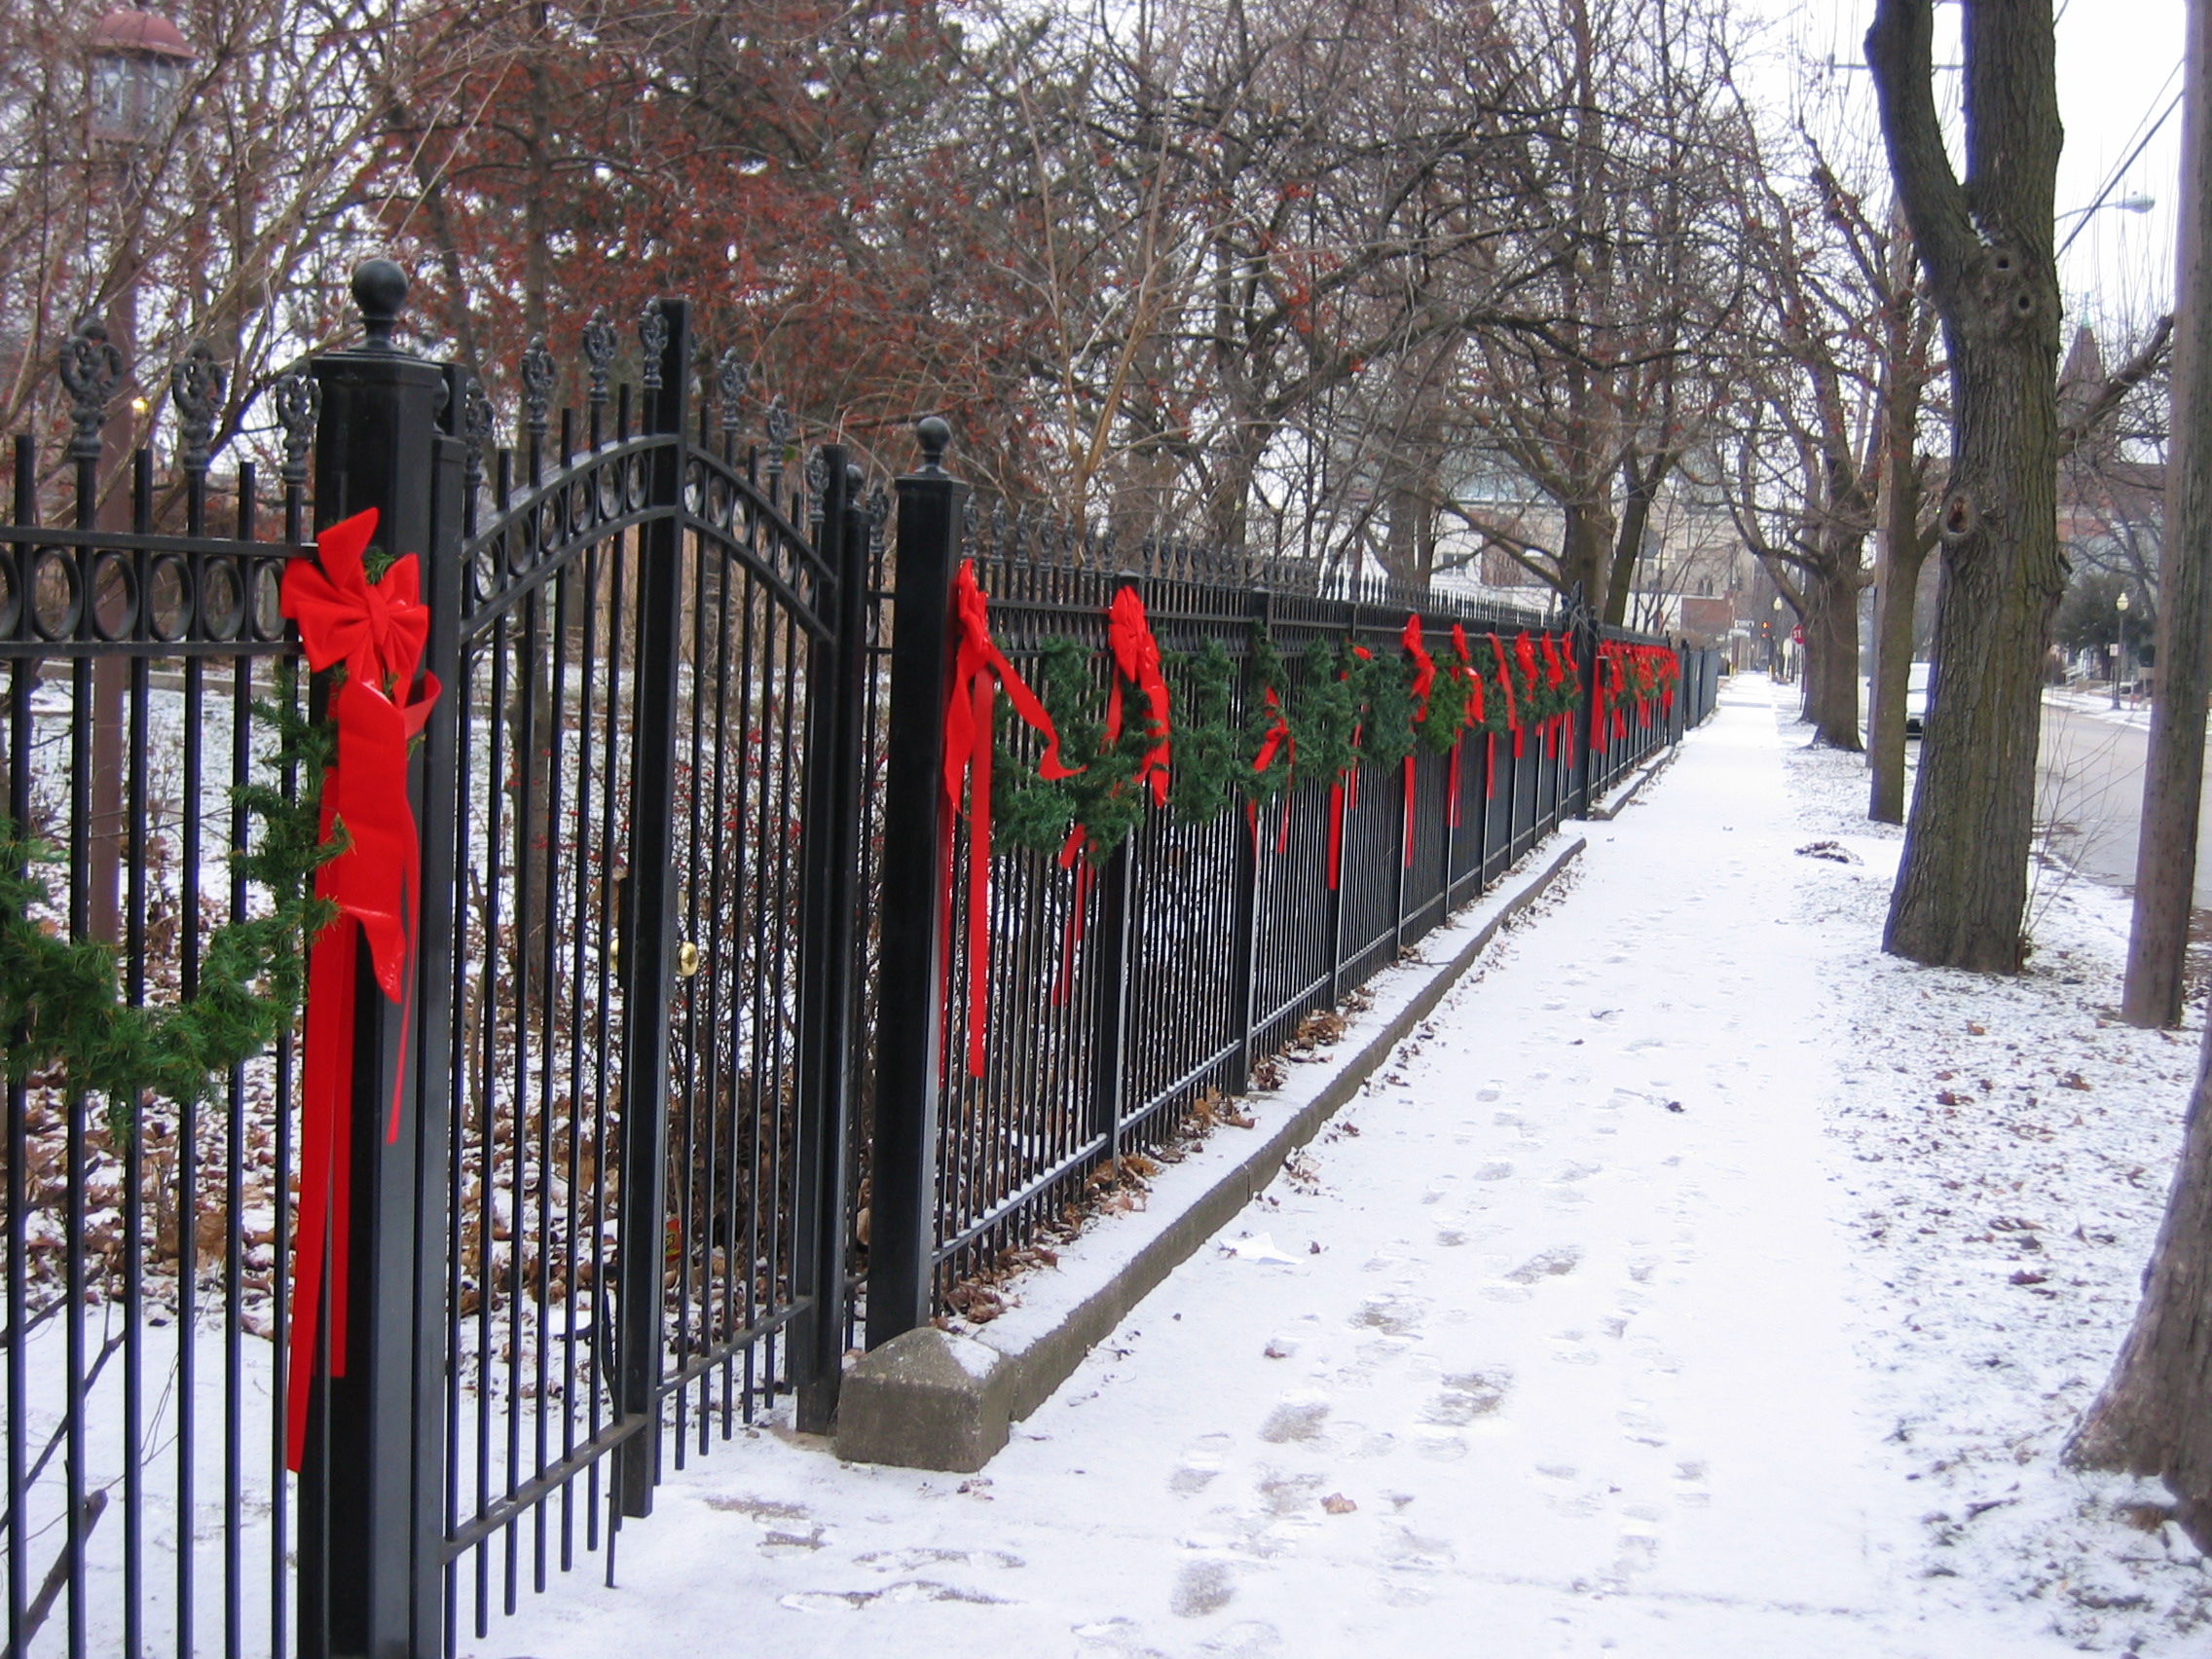
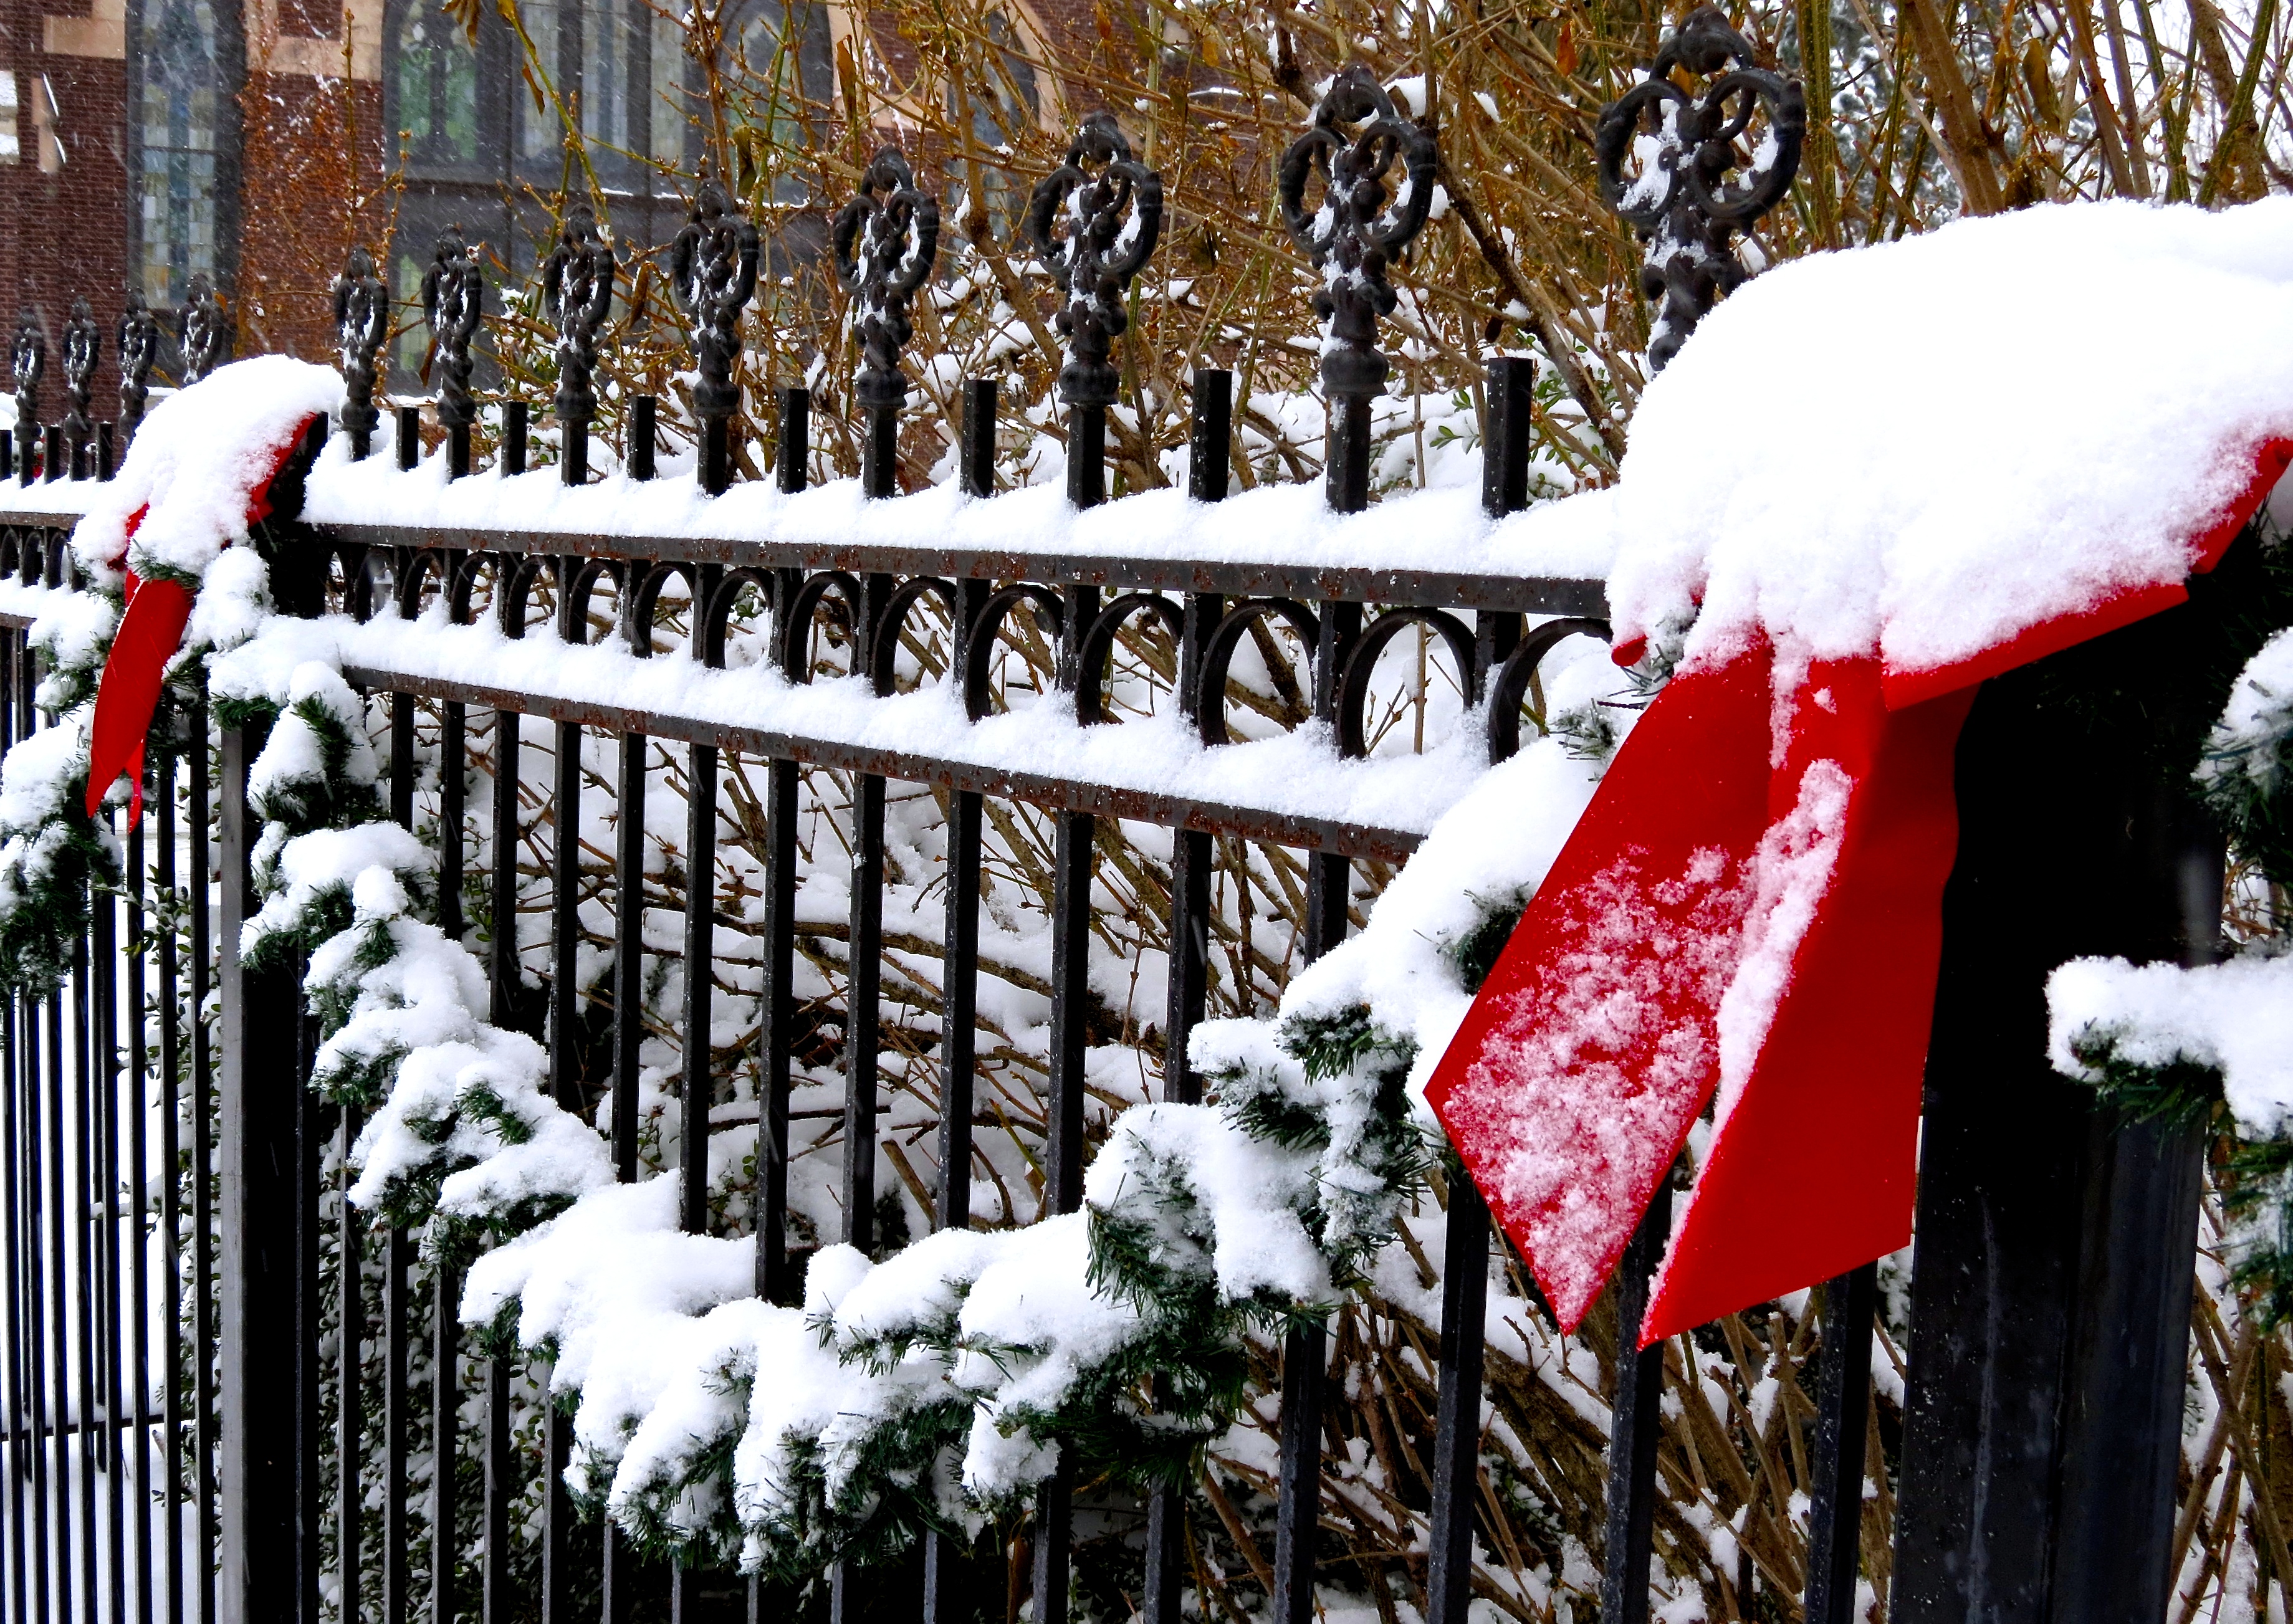
I finally found inexpensive bows for my fence. I’m used to getting them for $1 each and this year my previous sources have all gone up to $1.50. Not a big deal– except I need close to 100 bows and they don’t last more than a season due to fading. I finally found a two for $1 sale at a local store chain but none of the retail stores had the quantity I need in stock. So, they are being shipped, due to arrive any day now.
I’ll share more pictures when the windows are complete. It’s been a bit more challenging this year with the weather and our two puppies requiring more time and attention. I still have three weeks, right?
Twenty-One trees done.
Oh, I guess I didn’t mention the eleven full size trees indoors, plus four tabletop trees I need to finish.
I better get on the ball!

Of Puppies, Snowflakes and Fallen Angels
Yesterday started out simply enough: I woke up, made coffee and got my early morning grocery shopping out of the way.
The next thing I knew, it became just one of THOSE days…
 I had to wait for a train on the way home and hit every traffic light. There was no one else on the road. Michael woke up late and was rushing around getting ready, while also trying to get the dogs fed and settled– when I walked in the door.
I put the groceries away and turned around to discover Belle had learned a new trick. She had figured out how to jump up on the basement table–and she was eating the cat’s food. She had just had her own breakfast.
Yes, one of those days.
It’s too cold, too early in November with a wind chill of ten below.
Belle and Cash did not want to be outside. Dudley didn’t really seem to care. Whenever I tried to get the bigger two to go out, they’d just stare through me like I wasn’t there. Dudley really has no choice, his little bulldog puppy legs are too short to maneuver the stairs so he gets picked up and carried.
I was trying to bring Christmas decorations in from the garage, beating myself up for not putting them up sooner, while it was warm. This is what I get for trying to be a considerate neighbor by not putting them up too early.
It snowed a really fine snow, off and on, all through day with only a little accumulation. If it wasn’t cold enough already, the fierce wind made it brutal.
I’m decorating the exterior of the house, pretty much the same way I did last year, with a few minor changes here and there. I’d hung the large snowflakes on the porch over the weekend– but I hadn’t secured them and they were rocking and spinning with the wind. I was sure they were going to fly away with the real snowflakes. This prompted me to feel like I had to secure them today, despite the cold.
I rounded the corner of the house to find that not only were my snowflakes trying to take off– my two trumpeting angels had taken nose dives from the front porch, down the stairs. I’d already weighted them down with bricks– but not secured them to the railing. Apparently, the wind was strong enough to not only send the angels crashing to the ground; it also catapulted one of the bricks (as the angels went over) down to the sidewalk. Seeing the angels lying there, made me think of that horrible, current Life Alert commercial with the moaning woman and spilled clothes basket. This almost made me laugh.
Almost.
I put the angels back together, fastened them down, then secured the snowflakes before checking again on the babies.
 I went in to warm up and see if I could get them to go out… no deal. So I kept working. Every time I’d go in to check, Belle and Cash were either curled up together on the rug, or Cash was by the door (waiting for me) and Belle was asleep on a big pillow in the chair. (Dudley was sleeping soundly in his crate during all this.)
I brought some more decorations in and finally convinced the dogs to go out– that is, I bribed them with treats. They did their business, only lasting a few minutes before they wanted to go back in.
Now, I know I should have taken their lead and just stayed inside myself and snuggled with them– but I really wanted to get some of these things done so I didn’t feel like I was getting behind.
When I finally did decide to stay inside, things didn’t get much better. Belle decided to climb up on the bed, get Cash’s stuffed toy and pull as much stuffing out as possible, spreading all over the top of the stairs. Two of the window snowflakes I hung, didn’t light up after I’d run the cords and had to come down and be replaced. Dudley decided the only way he wanted to play was to chew on me; chopping down on my hand, making it bleed. And– I was making a big mess of the dining room with the decorations.
It wasn’t completely bad though…
All this time, aside from not wanting to go out– Cash was my buddy. He helps me. He stayed nearby, stayed out of trouble– watching me; content to get an occasional rub or scratch behind the ears. Always listening to me while I worked, responding to my mumbling, by cocking his head and panting.
Altering my plan, I was able to get quite a few of my lights up– Even though Belle was doing her best to distract me with her mischief. Though sometimes a handful, it’s hard to get mad at those cute puppy faces. And Cash, well, he’s my proud old man.
I didn’t even bother to try to start cooking before Michael came home and he graciously offered to do it, while Belle and Dudley wrestled around on the floor. I kept working, we ate, then Michael took the puppies back down to play while Cash and I finished up what we could on the first floor. Translation: I was up and down the ladder and he snored away on the couch.
It was after eight before I finally sat down to finish my blog post… the next thing I knew, it was time for bed.
I was working on this post this morning when everyone got up… Annnnnd……
The day ignited with crashing pet gates, Belle trying to eat everyone’s food and Dudley chewing my toes through my socks….
Suffice it to say, it’s pretty crazy around here every day. If it’s not snowing and angels are falling to earth– then there’s some new unexpected adventure in the works.
It’s just another amazing day.

Beautiful Christmas – Before You Start Decorating
I took Belle to doggie daycare for half a day yesterday and took advantage of the time to start decorating our house for Christmas. I got five trees up, including the 20 foot foyer tree; not lit or decorated– but they are up– and that’s a start!
 I want to share some of my experiences and some tips on how to make the most out of your Christmas decorating in a few posts over the coming weeks. I know it’s not Thanksgiving yet and even if you don’t plan on starting until then; it’s not too early to shop or at least begin thinking about what you want to do this season.
Whether this is your first time decorating or you consider yourself an old pro, I hope you find some ideas that will help you make the most out of your holiday decorating.
Before You Start
Especially if you are new to decorating, or looking to expand your efforts this year, here are some things you really should consider first:
- Budget. What’s your budget? Are you recycling old decorations or purchasing new for the first time? How can you save money?
- Storage. Where are you going to store all your decorations after the holidays?
- Time. How much time do you have to decorate AND take it all down?
- Size. How can you make the most of what you have? Is there such a thing as too much?
- Design. Do you have a vision in mind? Don’t know exactly where to start?
So, those are the five big things you should decide before anything else. You should consider these points in that order too. It’s great to have ideas first– but if you don’t ultimately follow these steps, you could find yourself coming up short down the line.
 Budget. If you have an unlimited budget then you can skip this step. Most of us are trying to make the most of what we have; and believe me, it’s easy to go way beyond what you intended to spend if you’re not careful. Something that may start out as a simple idea can snowball. Before you know it, you’re either out of money or over extended.
Example 1– Trees need a lot of decorations and lights. The bigger the tree, the more you need. I always find if I think I need 6 strings of lights– I end up needing 8 or else I’m taking them all off and stringing them back on the tree again. At least with the ornaments, you can re-space them if you run out. I’m not saying you can’t have a simple, elegant tree. I’m saying that it’s so easy to start and then find yourself needing much more than you anticipated.
Example 2– Garland and swags. Yes, you can measure the areas you want to hang garland and swags and you can get a pretty good idea of what you need. Don’t be surprised though, if you don’t anticipate the extra you’ll need depending on how you drape it. I reuse whenever possible but garland doesn’t last forever. I’ve also noticed you can’t always find suitable garlands readily available form season to season. Prices have also doubled and even quadrupled in some stores this year.
Three ways to save money are: 1) Start early and watch for sales. 2) Don’t forget to check dollar and discount stores! You’d be surprised at what you can find. 3) Maybe go simpler this year and then make the most of the clearance sales after Christmas for next year.
If you wait too long, most of the good stuff will be gone. Don’t expect to find the shelves are still full after Thanksgiving. Trendy items and single color lights (even red or green) tend to sell out early.
A good rule of thumb is: What ever you expect to spend… double it. What ever you can afford to spend, cut it in half and start there as your budget amount.
 Storage. Many people make the mistake of not considering what they are going to do with their decorations when they come down. You may not have room to store a large artificial tree and all the trimmings. You may have to go with a smaller, compact option. Another alternative is to use a live tree but that might not fit in your budget year after year. Know how much space you can afford to dedicate to storing your decorations before you buy– unless you expect to throw out or donate them when they come down.
Storage space isn’t so much an issue for me, the organization of it all has been a huge challenge. This past year, I actually took the time to separate out my decorations in containers and label them with the contents. This helps so much when you start to decorate the following year. Don’t skip the labeling part– You may think you’ll remember what’s in that box on the top closet shelf and a year later– your memory is gone. I label the top and at least one side of each container and make sure I store them with the label side out.
Proper storage does take a little extra time but not as much as you might think. It definitely save you time later on.
WARNING: I know it may seem obvious…. Don’t store items that can freeze or melt in an non-climate controlled area like the attic or an unheated garage. Candles and snow globes might not look the same when you open them the following year.
One more thing– when you take your tree down: It may not seem important at the time to separate out your ornaments (if you use sets of things) but do it. When you open the box the following year, you’ll be glad you did.
 Time. Last year was the first year I wasn’t still decorating Christmas Eve. Biting off more than I can chew is an art I have mastered and a bad habit to break. I highly recommend starting early if you plan on a lot of decorating and think you might run into a time crunch. Procrastinating can also create a holiday stress load you don’t need.
Same as with your budgeting: Whatever time you think it will take, double it. Whatever time you have available, cut your time expectations in half. Start there and if you complete everything, you can always add more later.
We used to host the same group for Thanksgiving and Christmas and Michael always preferred that Christmas wasn’t up for both holidays. This created a big time crunch because of the amount of decorating I do every year. Some years I waited and some I started early depending on what the schedule looked like. My preference is to have everything up by Thanksgiving so the time before Christmas is open for holiday fun.
By all means, allow yourself enough time to enjoy decorating! For me, it’s one of my favorite parts of the holiday season.
Don’t forget, you have to take it all down! This is my least favorite part. It takes time. You may want to leave it all up a few extra weeks to enjoy, run out of time– and then find you’re still taking it down before Easter. Yes, that’s happened to me.
Size. This directly relates to the other four considerations. How big do you want to go? How much room do you have for storage? How much can you afford to spend? How much time is it going to take?
I love a fully decorated house, inside and out. But simple and elegant or warm and homey is great too. Know and stick to your limits!
 Design. Here’s a chance to show off a little of your personality. Your ideas and creativity here, are your only guide. I highly recommend considering 1) colors and themes and 2) whether your design will vary from room to room or encompass the whole house. Make sure, what ever you decide, compliments the everyday design of your living space. Complimentary or contrasting colors and be very effective. Using one or two primary colors can also give a very elegant and designed feel to your decorating.
I love Christmas decorations so much, I’d be hard pressed to say I’ve seen a really ugly, tree, house or room. Christmas is the one time that I think its perfectly acceptable to be completely gaudy if you want to… It’s really your choice.
Christmas decorations can completely transform a space either good or bad. A tree that’s too big can make a room unlivable and hard to navigate. One that’s too small can look dwarfed. To compensate here, especially if storage is an issue: consider using a tabletop tree as room accent as opposed to a 4 foot tree stuck in a corner or behind the couch.
Colored lights are great — keep in mind you might not want blue or purple lights next year. White is classic, multicolored lights can be more casual and whimsical.
Last year, for the first time in many years, I used the inexpensive glass ball ornaments (that have been around for ever) on several trees. By limiting them to a few colors, (gold and white, silver and white, etc.) and using a couple different sizes; I was surprised at how really beautiful they looked. It’s a very cost effective way to decorate, you can use them in groupings and arrangements as well, and if you have to get rid of them because you can’t store them– they are cheap to replace.
I also love a traditional family ornament tree. Not only is it totally unique to your family but the sentimental value is priceless. That can be included in other decorating elements in your house as well. Saved treasures from your children’s, or your childhood, can be used for a warm, sentimental touch.
 Go For It!
I hope this helps some of you in getting the wheels turning! I’d love to hear from you and have you share your own thoughts and ideas. I’ll be posting more though the season. If you’re new to my blog, check out the archives from last November and December for some easy ideas and suggestions.
Happy Decorating!
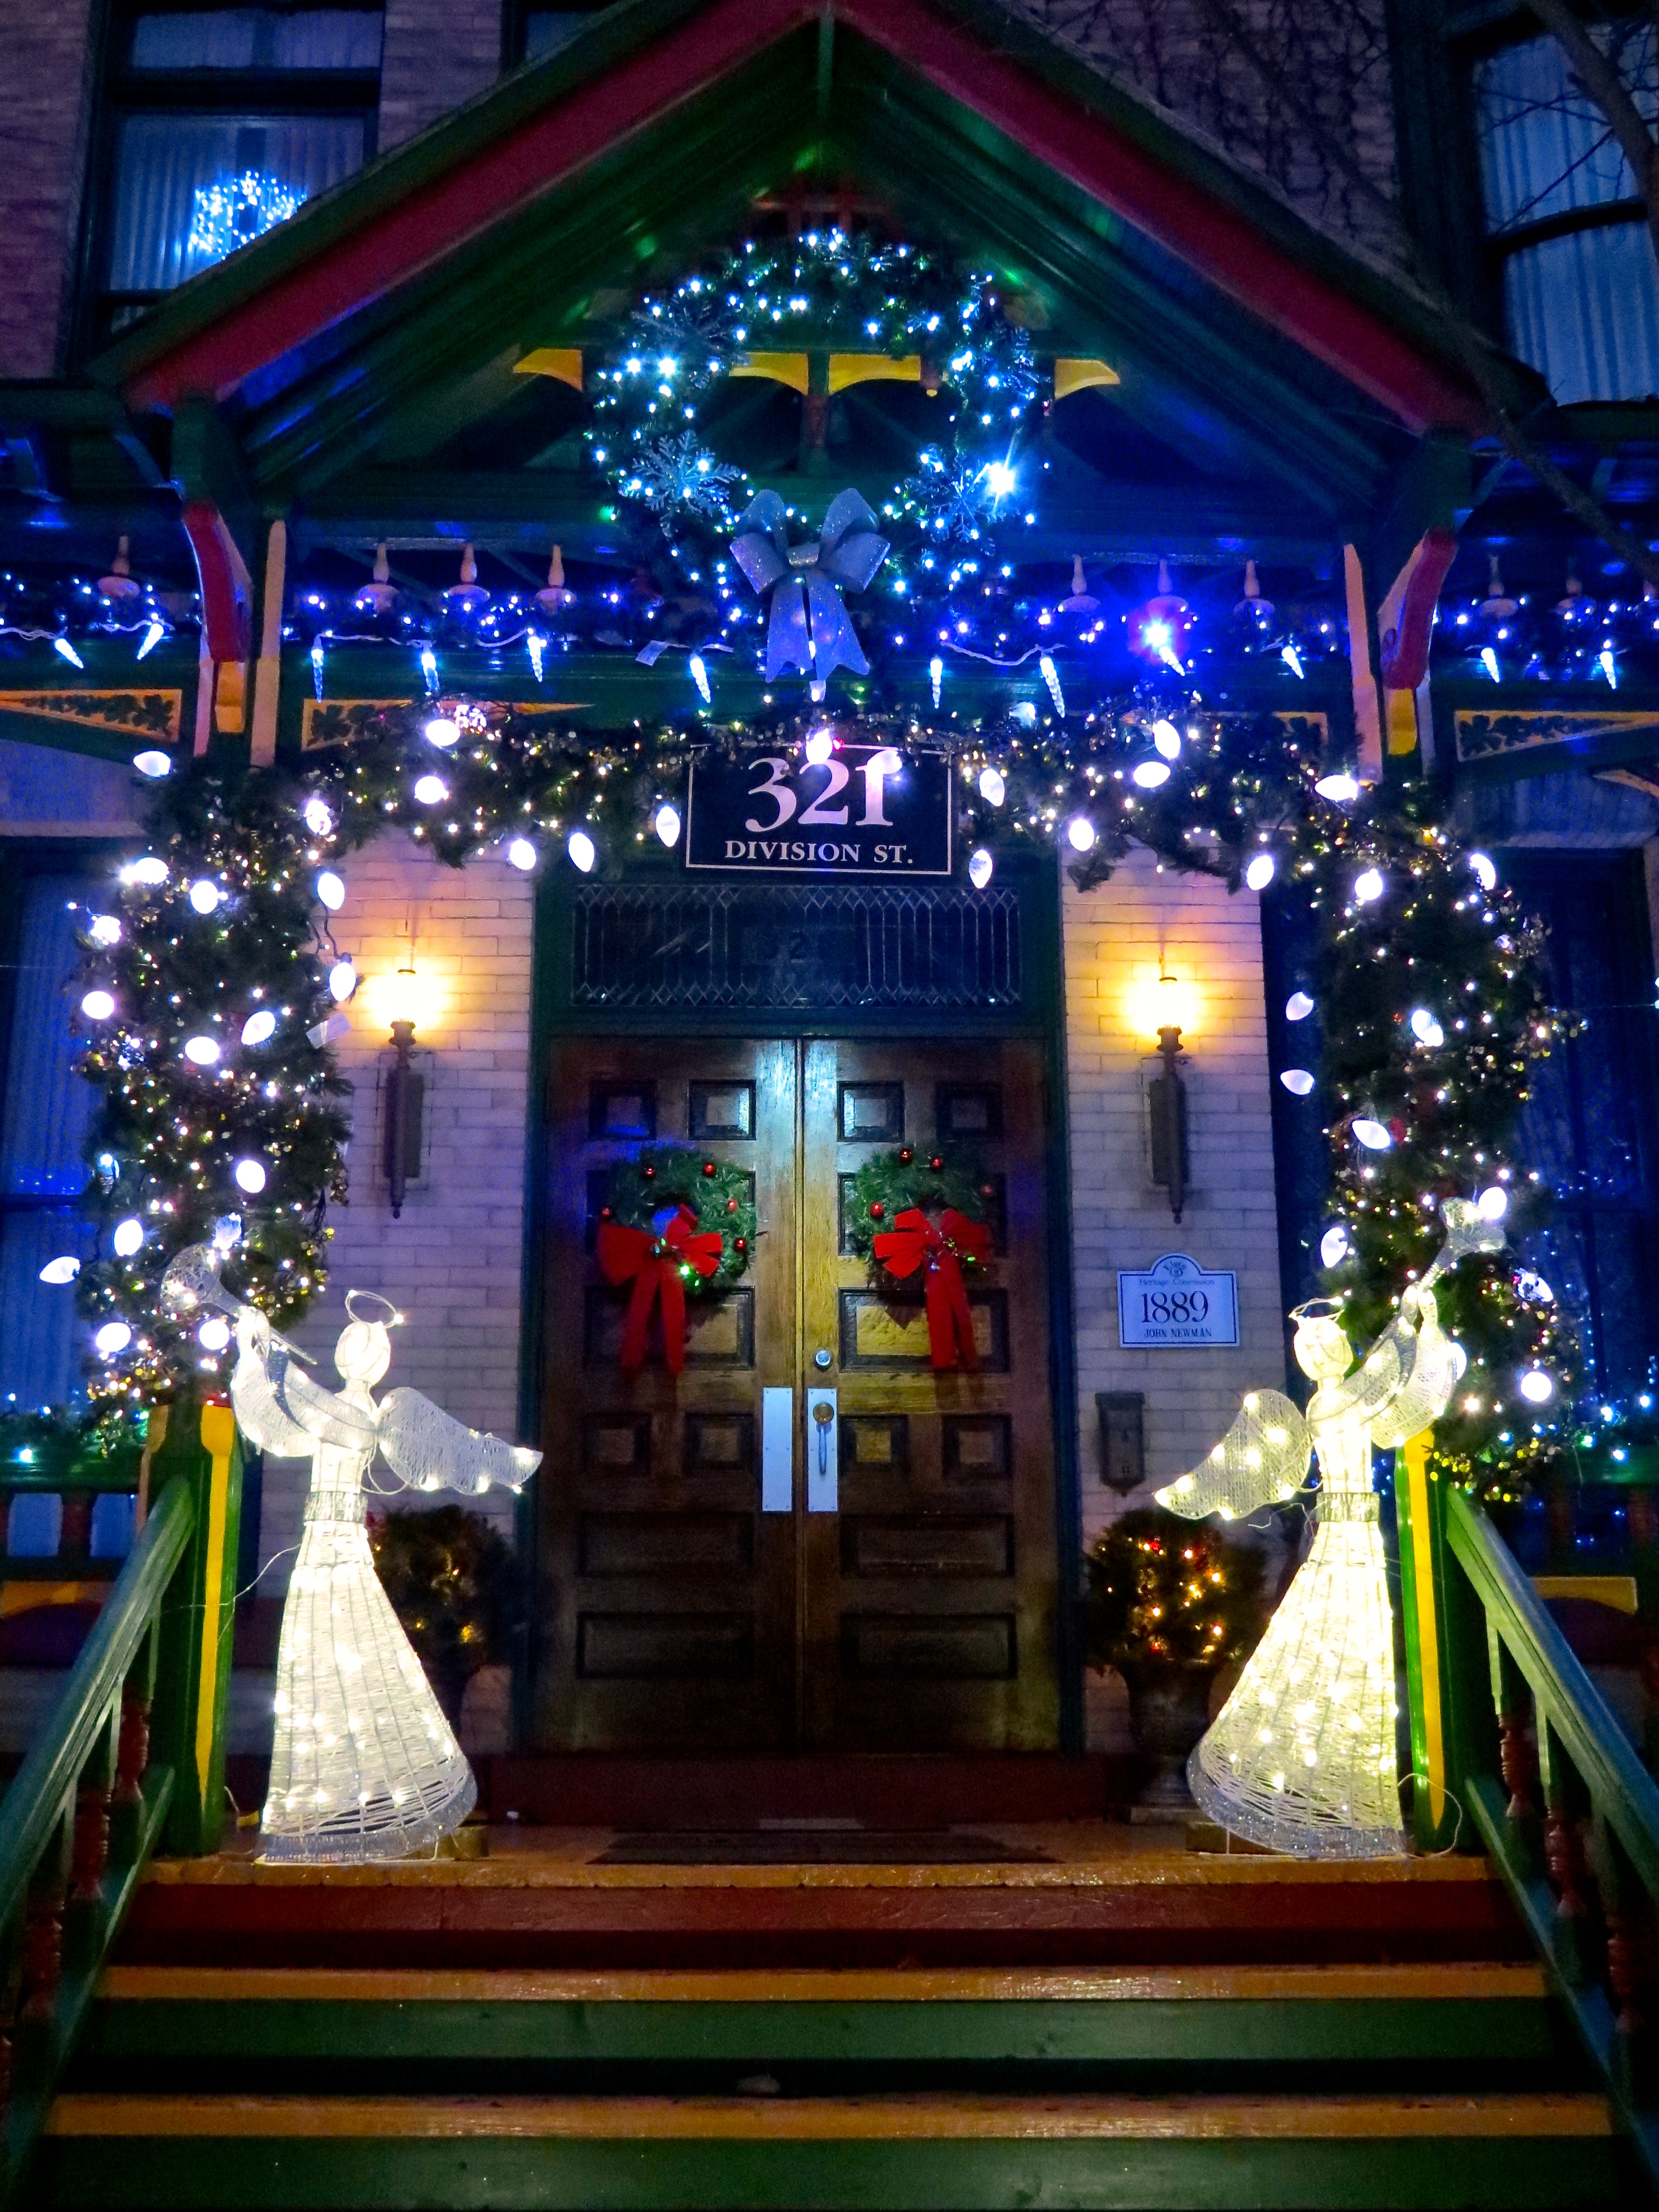
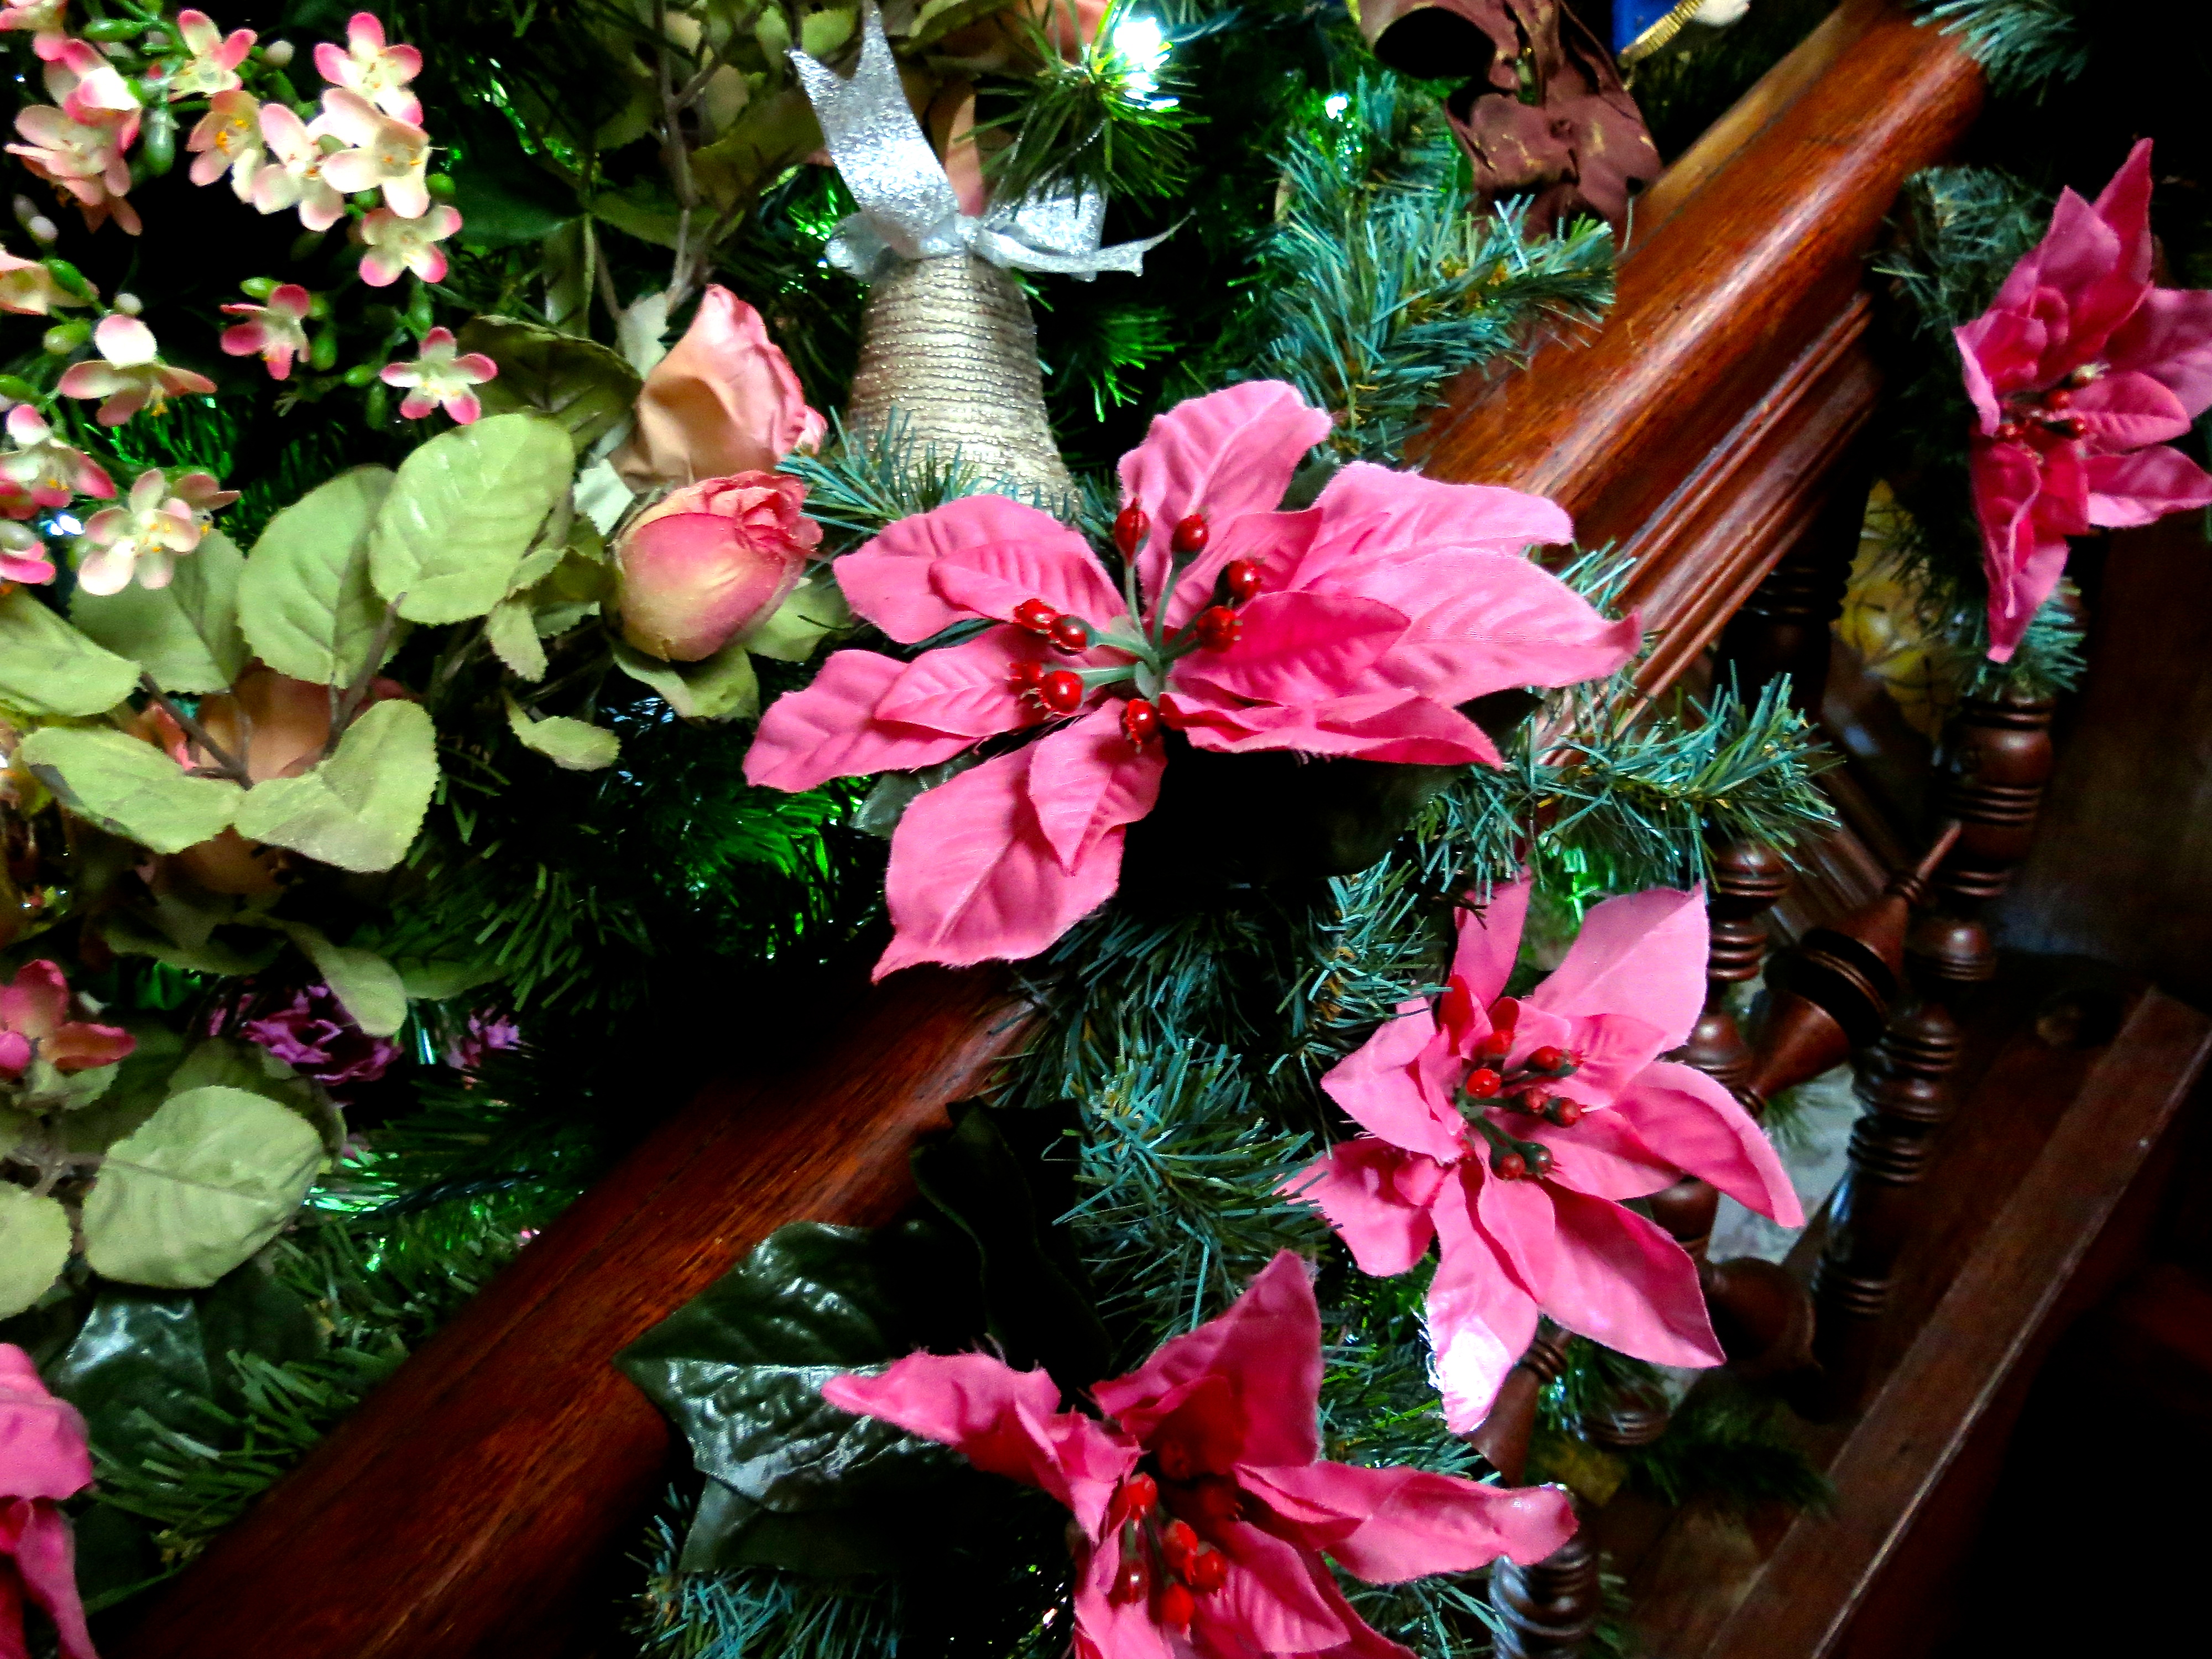
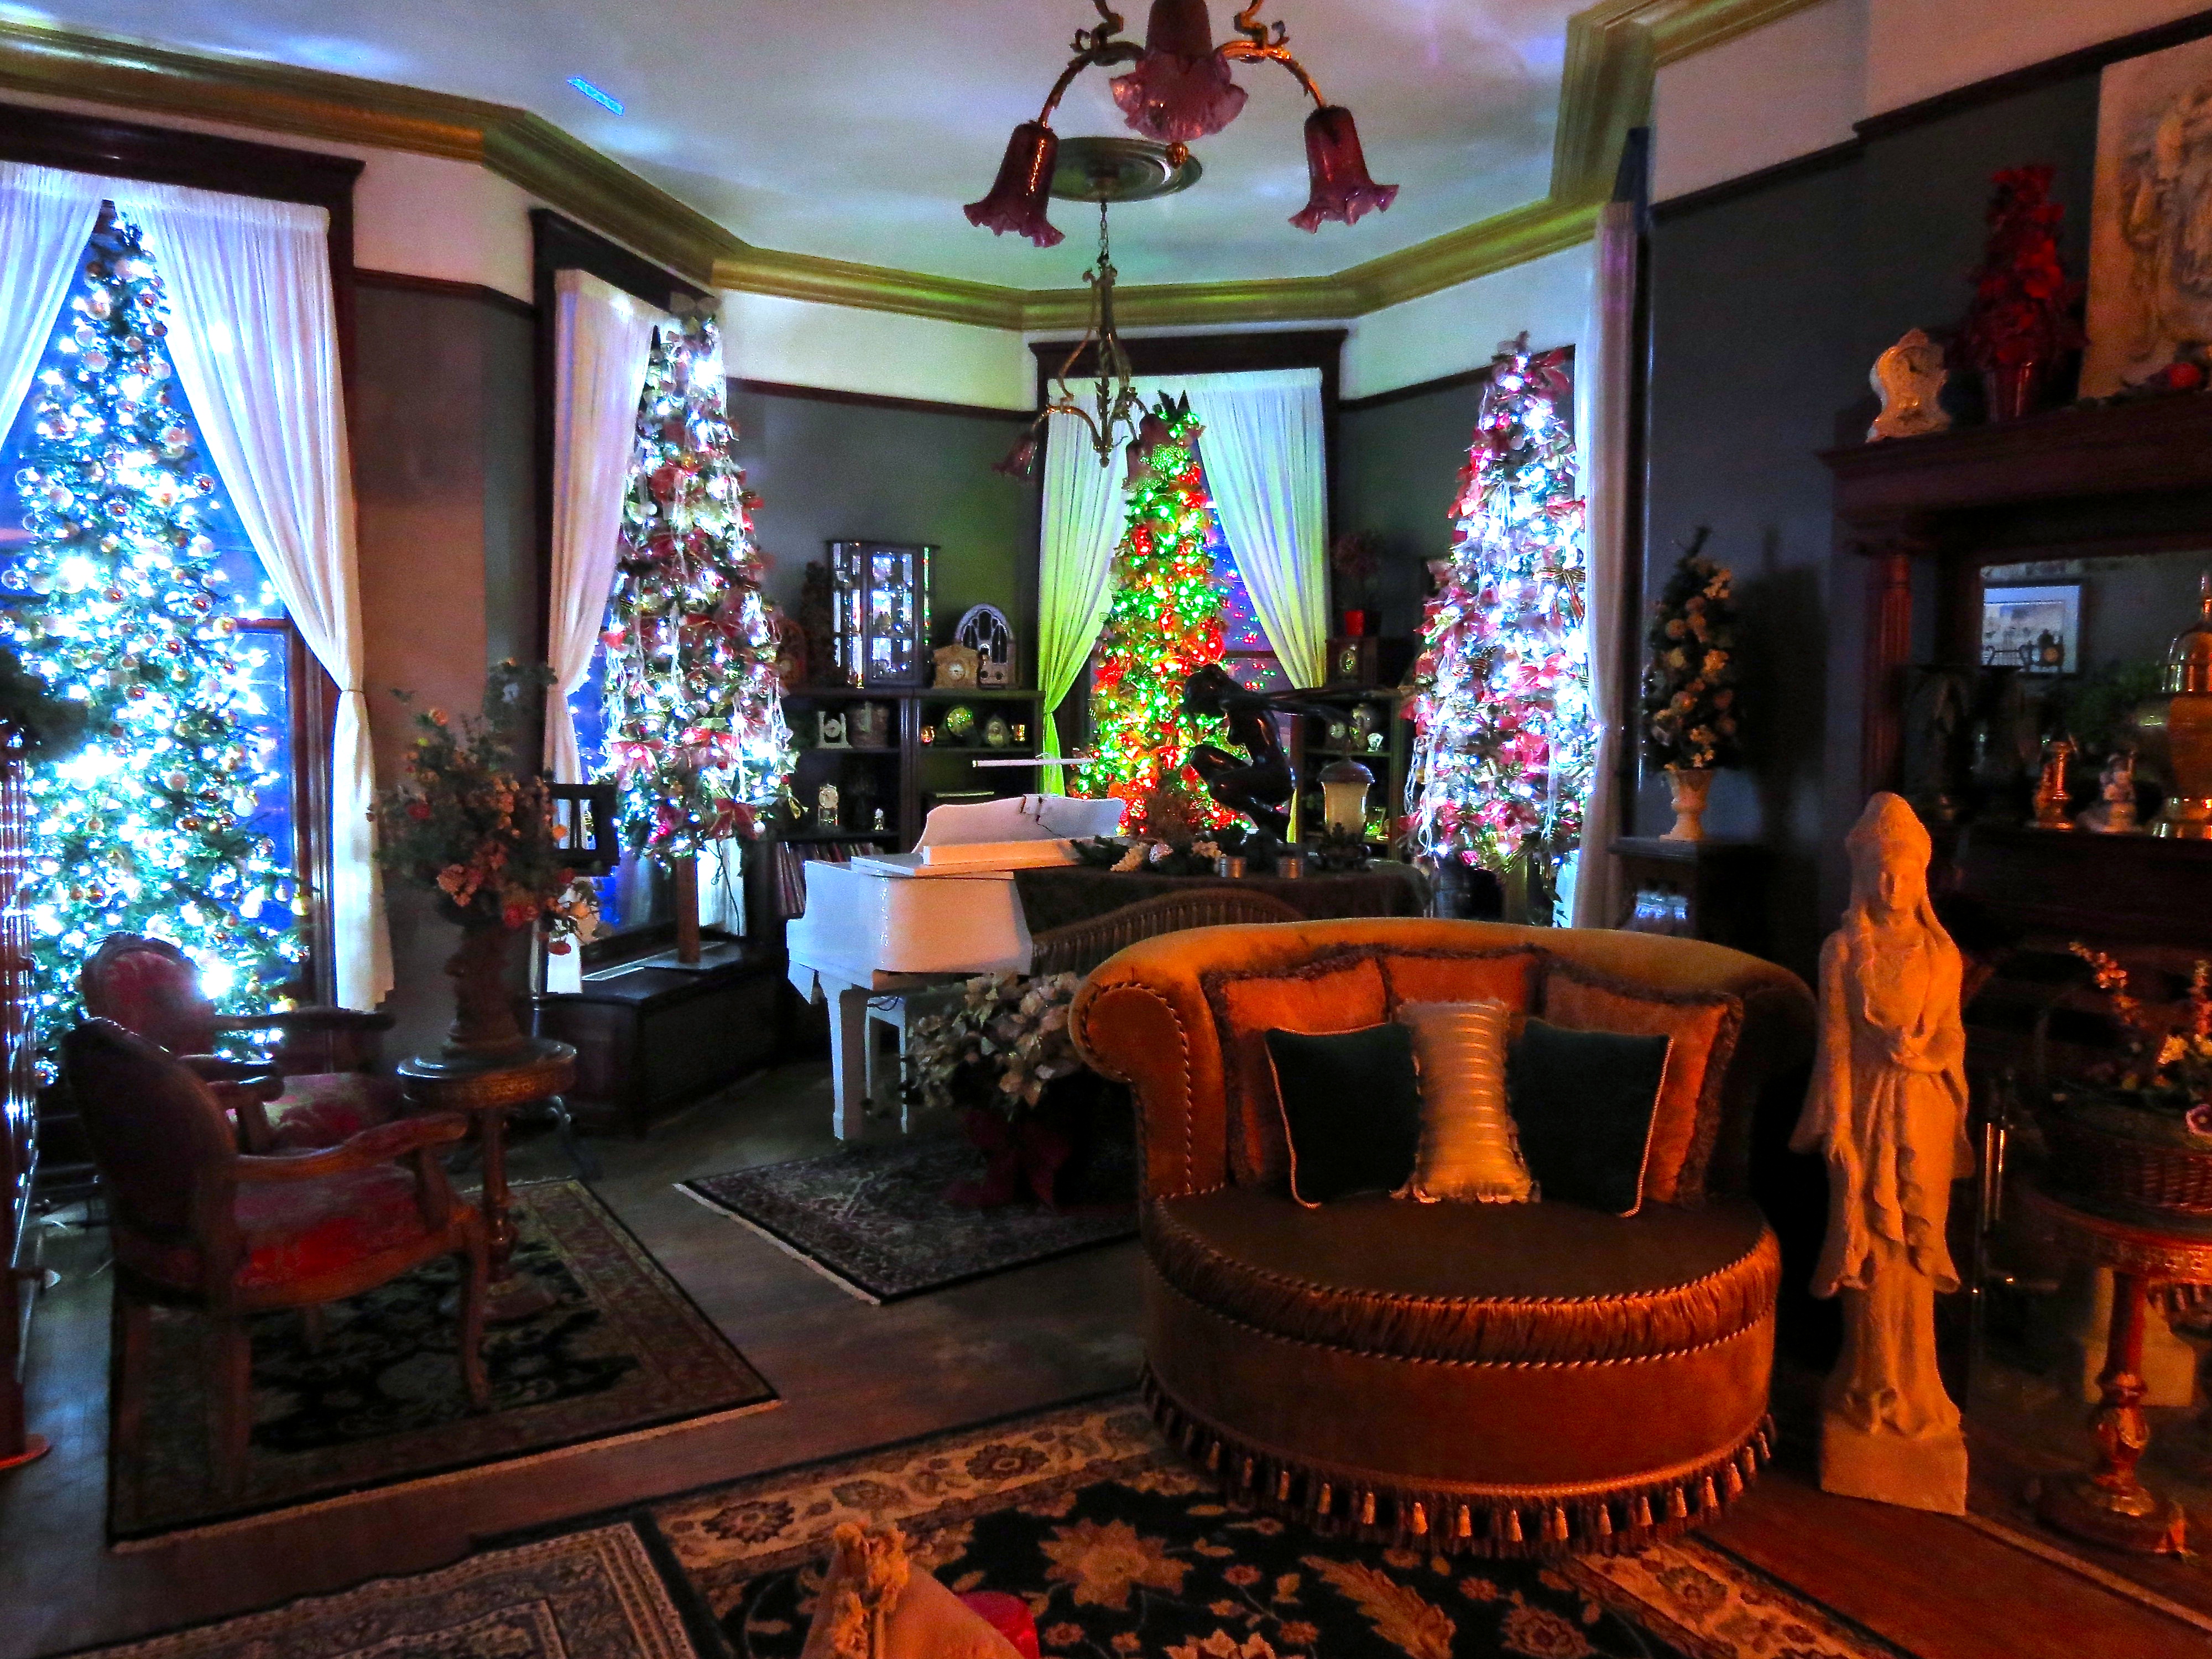
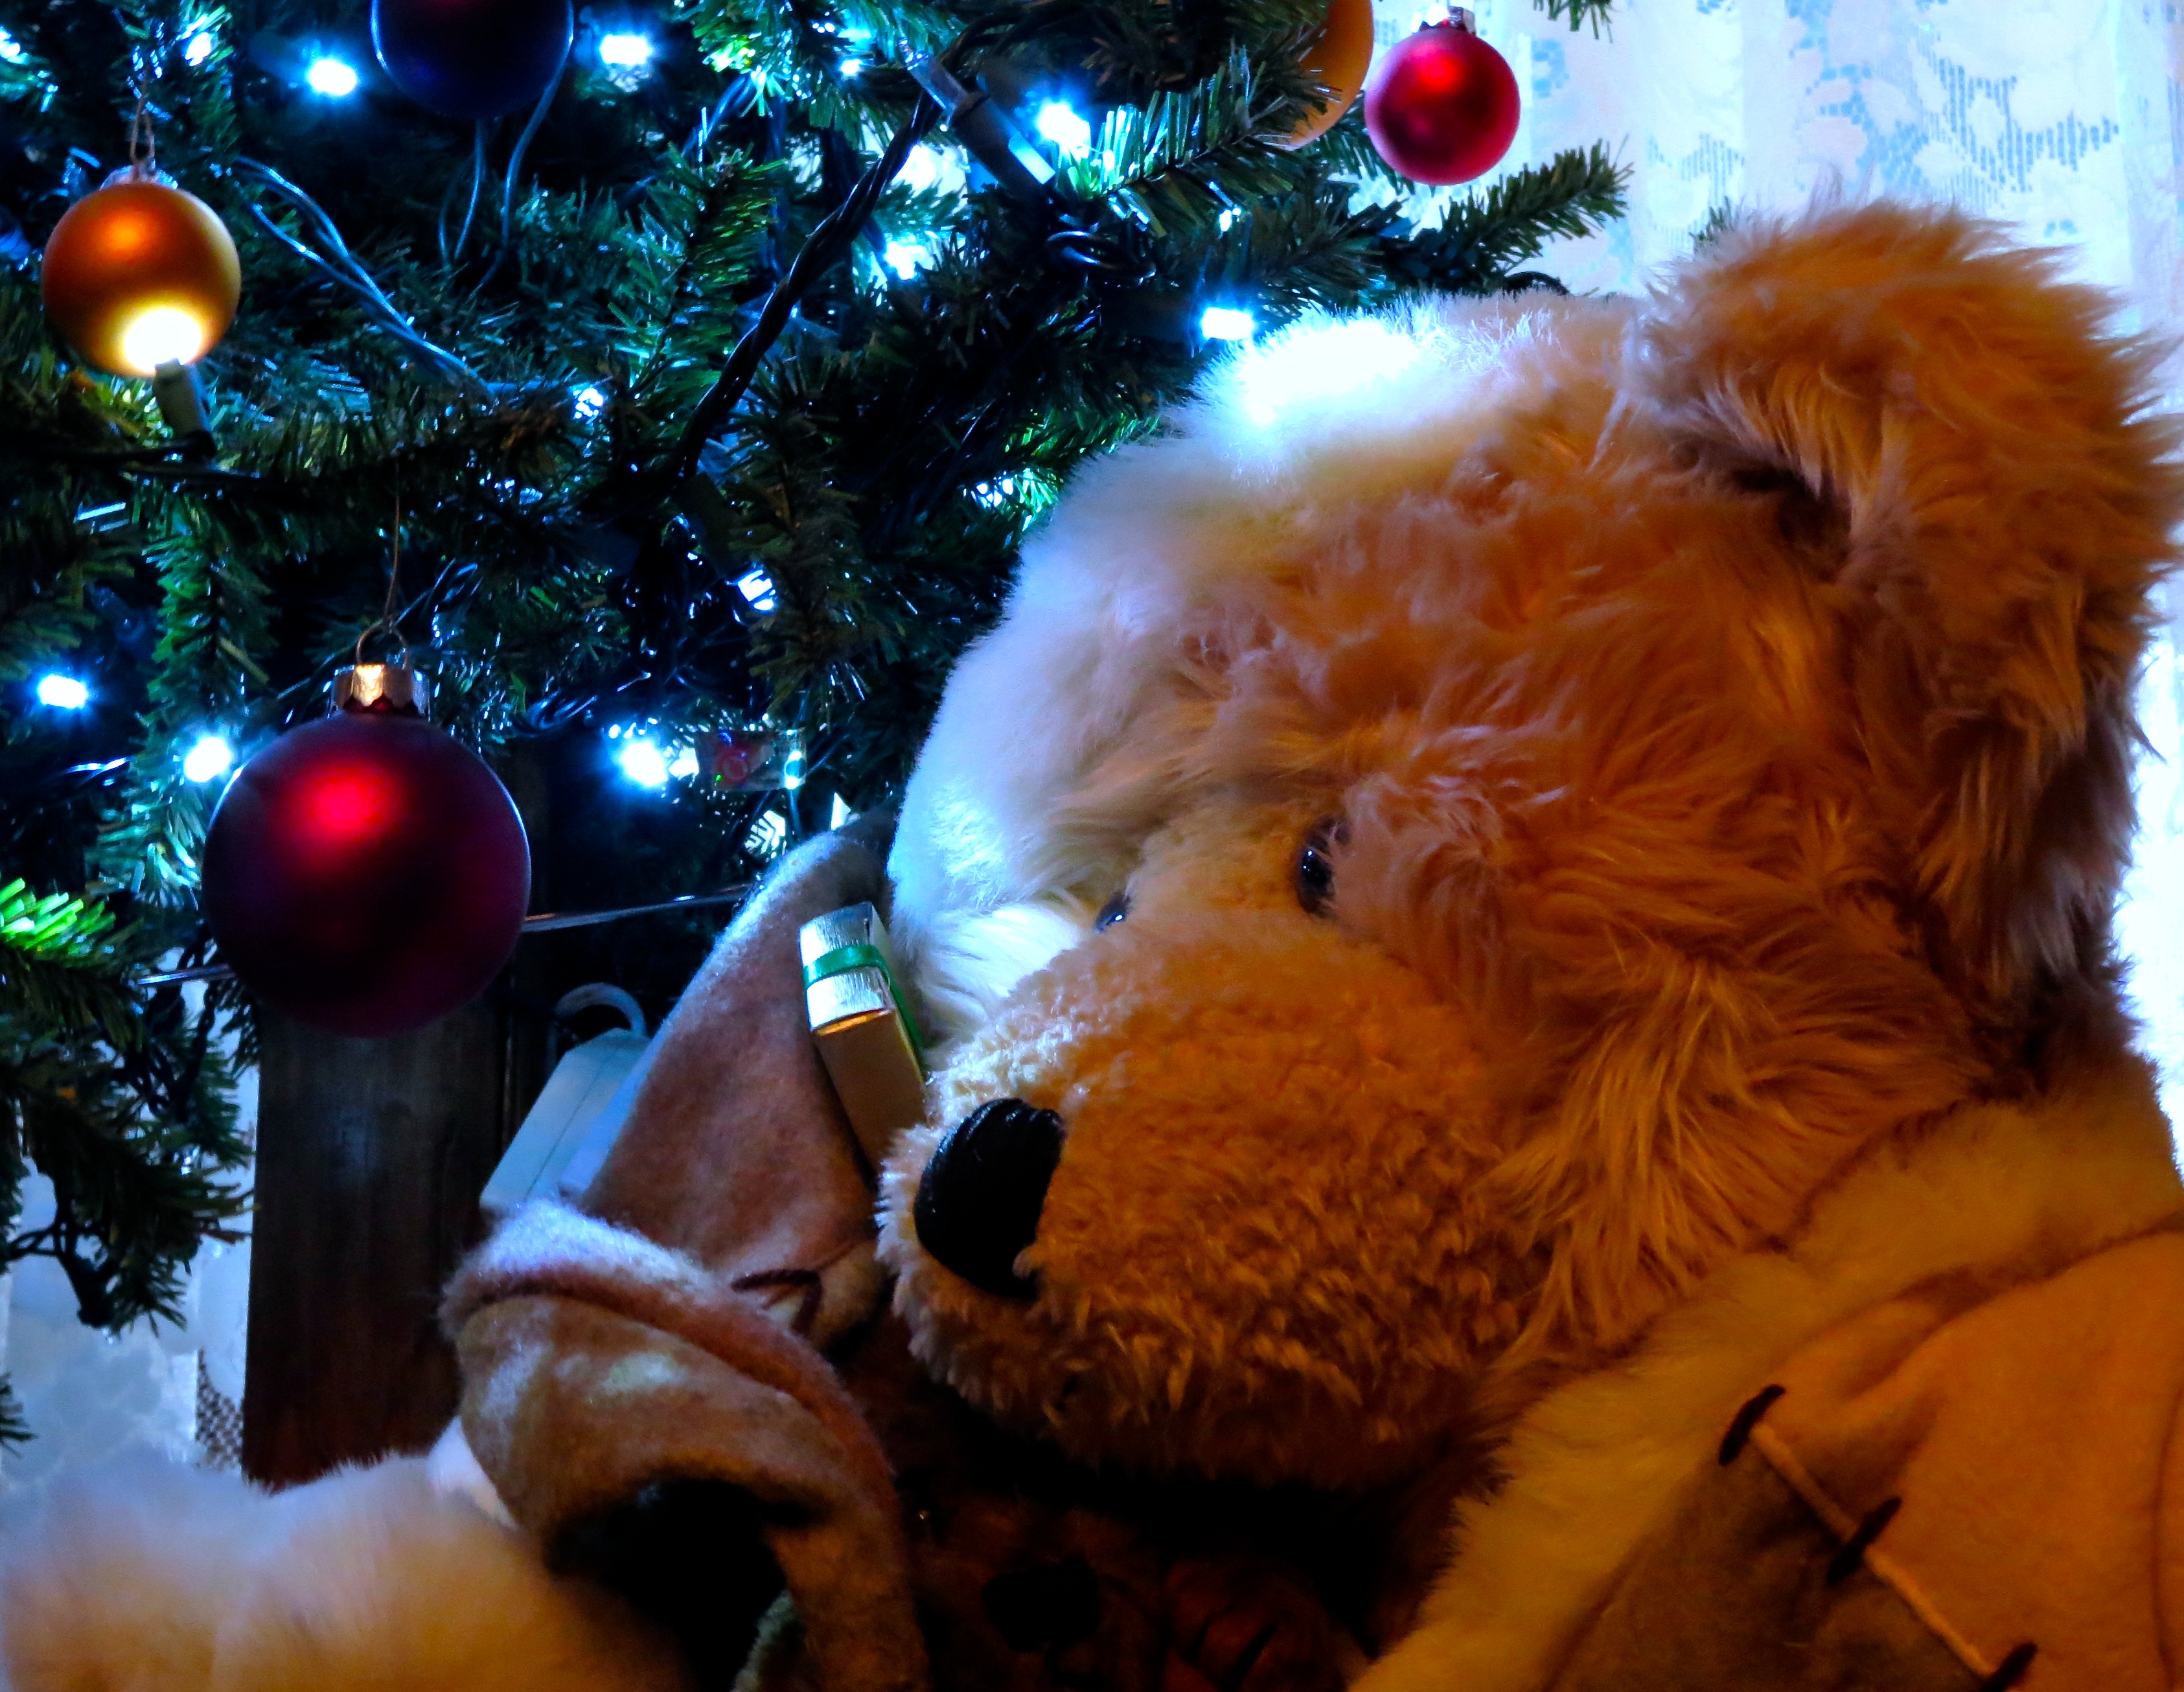
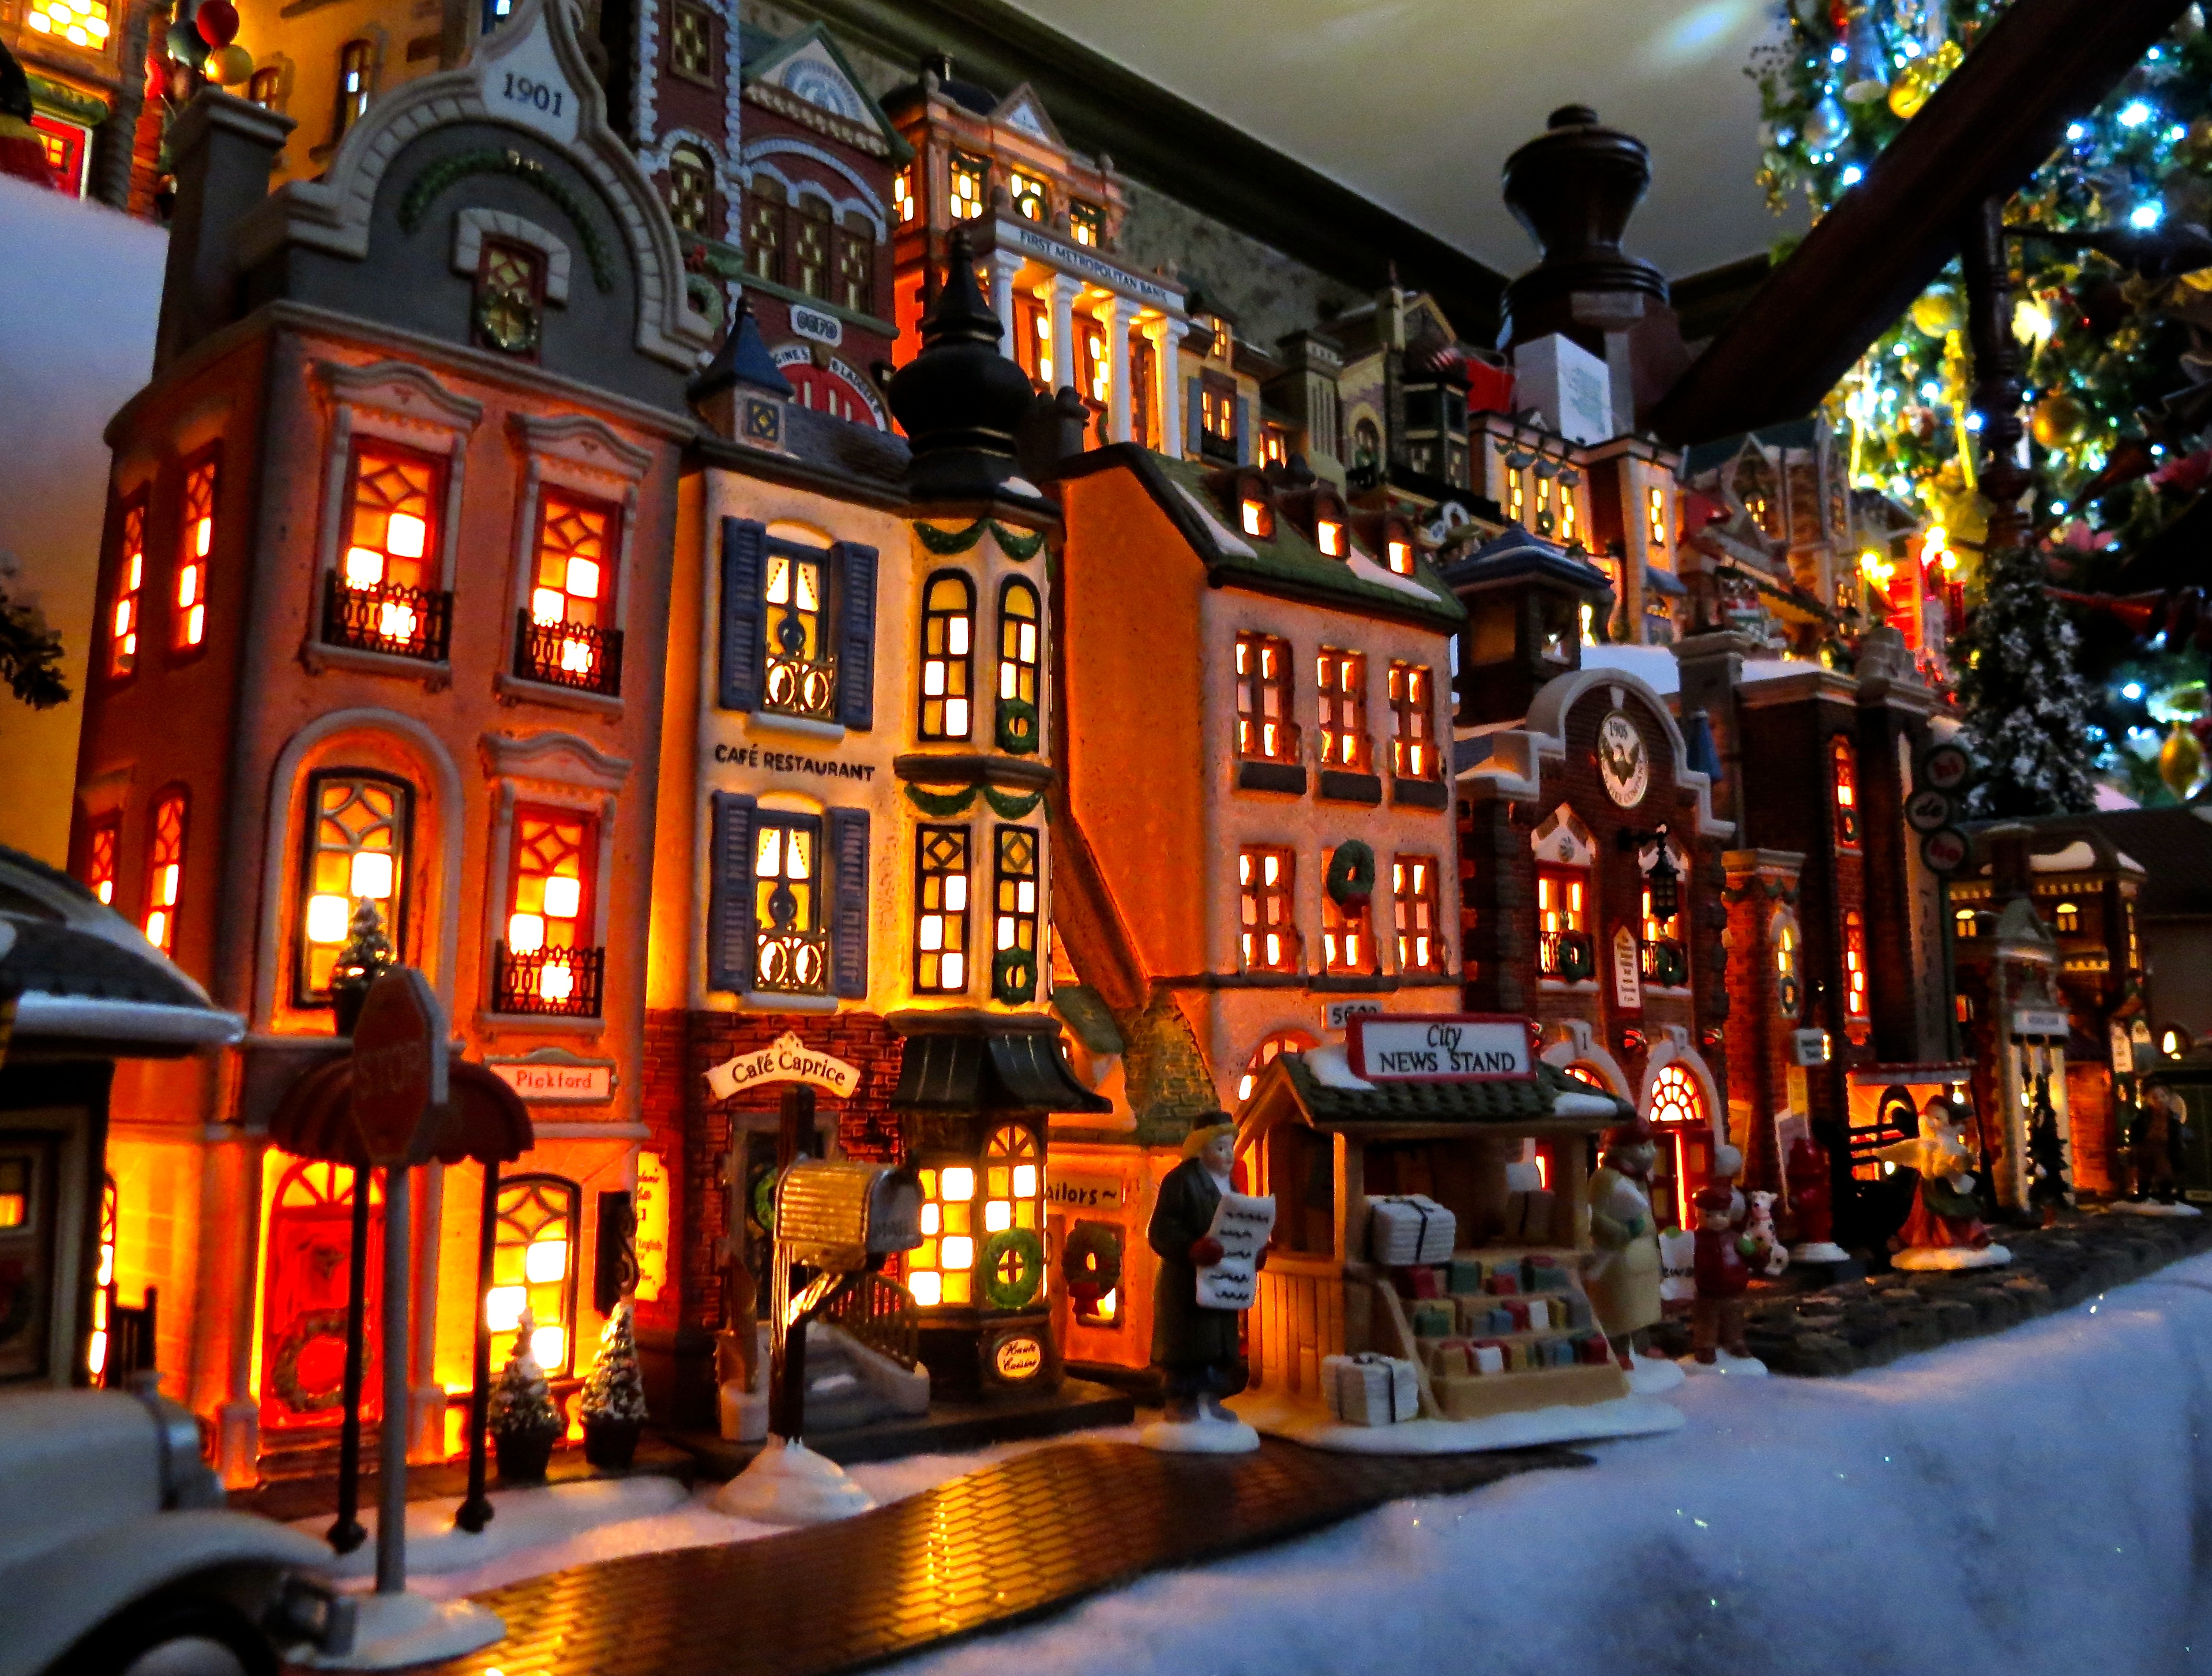
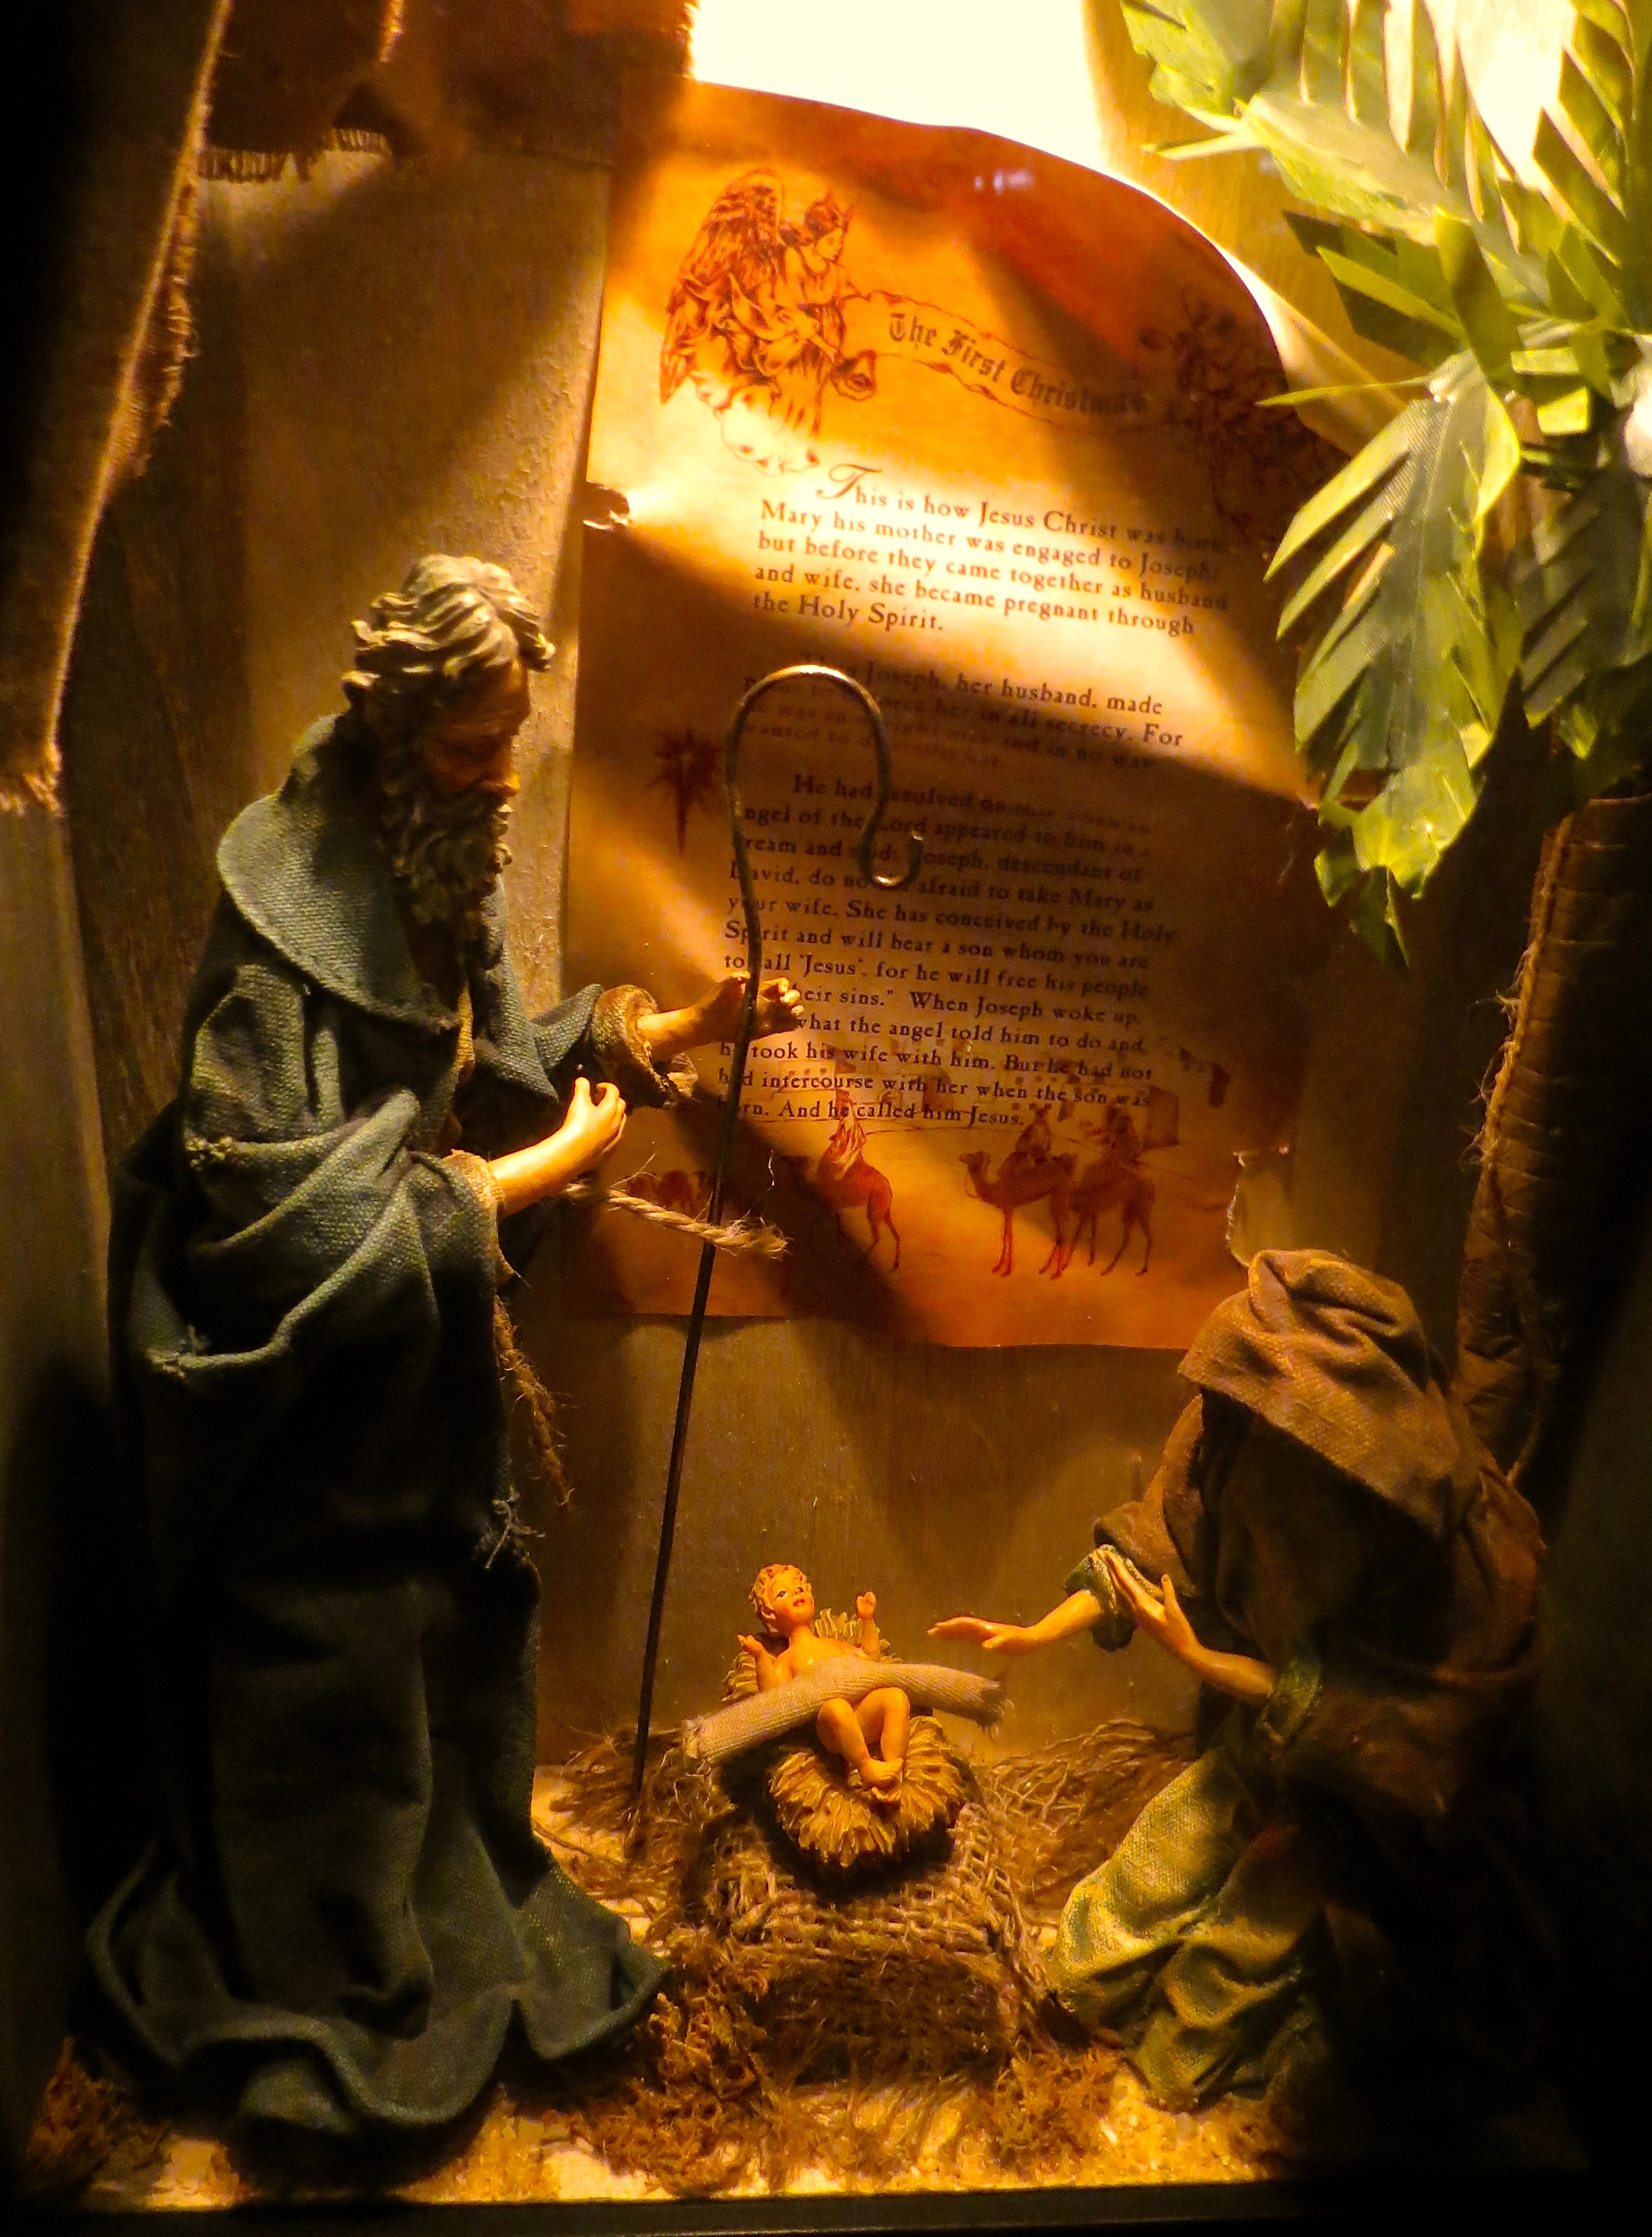
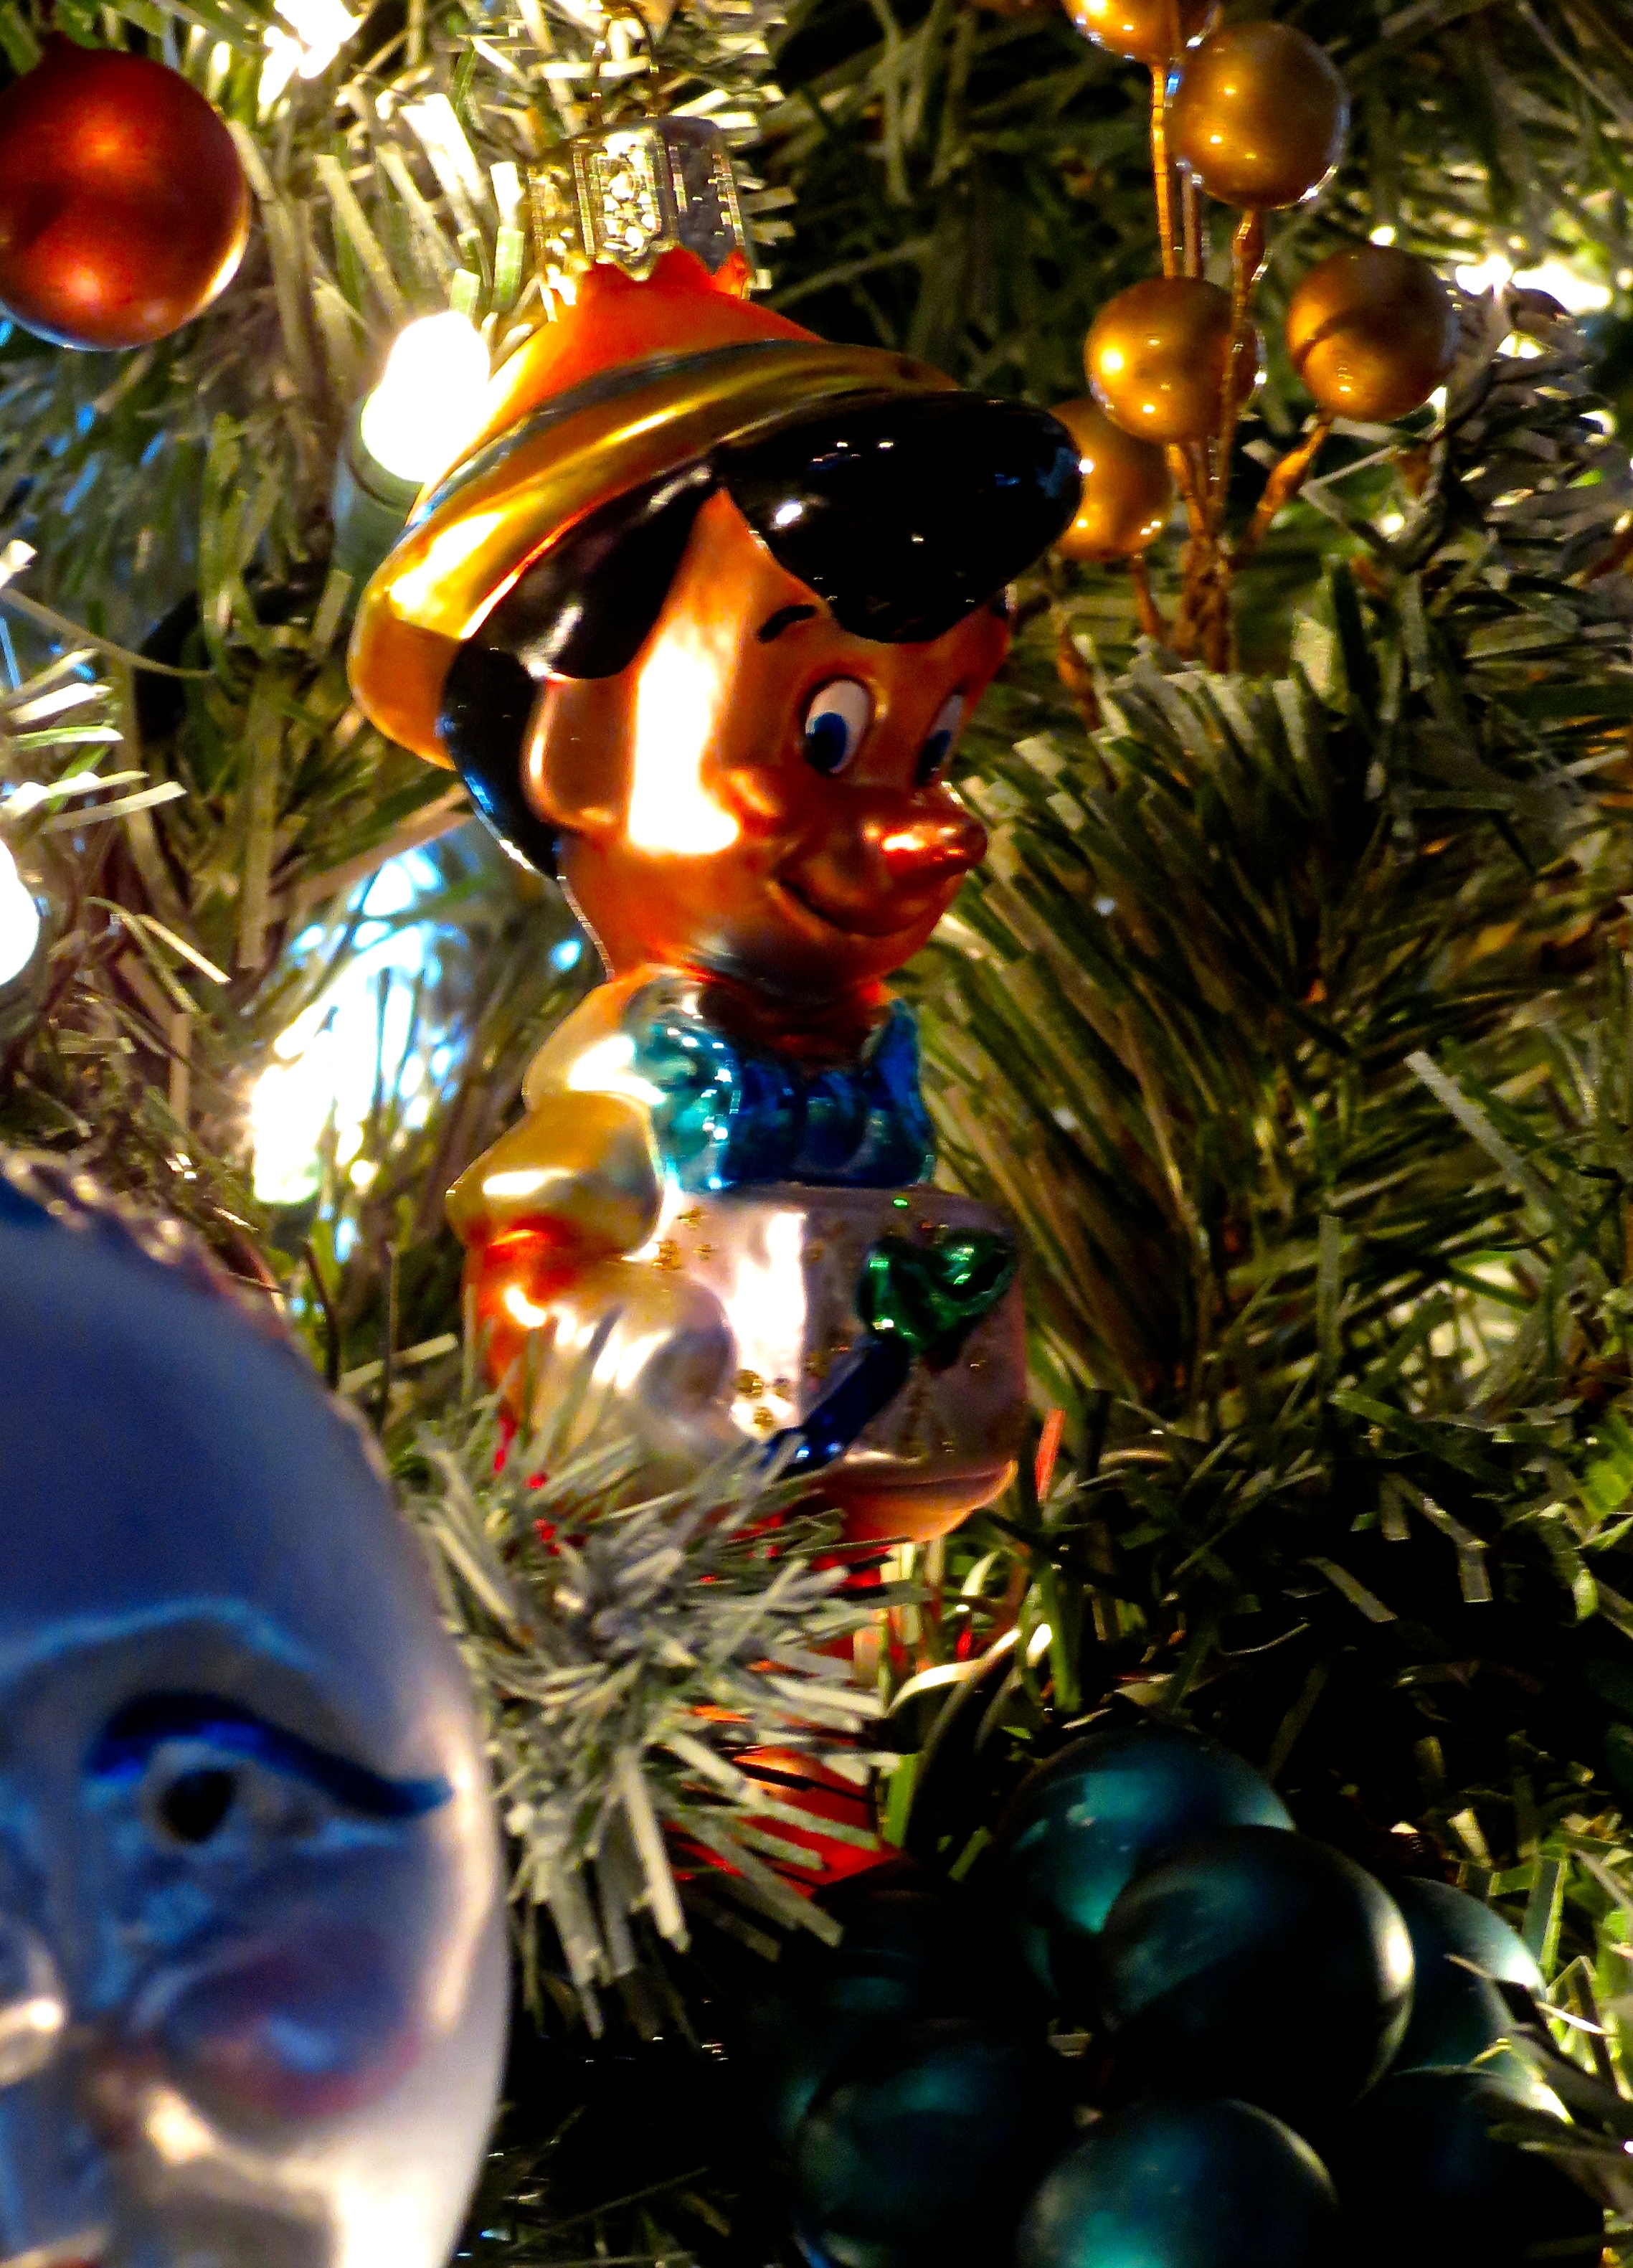
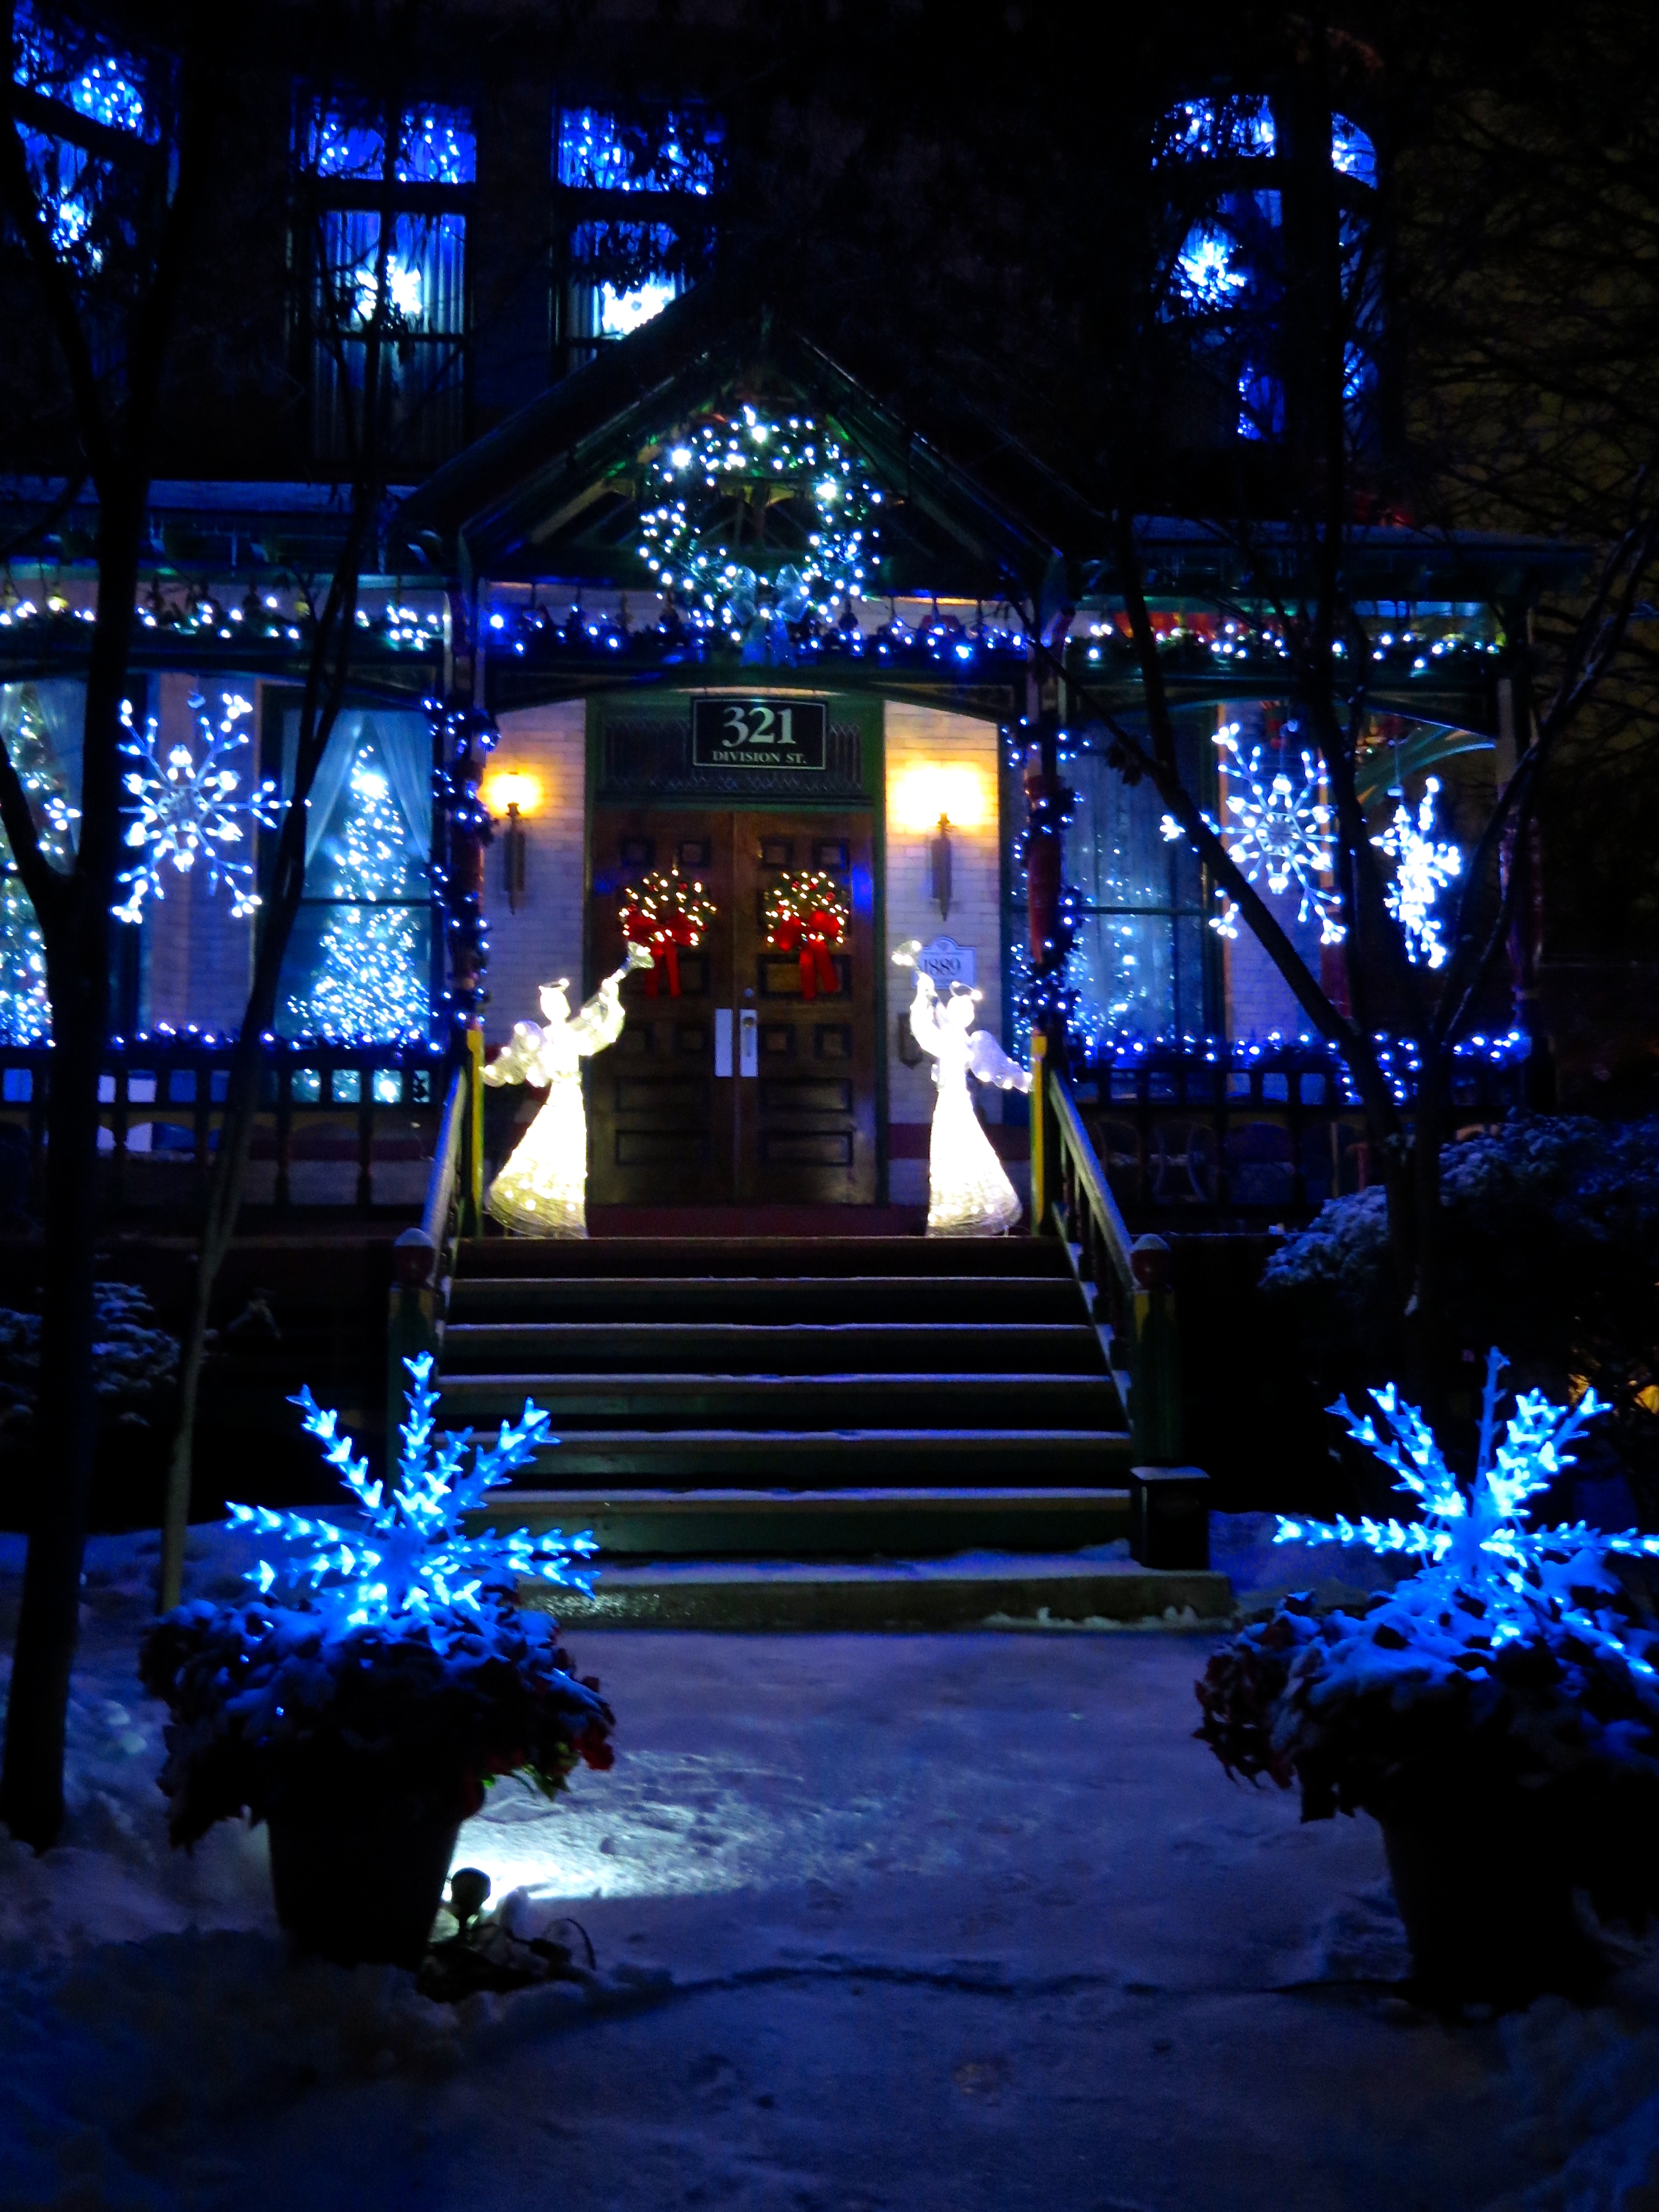
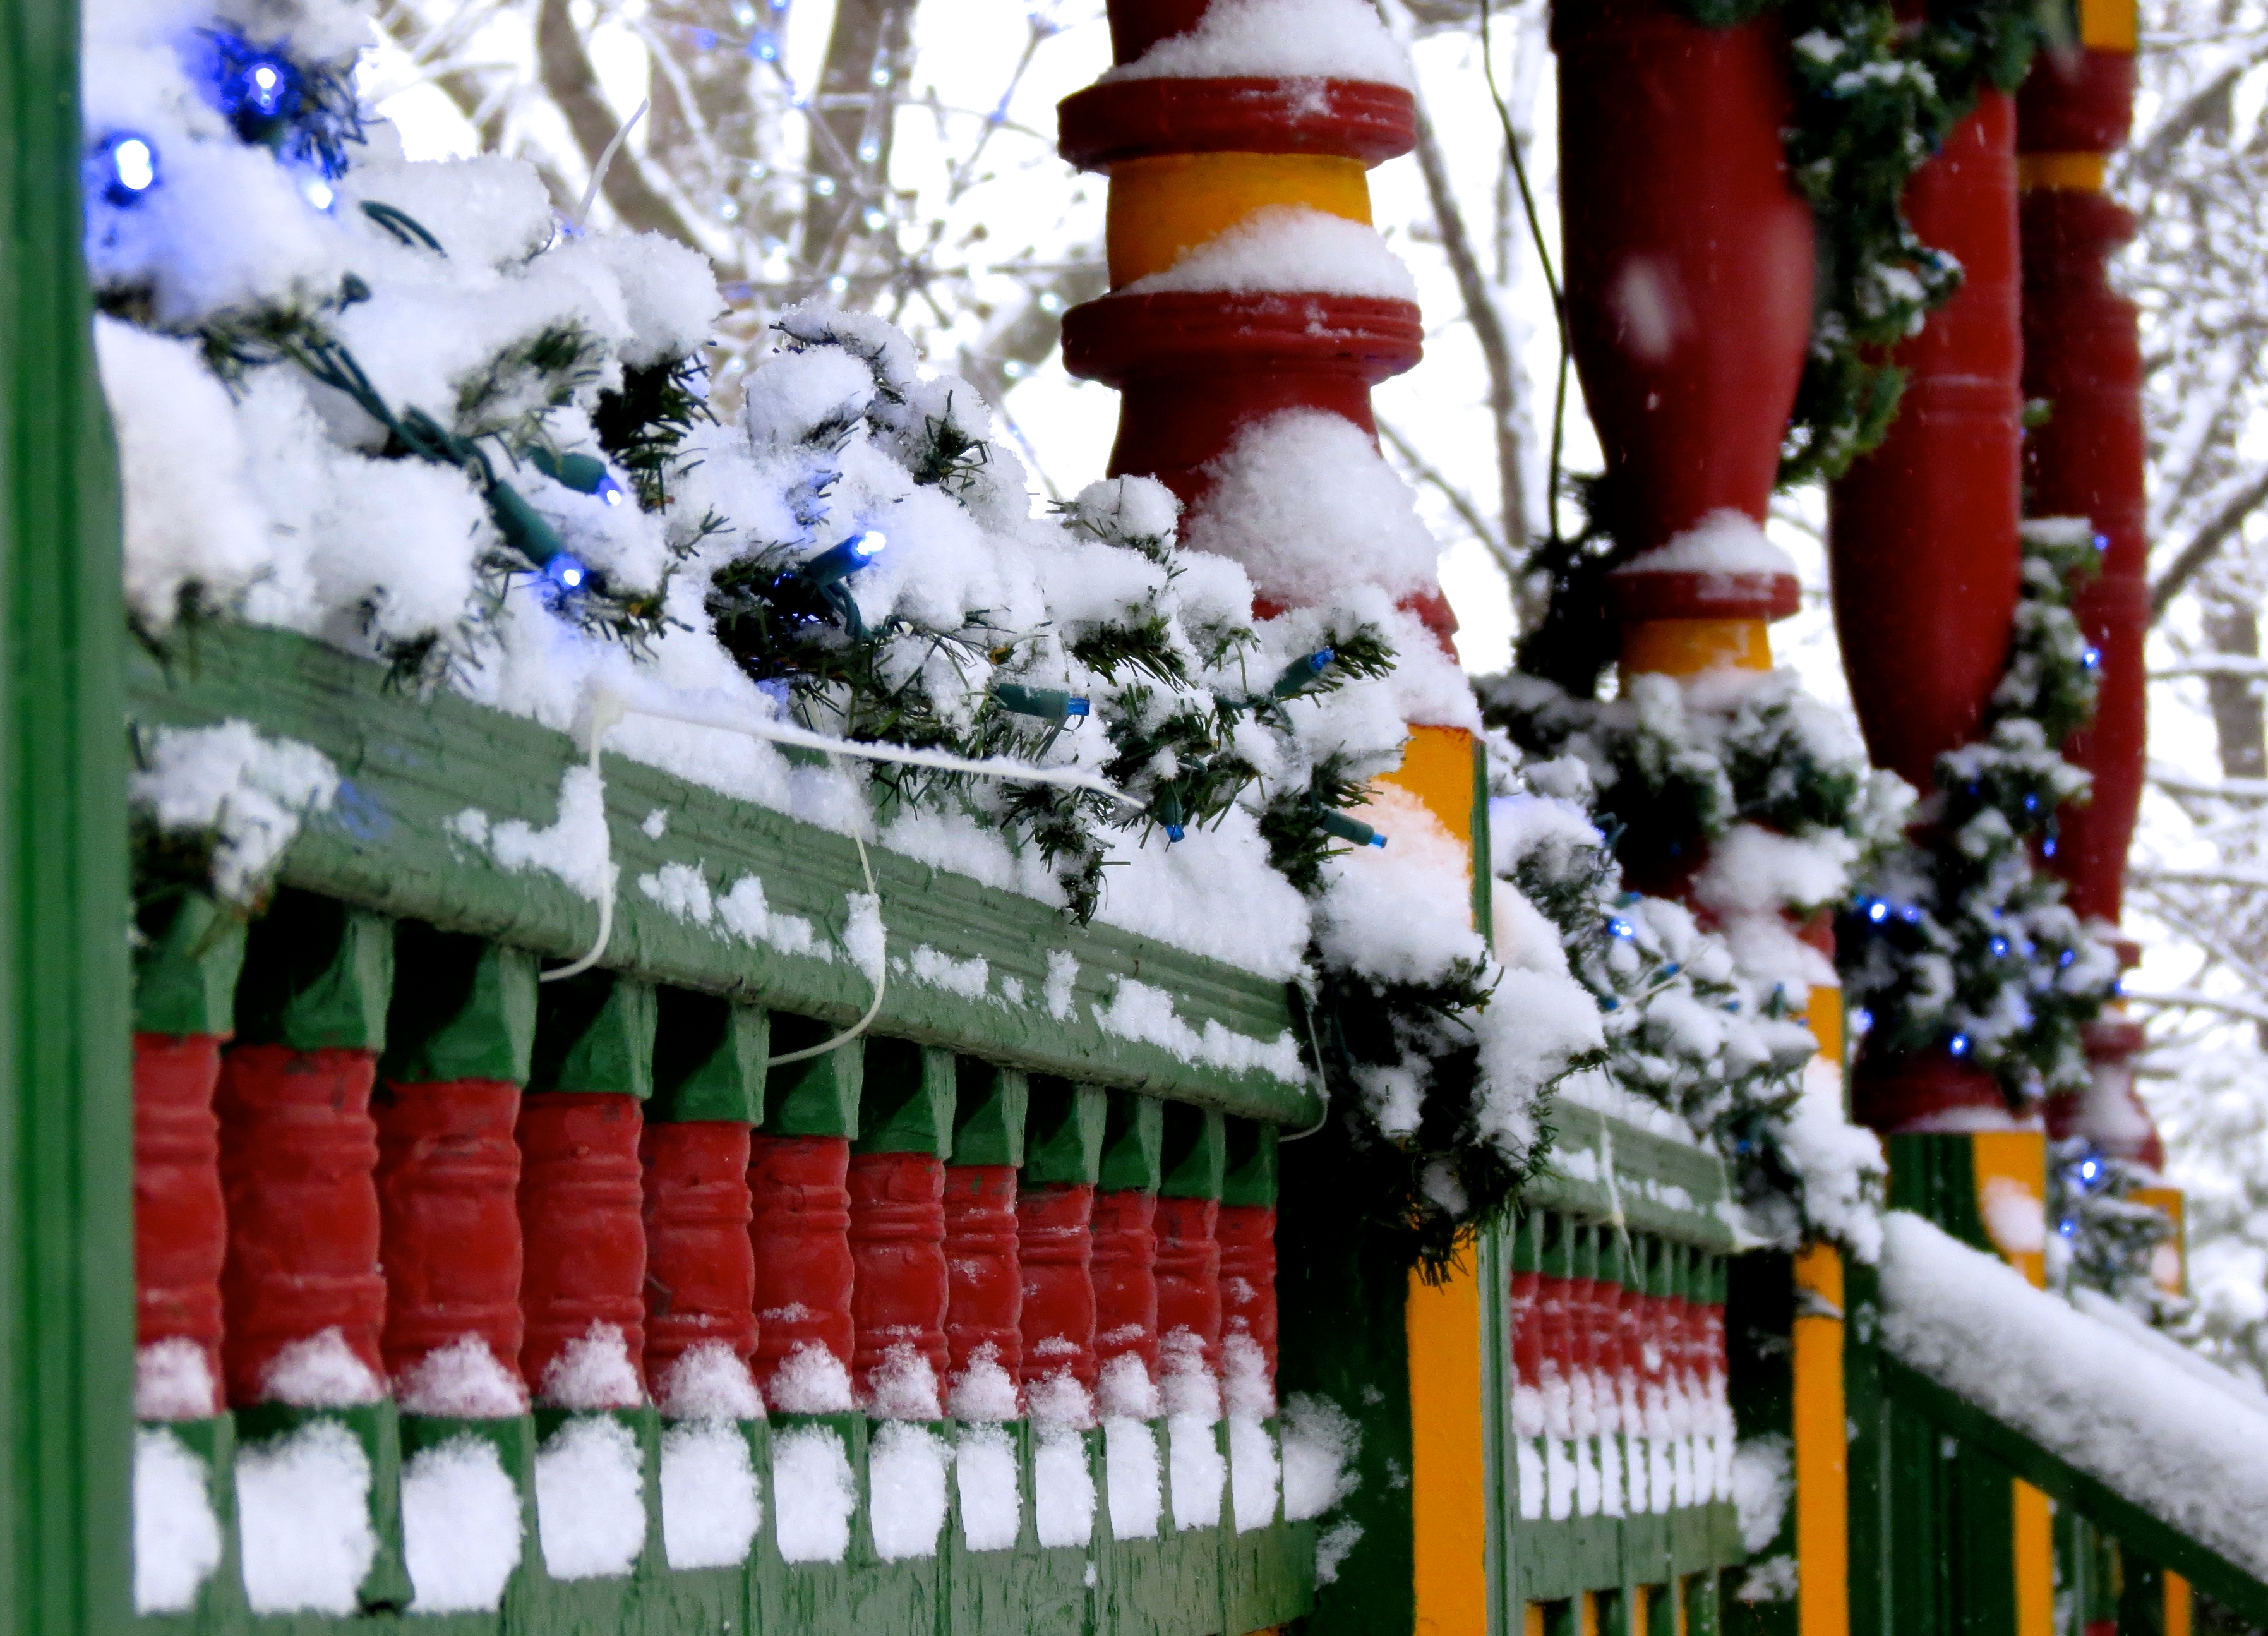
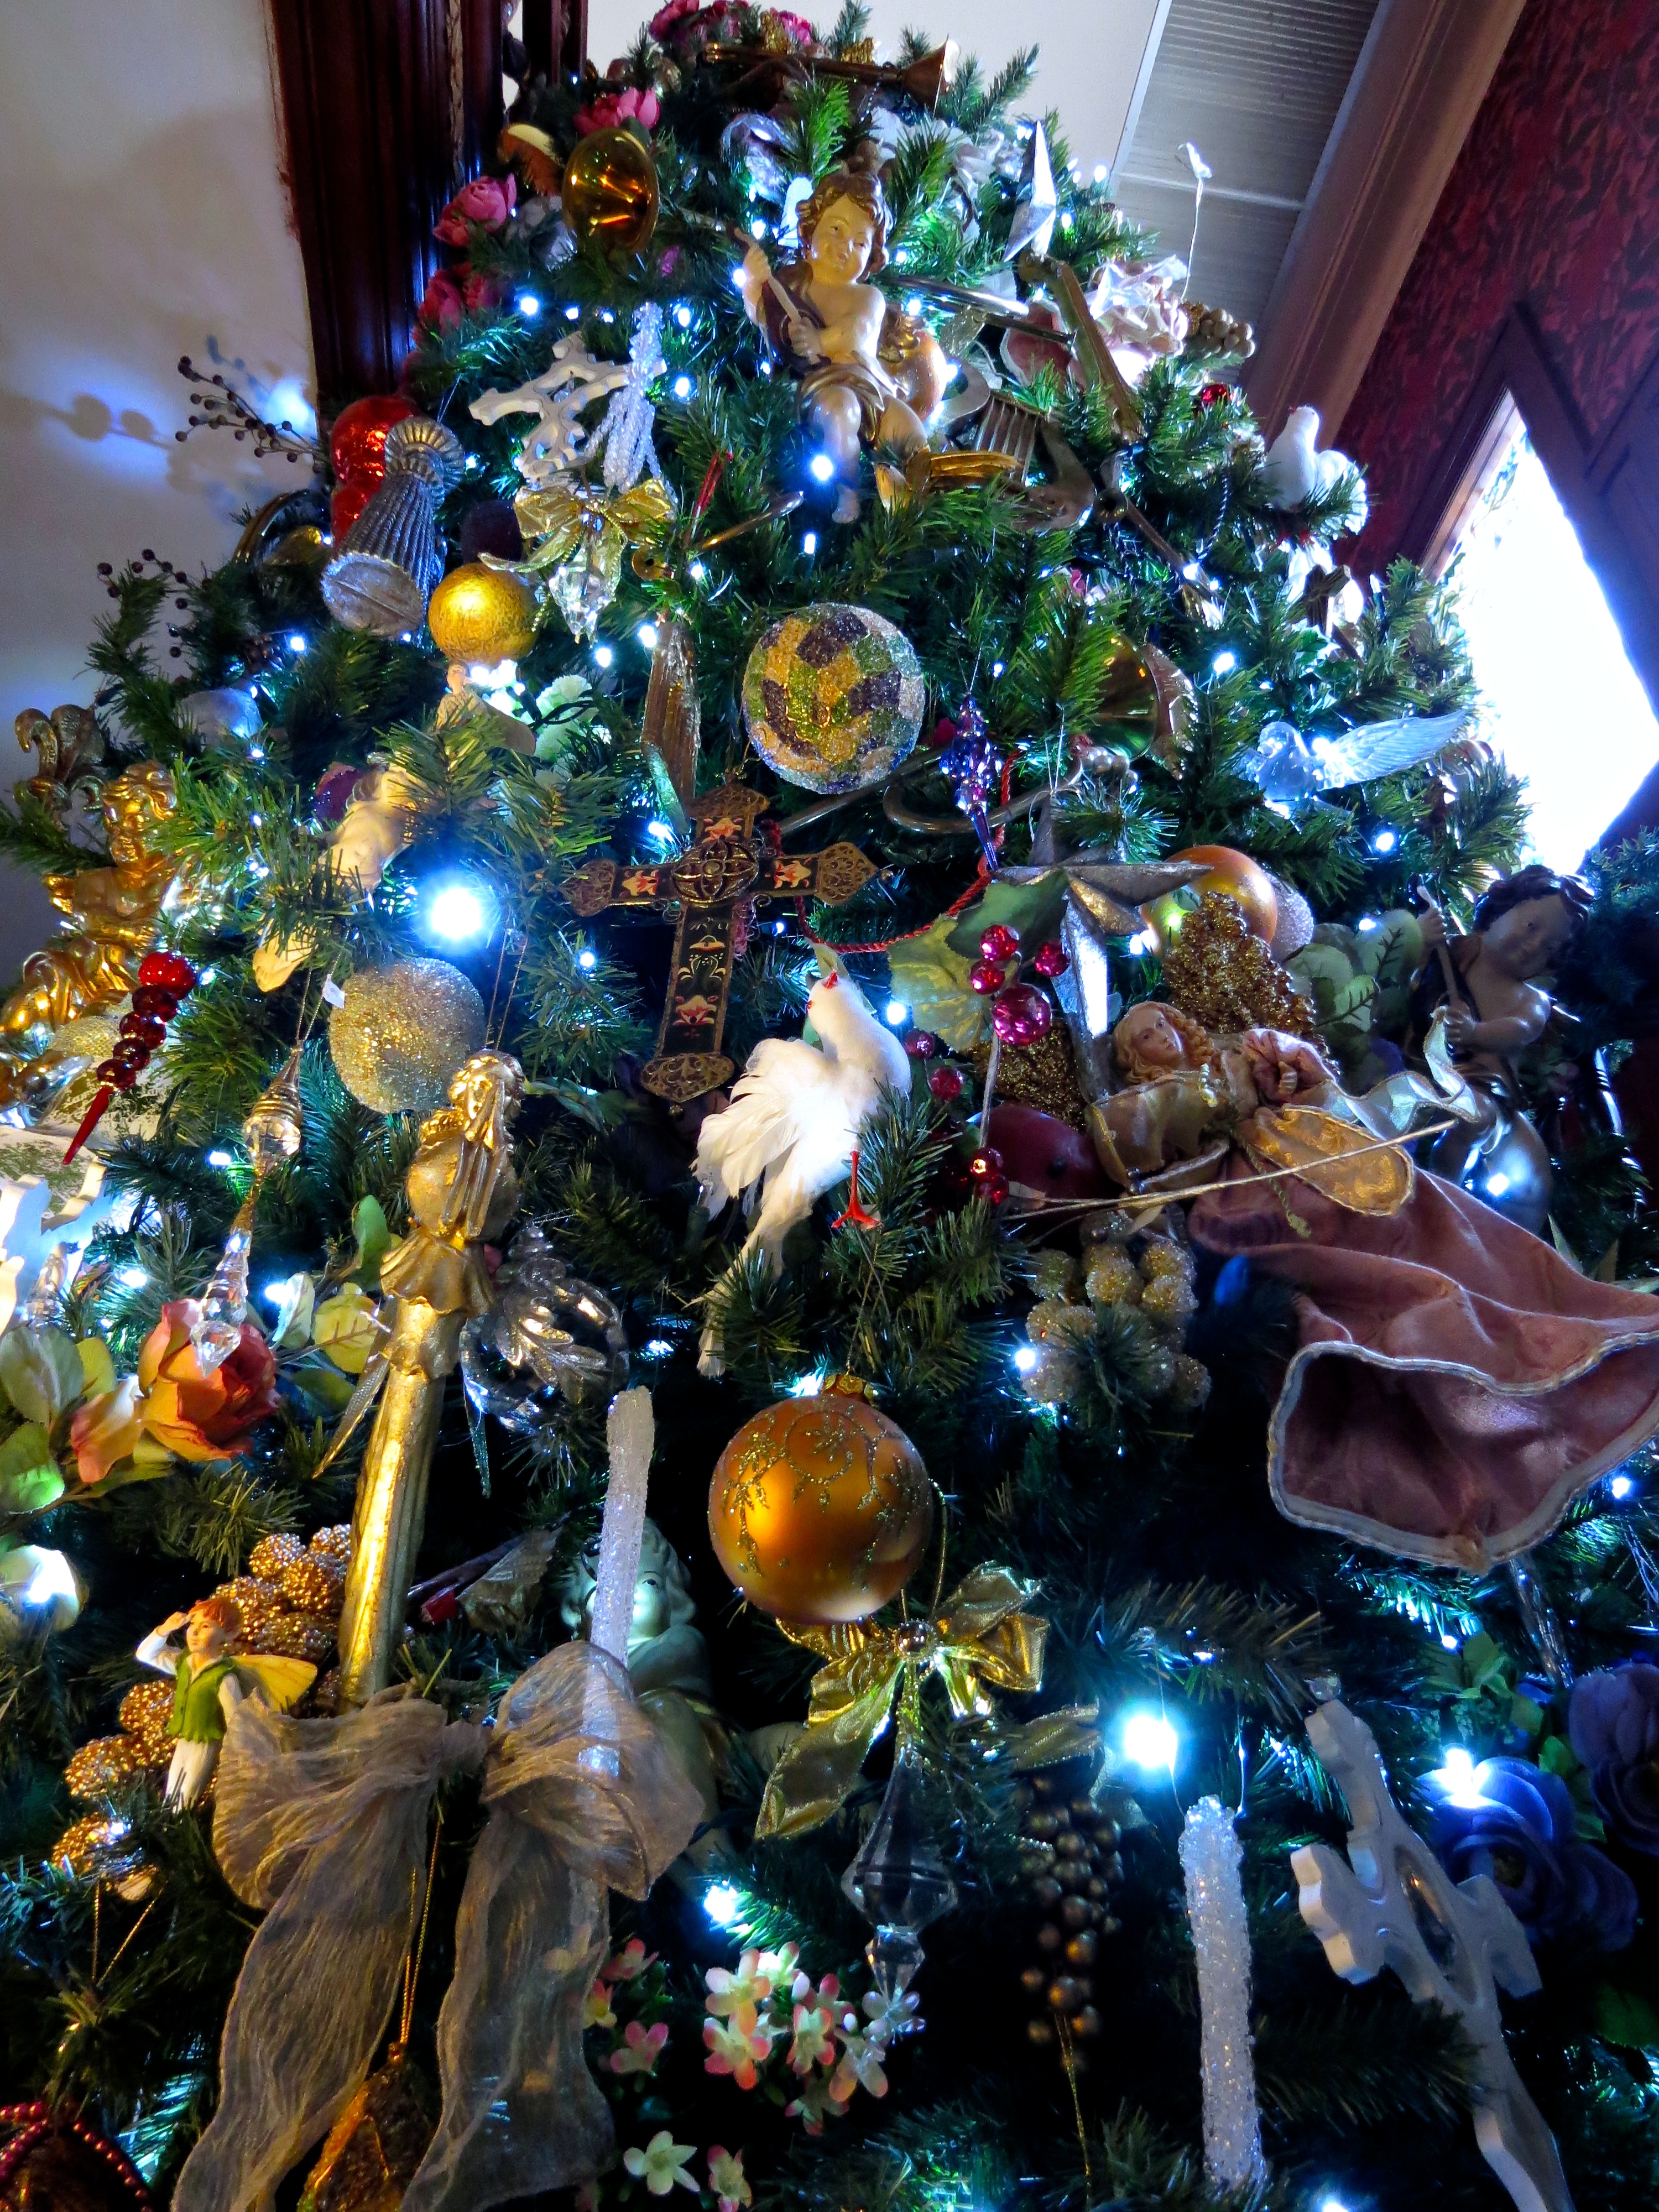
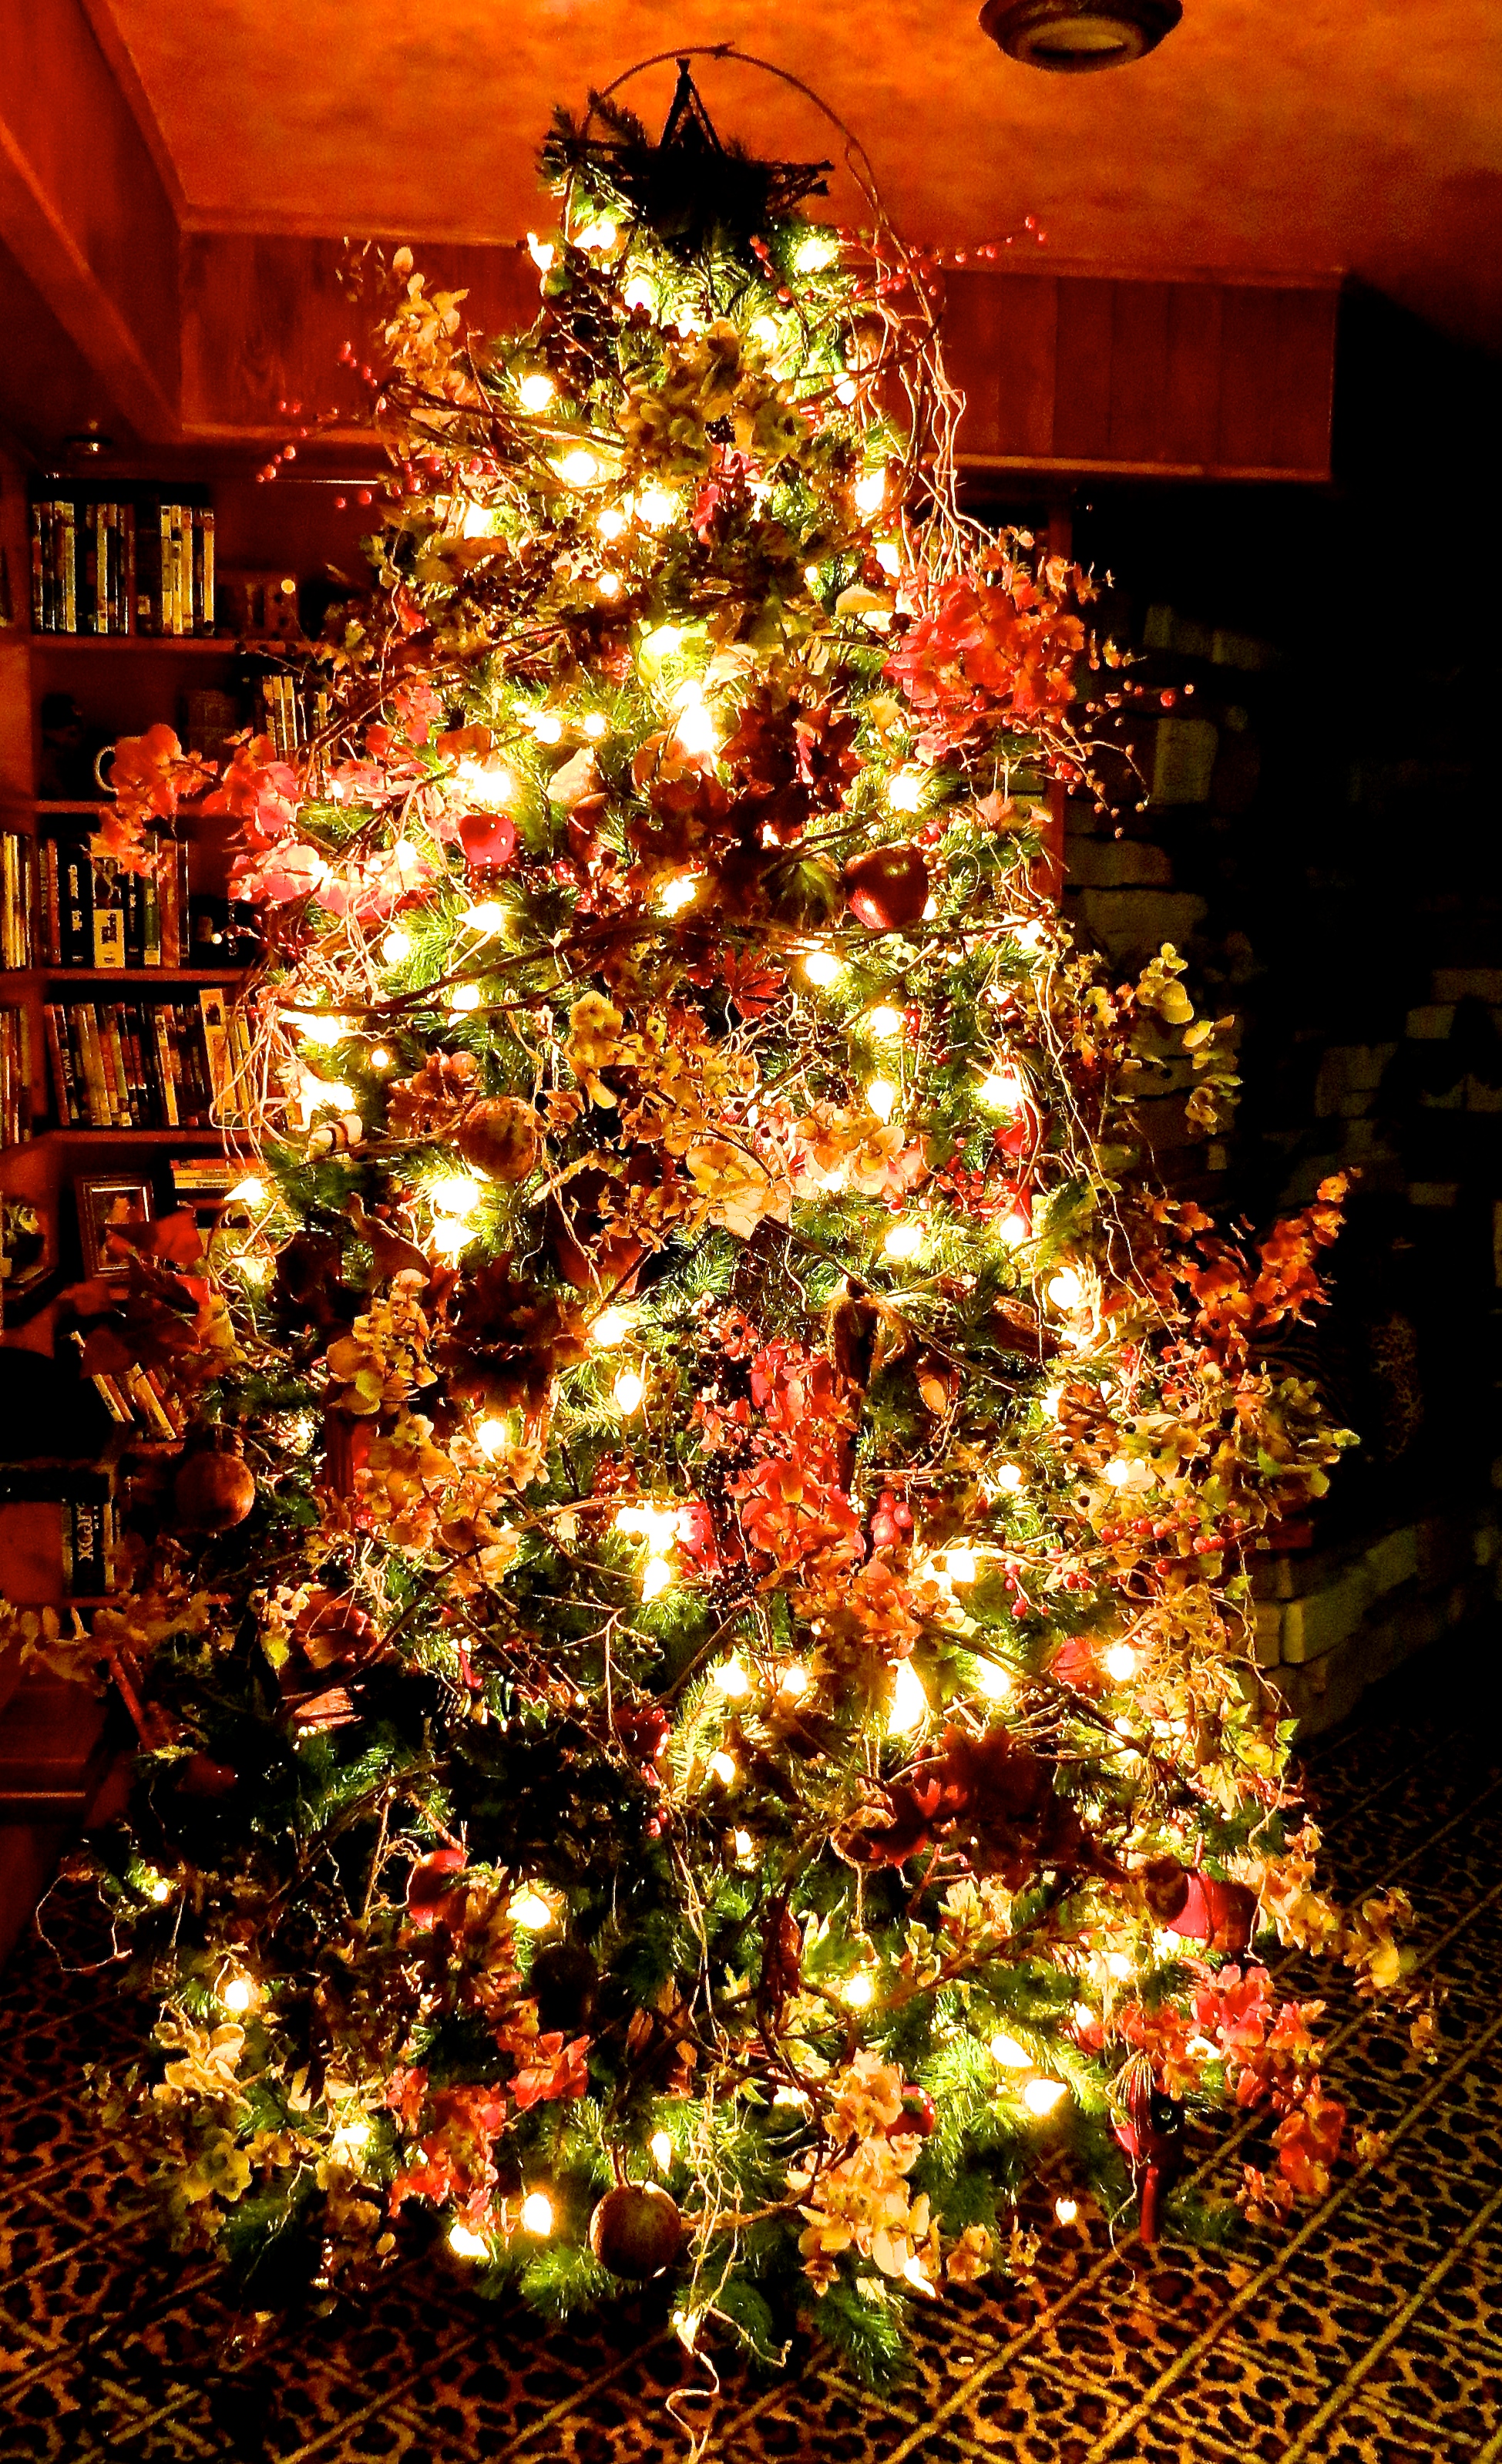
Christmas at 321 Division Street: Photo Essay
Happy Holidays Everyone! I just wanted to share some photos in and around the house decorated for the holidays. Our house was built in 1889 by John Newman and is frequently referred to as the Butterman Mansion. I hope you enjoy!


Sounds of the Season: My Top 12 Favorite Christmas Recordings
I thought I’d share some of my favorite holiday music with you to help you get in the Christmas Spirit.
As a kid, my favorite thing was to turn all the lights off in the house, except the Christmas lights, pull out all the old Christmas records and crank up the stereo.
When I started putting this list together, I was wondering if I should include some of my old favorites that are out of print. As luck would have it, I found several of them in various formats! I’ll start by mentioning a few more sentimental favorites from my childhood that aren’t readily available.
Firestone and Goodyear released some great Christmas collections when I was a kid. Many are out of print but a few have managed to be released and re-released commercially and fewer still are available as mp3 downloads. I realize many people won’t appreciate these vintage recordings the way I do because the style and recording quality may feel too outdated.
 Firestone – Your Favorite Christmas Volume 1 (MLP7005) My parents owned this album and my Grandma had Volume 3. Lots of choral renditions with soloists here. Very nostalgic. I was able to get a clean, digitized copy and I;ll admit, I kind of miss the skips and scratches I remember from our old worn out record.
 Goodyear – Great Songs of Christmas, Volume 6 Featuring many prominent artists of the day. If I think of childhood Christmases, I immediately think of the New Christy Minstrels’ version of We Need A Little Christmas found here. It also includes the best-ever version of Let It Snow! by Steve Lawrence and Eydie Gorme.

Goodyear. Christmas Is (P11417) Another popular artist collection– I can actually remember the excitement of following my Mom into Goodyear to buy this one. I played The Carpenters, Merry Christmas Darling — so many times, I nearly wore it out.
MY TOP 12
O here’s my most current top twelve. I did try to rank these album as best I could– saving the best for last. I hope you find some new, or maybe remind you of some familiar choices!
Number Twelve
 Wrapped In Red by Kelly Clarkson New this year, I hate to list it in last place but it hasn’t had the opportunity to stand the test of time. Clarkson co-wrote five original songs on the album that vocally, once again shows her versatility as an artist. Pop, country, traditional– there’s something for everyone. Undoubtedly, the song I’ll have listened to most this season, will be the original, Winter Dreams (Brandon’s Song). Contemporary and upbeat, I can’t get enough of it.
Number Eleven
 Rudolph the Red-Nosed Reindeer by Burl Ives Pure nostalgia wins this album a spot on my list. Watching Rudolph on TV was a family holiday tradition. It was years before I knew Burl Ives wasn’t a snowman in real life.
Number Ten
 White Christmas by Bing Crosby One of the best-selling Christmas albums of all time, White Christmas (1945) has the distinction of being the longest, continuous in-print recording in the U.S.. second only to the musical cast album, Oklahoma! (1943).
Number Nine
 When My Heart Finds Christmas by Harry Connick, Jr. A long time favorite. Connick’s smooth crooning warms you from the inside out.
Number Eight
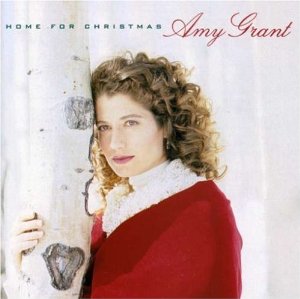 Home For Christmas by Amy Grant I love this album. Re-released and expanded as The Christmas Collection, Two of my all-time favorites are included: Breath of Heaven (Mary’s Song) and My Grown Up Christmas List.
Number Seven
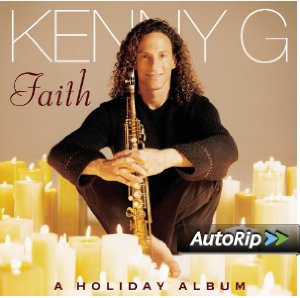 Faith: A Holiday Album by Kenny G Currently only $7.33 for both the CD AND the MP3 (Auto-Rip) version through Amazon. I love a good soulful instrumental album and this one hits the spot. The perfect background for holiday parties or after dinner music and cuddling by the fire.
Number Six
 The Christmas Collection: The Best of Vanessa Williams: 20th Century Masters Originally released as Star Bright, this collection is hard to beat. I’ve always been a big fan of Williams and this recording is one of her best. It’s a terrific bargain, currently only $4.99 and you receive both the CD AND the MP3 (Auto-Rip) version.
Number Five
 Christmas! Christmas! Christmas! by Karen Mason A live recording by Chicago’s own, Karen Mason. Mason still tours a version of this cabaret production annually, which is brimming with humor, heart and holiday joy. It’s a gem!
Number Four
 Ally McBeal: A Very Ally Christmas From the hit TV show featuring Vonda Shepard as well as performances by the rest of the cast. Shepard may not have Adele’s dazzling technique but she certain has her heart and soul. Most notable on this album is Robert Downey, Jr.’s heartbreaking rendition of River. Amazon doesn’t currently have the album available for download but it is available on iTunes.
Number Three
 Noel by Josh Groban I can’t resist Groban’s warm smooth voice. If you are looking for a male artist whose sound is a little more traditional– check this one out. You can get both the CD AND the MP3 download together in this version from Amazon Here.
Number Two
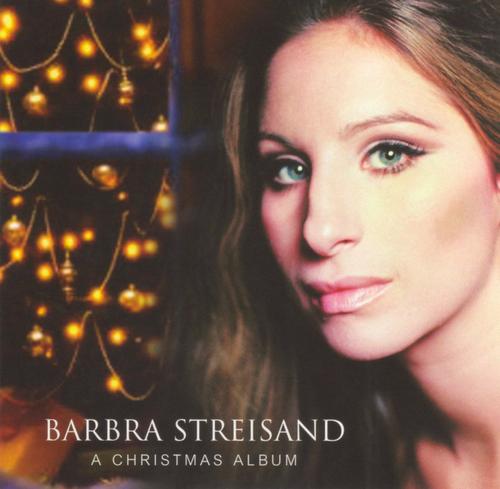 A Christmas Album by Barbra Streisand A perennial favorite, re-issued three times and never out of print, this 1967 album is always on my playlist. It was the best-selling Christmas Album in 1967, spending five weeks at #1 and is believed to be one of the best selling of all time. ( It is not listed in the Top Ten on the Billboard chart, which only records sales from 1991.) It’s probably my most listened to Christmas recording. Over the years, I owned it in every format (except 8-track tape) and I love every song. Streisand’s rendition of Ava Maria remains my favorite to this day. Not bad for a Jewish girl from Brooklyn. You can purchase the CD AND the MP3 download together in this
  version from Amazon for only $4.99 Here.
 My Number One Favorite Holiday Album of All-Time is:
Christmas Wonderland by Bert Kaempfert Recorded in 1963, this all instrumental album is timeless. I grew up with it and some of you may recognize tracks that were used frequently in seasonal commercials. I spent years looking for it on CD and finally found it a few years back. It was remastered and re-released in 1997 on CD and cassette. It is currently not available as an MP3 download but new CDs are available through Amazon.com starting at $23.99. If you are looking for a great one, I highly recommend it.
Free (and Cheap) Holiday Music at Amazon.com:
Here are some free Holiday MP3 album downloads available as of today (12/17/13):
Green Hill Christmas Music Sampler – Twelve songs by various artists. FREE.
Green Hill – Christmas Music Sampler: 20 Holiday Favorites – Free Download.
Free Must-Have Christmas Masterpieces – Four more songs; various artists. FREE.
Tons of Music For Only 99 Cents:
Big Christmas Box – 280 tracks including a large chunk of Handel’s Messiah for a total of over 13 hours of music! Only 99 cents.
And For Those of You Stressed Out By the Holidays:
Green Hill – One Hour Of Spa Music: An Exclusive Amazon Sampler – Great Artists in this free 9 song download.
Dream Music: For Sleep & Relaxation (Exclusive Amazon Digital Sampler) – 24 free Tracks to help you sleep and relax.
I apologize in advance if any of the prices or links aren’t accurate but they are all current as of this posting. (12/17/13)
Happy listening!
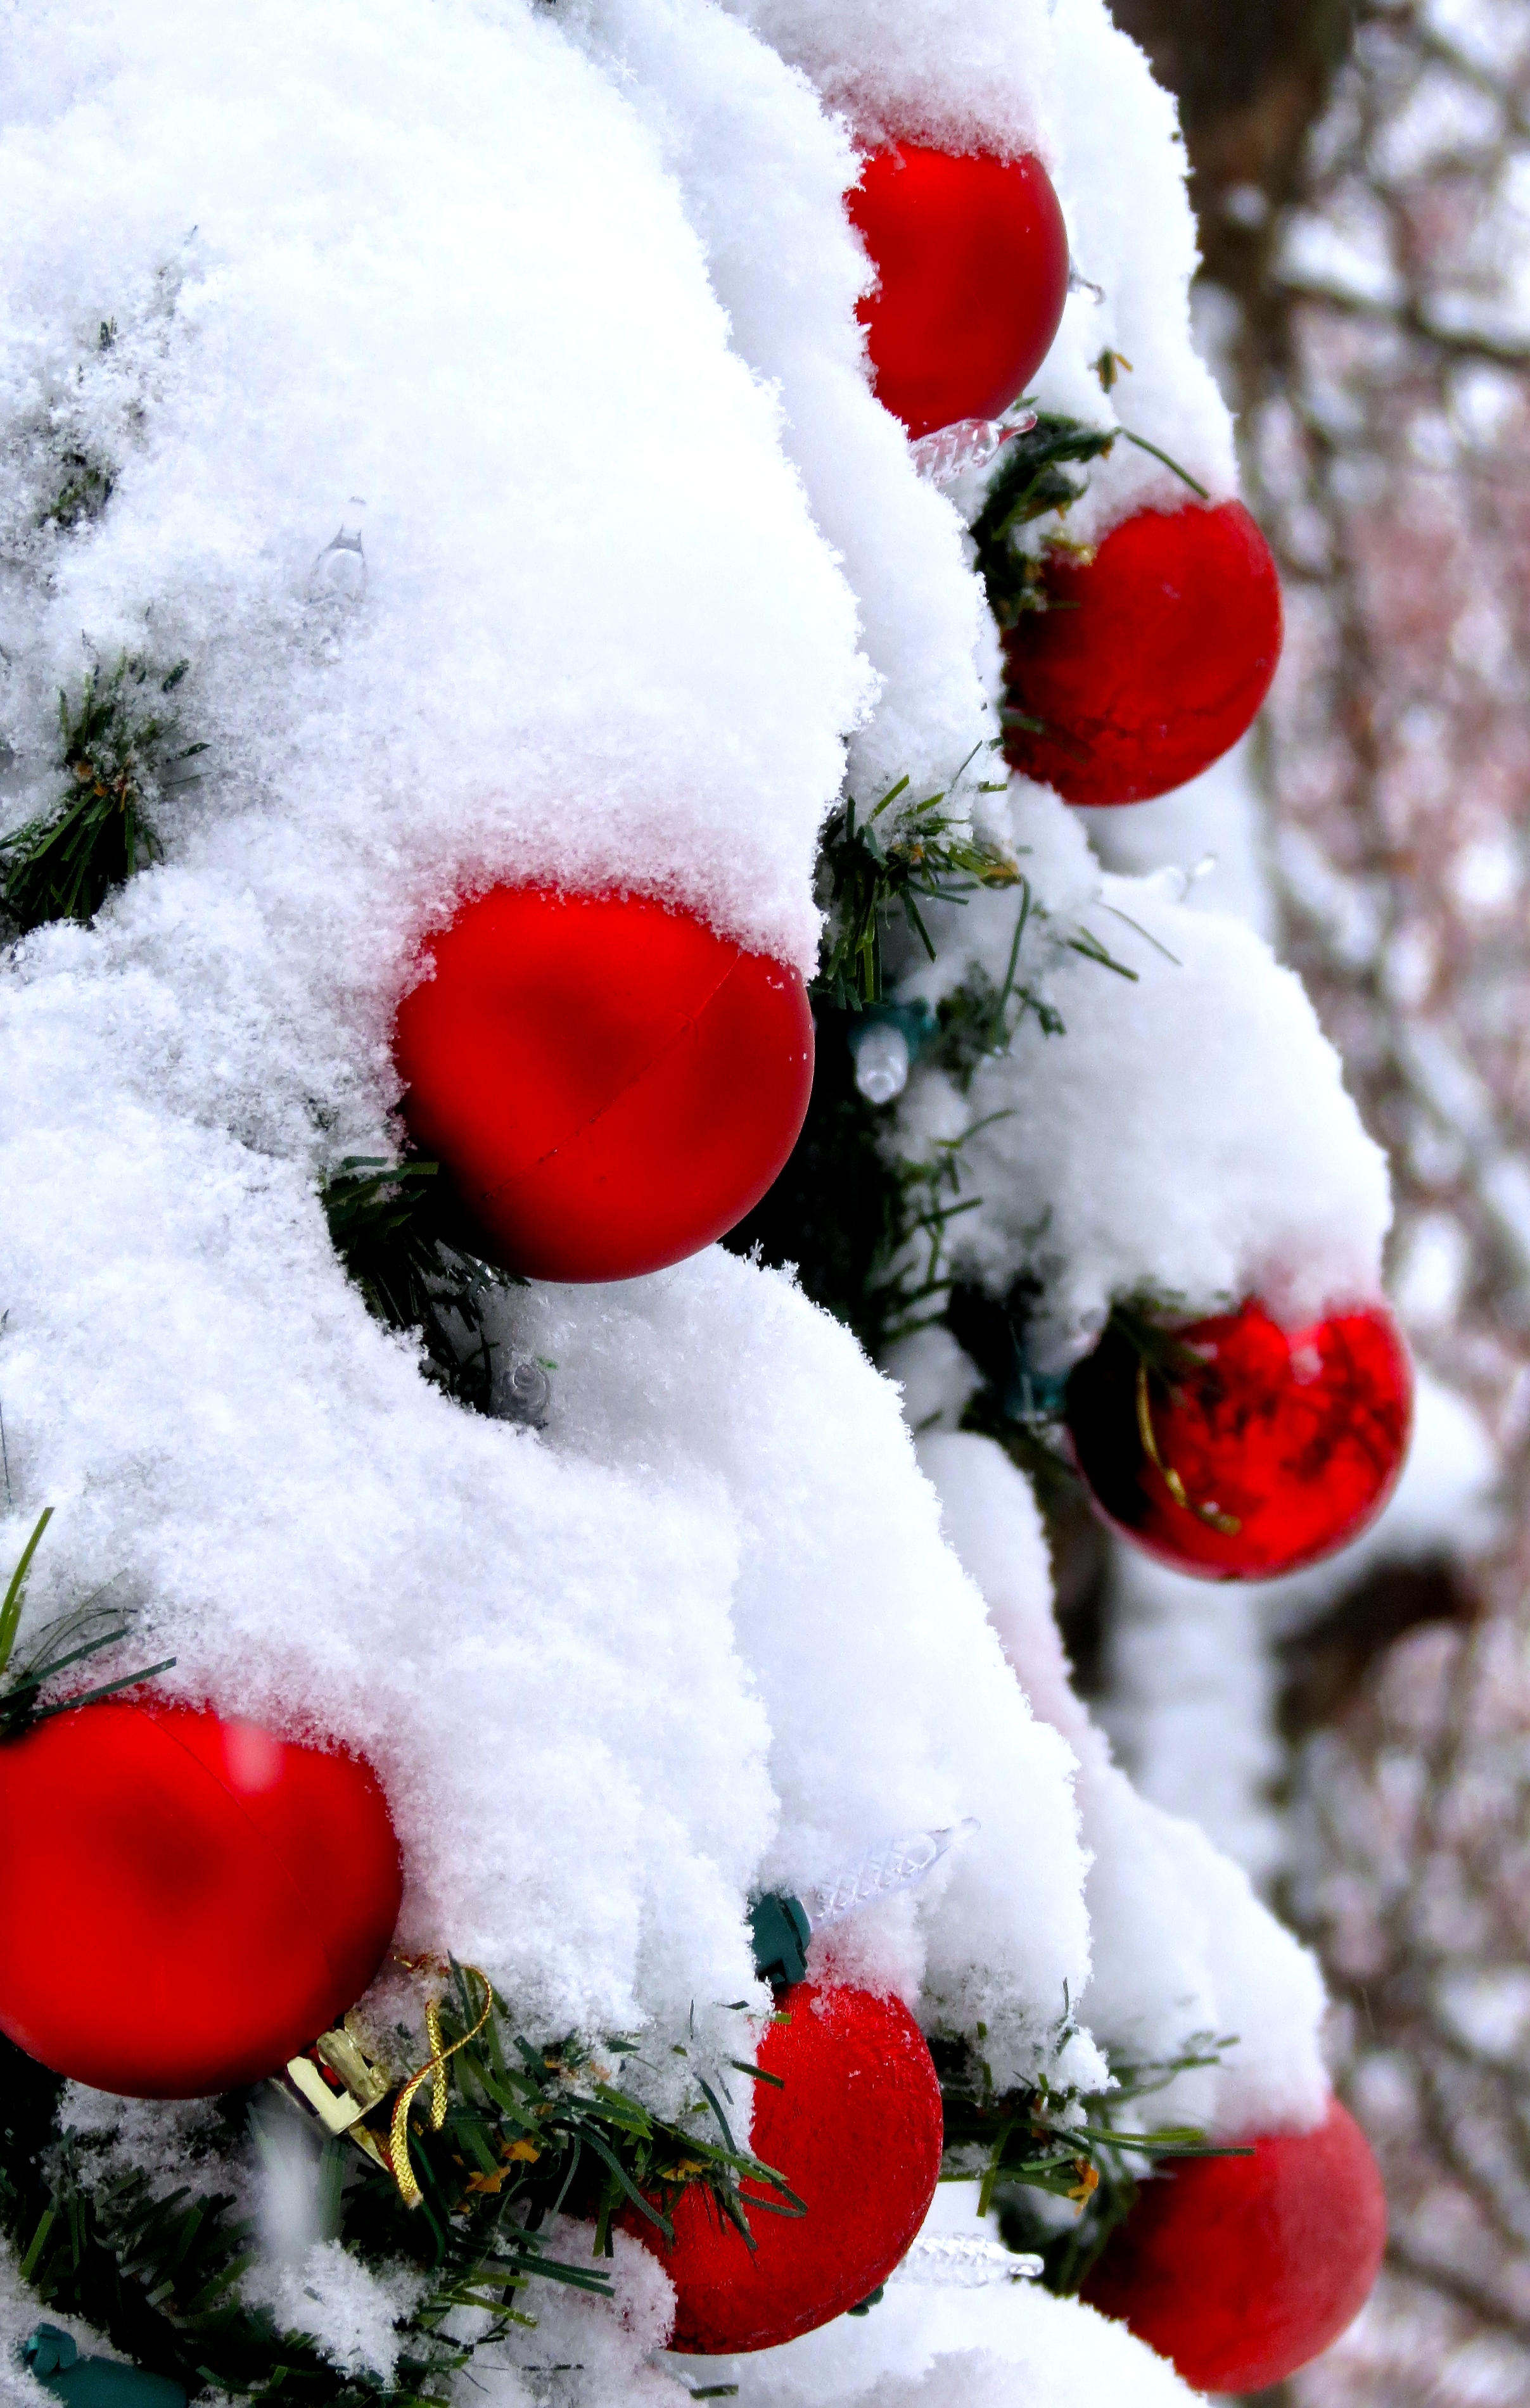
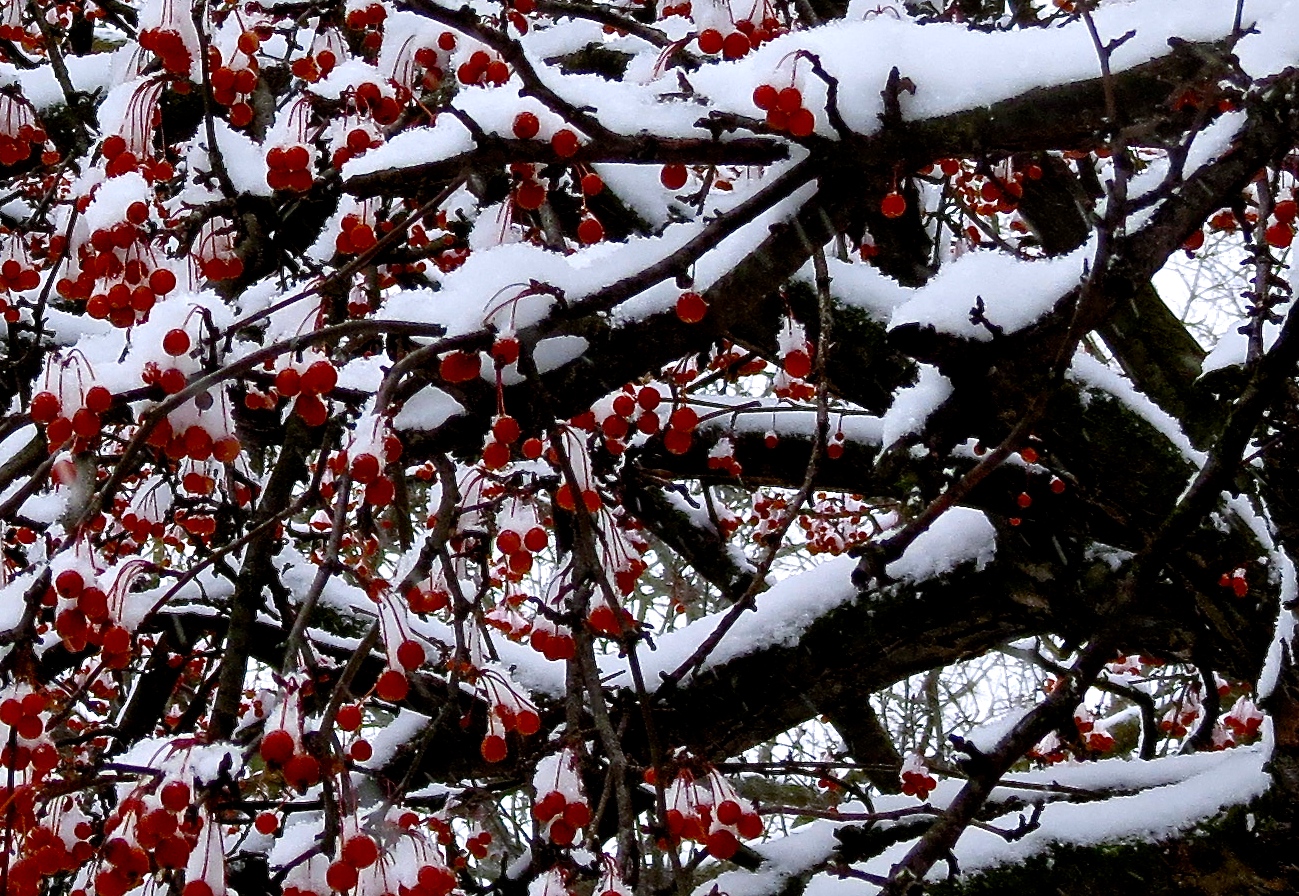
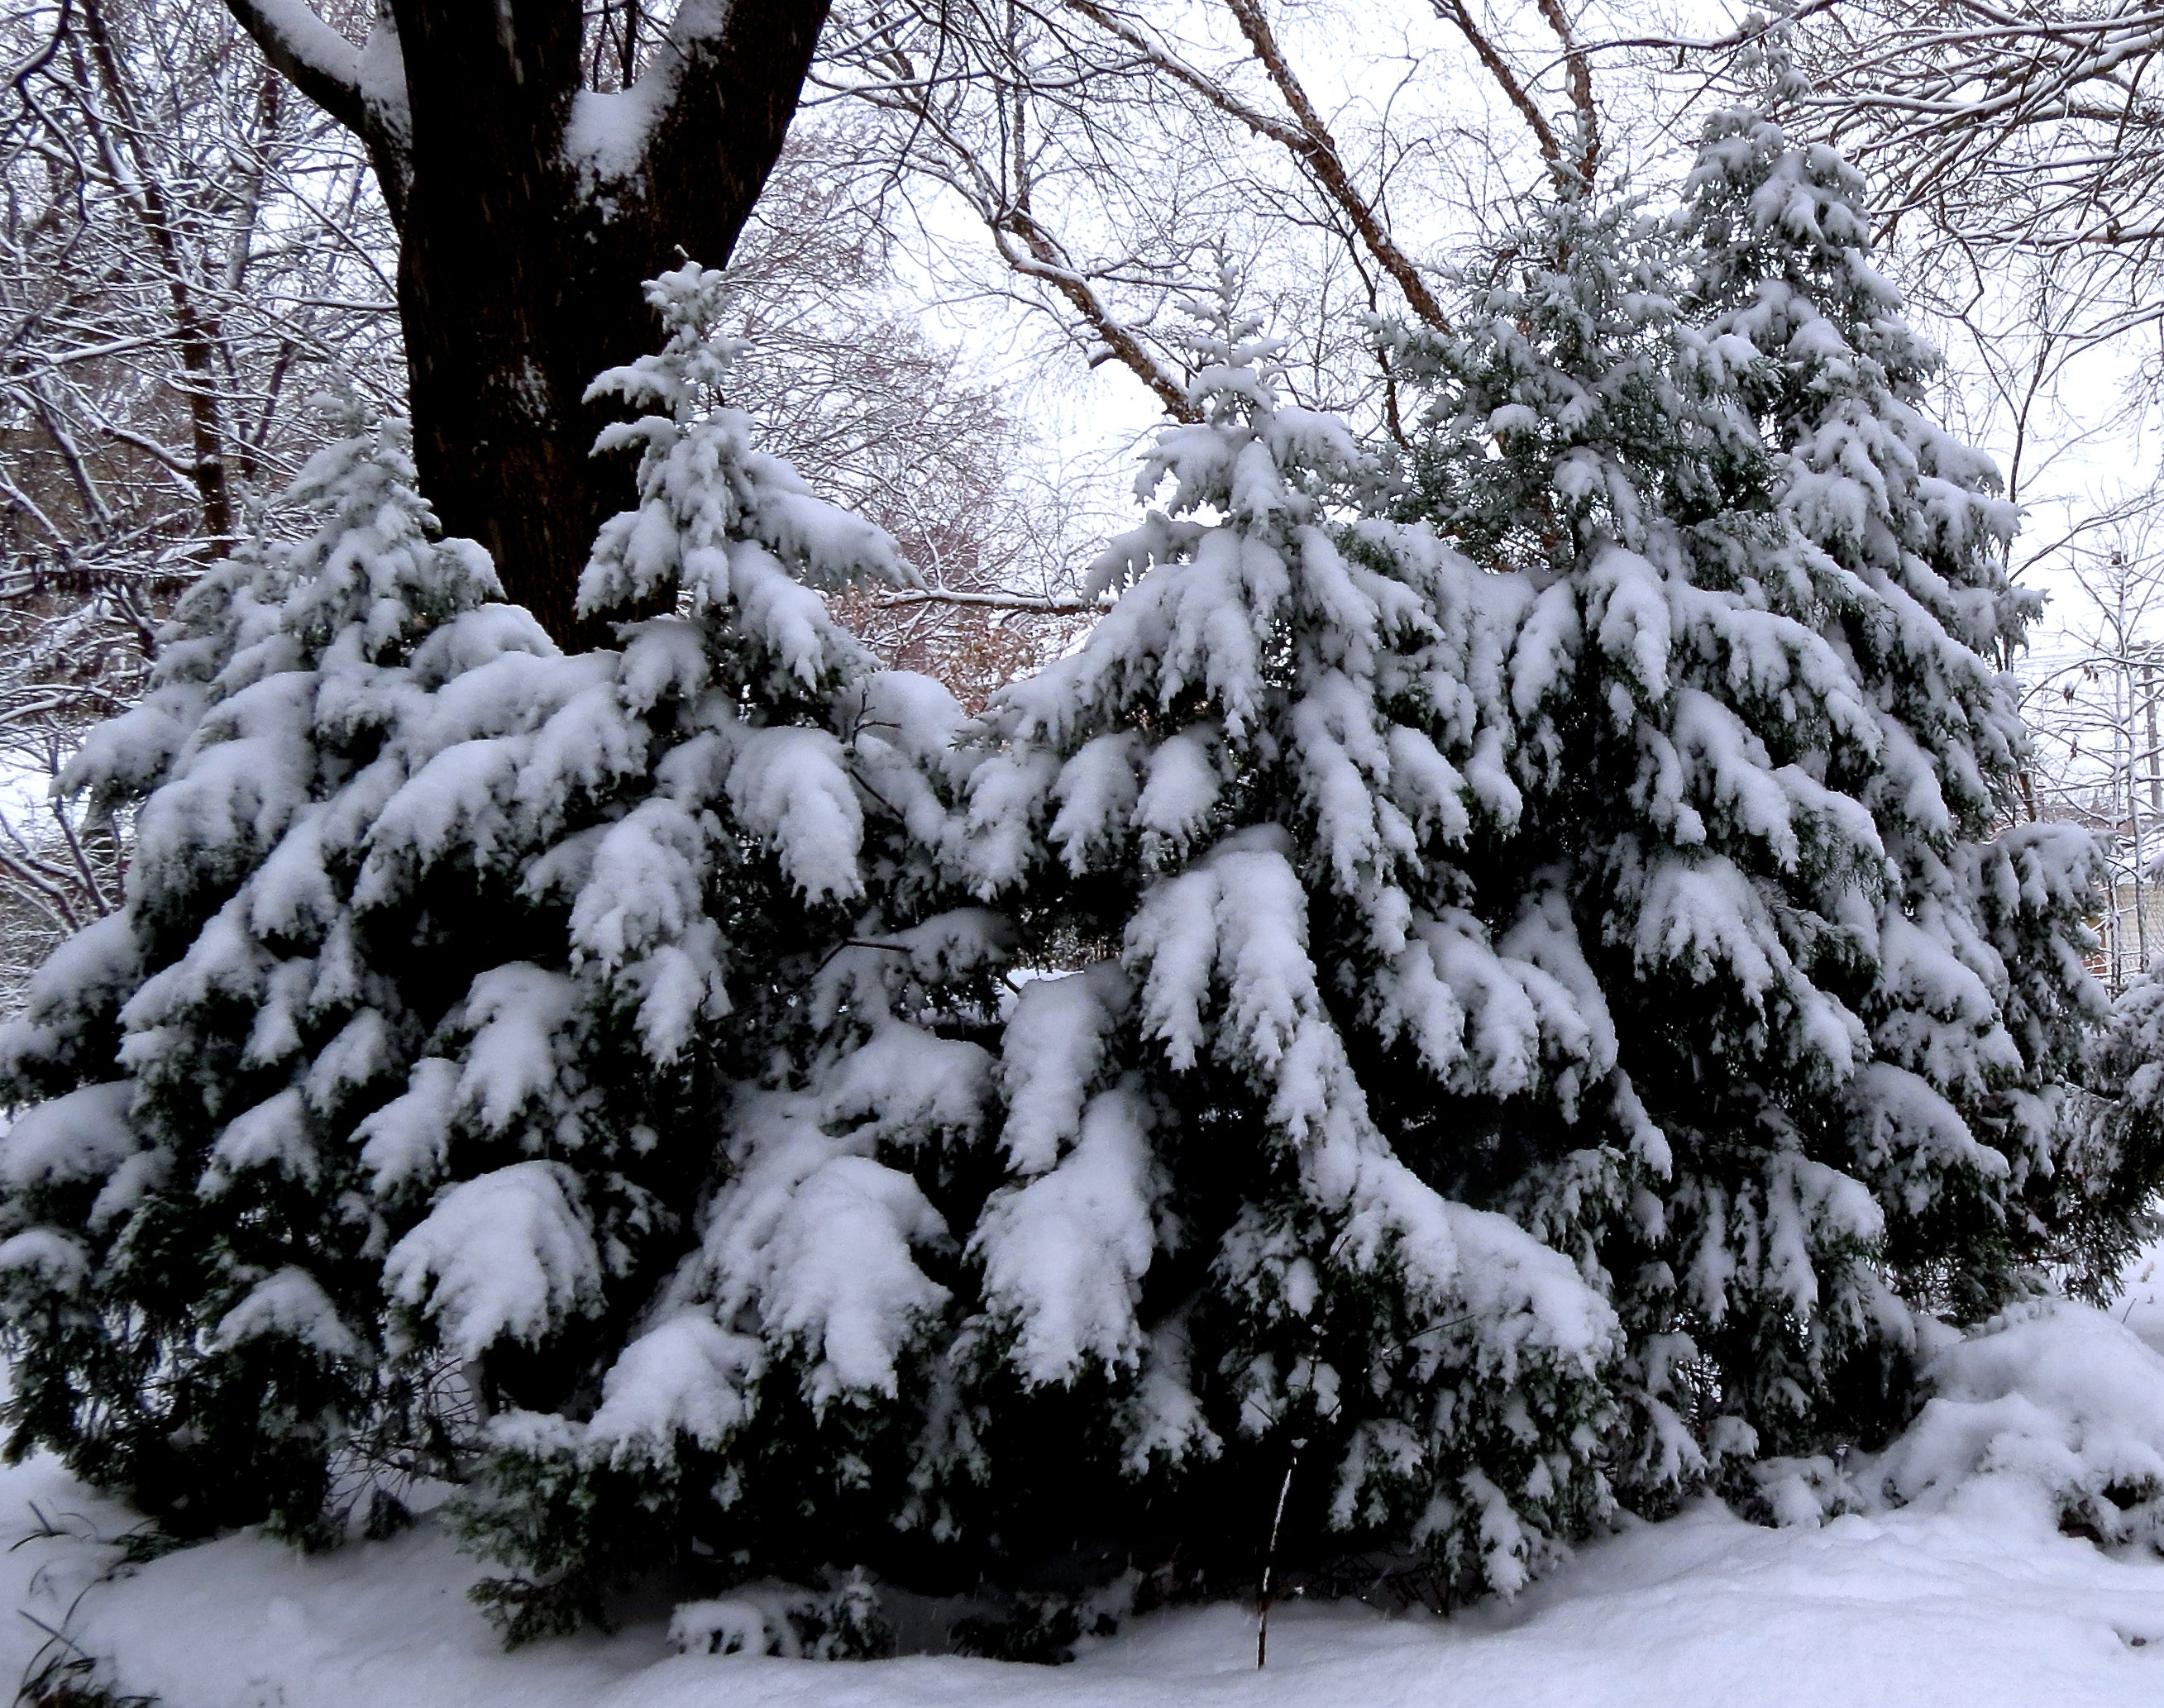
Winter Dreams: A Photo Essay
We had a beautiful snow yesterday– so at my Dad’s request, I took the opportunity to shoot some photographs around the house. I hope you enjoy them! (If you click on the photo, you’ll be taken to a larger image.)


Decking the Halls For The Holidays: Part Four- The Easy Holiday Centerpiece
 Accenting the home for the holidays can be as much fun as decorating the tree. It can also be challenging if you aren’t sure what to do. You can always go out and buy a floral arrangement, accent or centerpiece but I find so many items available are overpriced for their marginal quality.
Why not create your own?
You can add charm and warmth to a room with a few small groupings of holiday accents. It’s real simple to create a beautiful centerpiece for your dining table, fairly inexpensively and in a matter of minutes. I’m going to walk you through the steps to creating one simple arrangement and then I’ll share some additional ideas and suggestions to get your creative juices flowing.
I always recommend that you start with an idea and with items you already have on hand. Then purchase only what you need to complete your project. It’s easy to re-purpose bowls, baskets, greenery and other accessories with just a little thought and imagination.
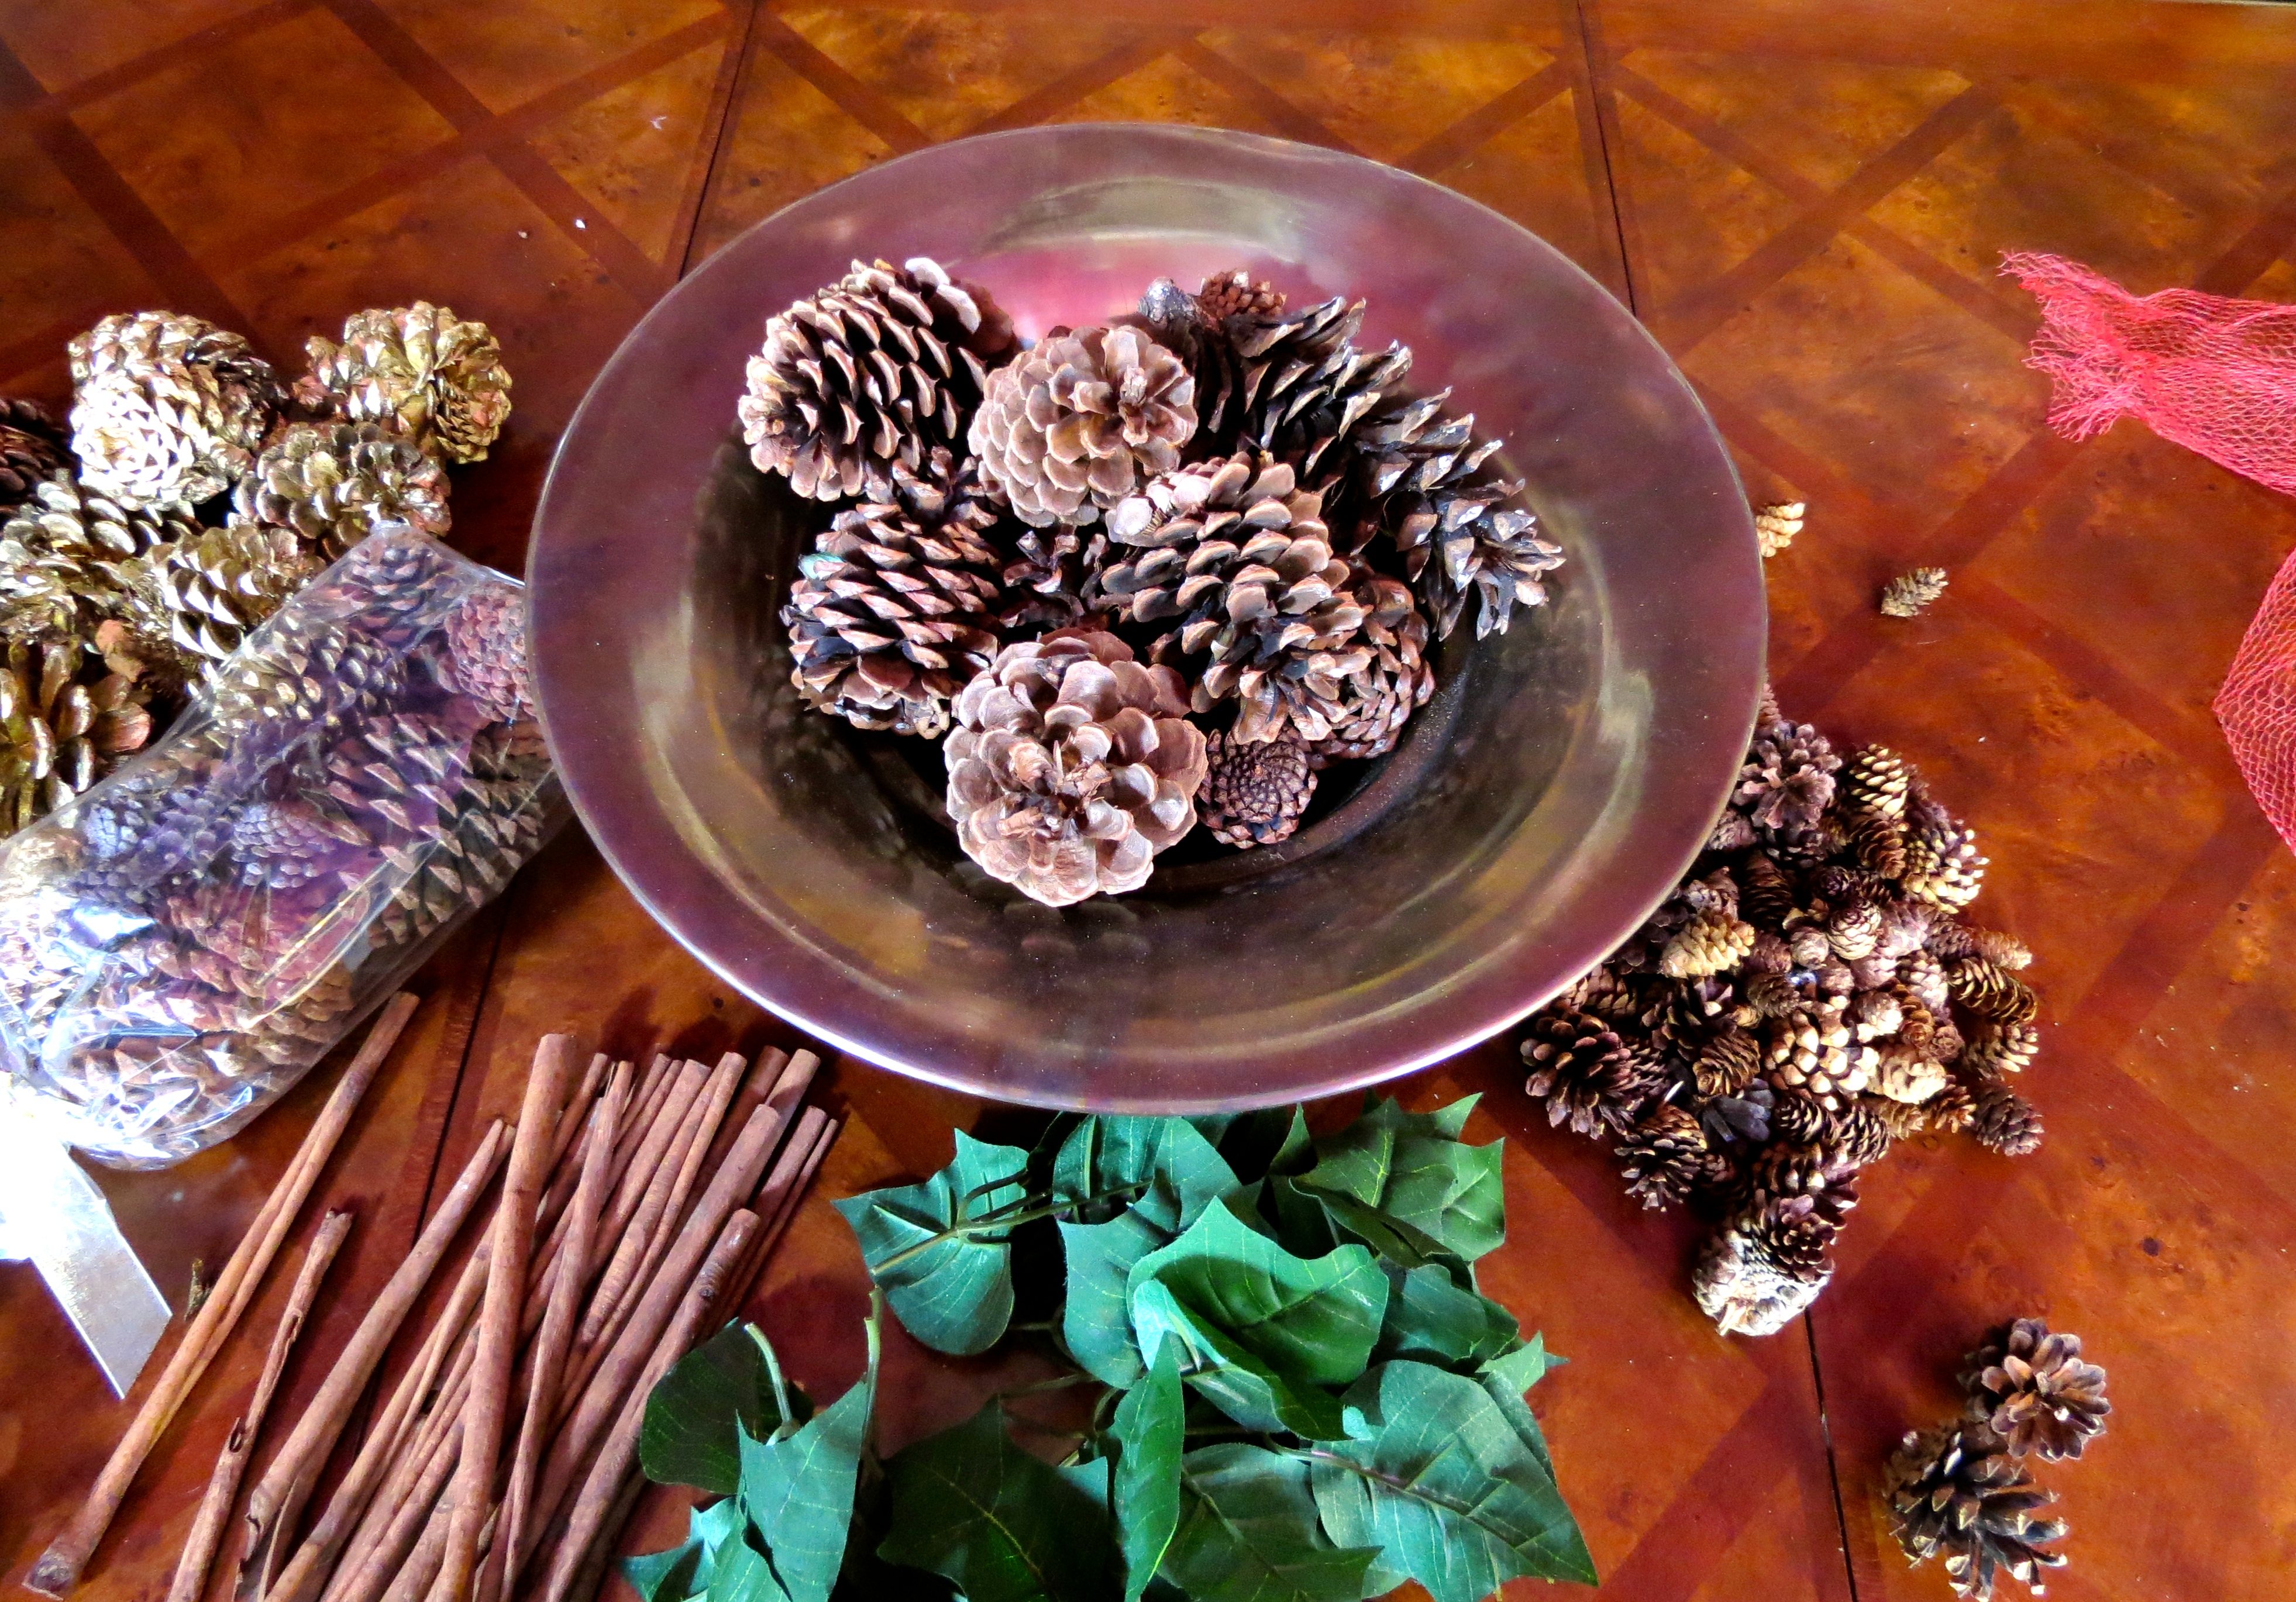
The Easy Holiday Centerpiece
I didn’t purchase anything specifically for this project. All the items I used are inexpensive and easily attainable if you decide to duplicate it for your own home.
Material List:
A Decorative Bowl
Pine Cones (assorted sizes)
A Small Bundle of Cinnamon Sticks
Assorted Artificial Fruit (floral picks)
Artificial Leaves
A Floral Berry Pick
Wire cutters
Your bowl can be as plain or decorative as you want. A basket would also work for this project.
I actually used three bags of pine cones I had on hand, in three sizes (S, M, L)– some of which were painted gold. Of course you can use pine cones you find outside; or they are available, by the bag, at most craft and home stores. (Home Depot has big bags of scented pine cones for under $5, as an example.)
You can use any kind of artificial fruit you’d like. They are available in a wide variety of types, colors and finishes to choose from. I used 2 pears, an apple and 4 pomegranates for this one.
For the leaves, I had used the flowers from an artificial poinsettia bunch for another project; then, cut the leaf stems off and used the leaves for this one. I didn’t have any wire cutters handy so I used an old pair of pruners to cut the stems. You might also find that an old dull pair of scissors will do the job just as well.
I only used one berry pick (stem) as the final accent. The stem was easy to separate and pull apart in sections but could also be cut apart. Again, different sizes, colors and finishes are available and can work well here.

First. lay out your materials so they are all visible and within reach. Remember, there is no wrong way or right way… just your way.
Next, dump your large pine cones in the bowl. Arrange them loosely. As you continue, you can arrange them any way you like.

If using painted pine cones, add the large ones and you can mix them slightly with the unpainted ones or group them on top. Adding them separately gives you the ability to make sure they are visible accents and don’t become buried in your arrangement.

Add all your medium pine cones to the mix. I literally just dump them on top and move a few around to balance them out among the larger ones already in the bowl.

Add the fruit to the bowl. You’ll want to start paying attention to the shape of your centerpiece at this time. Also, make sure you mix up the colors and kinds of fruit you are using for balance.

The cinnamon sticks are next. I randomly placed mine, sticking them in between the pine cones. If you want a more formal look to your arrangement, you may want to start placing things in your arrangement, more symmetrically.

Add the leaves or greenery. You may choose to use more or less, depending on your taste. Use just a few to accent or more to blend all the elements together.

Now, add your small pine cones. let them fill the gaps and voids and make sure to allow some to lay on the leaves and fruit.

At this point, you may want to rearrange some of your elements and get them exactly where you want them. Make sure to look at your project from all angles so it looks good from anywhere in the room. You can always add or subtract items as you go. The final step is to add the pieces of your berry stem as the final accents to your centerpiece.
You’re done! Congratulations!
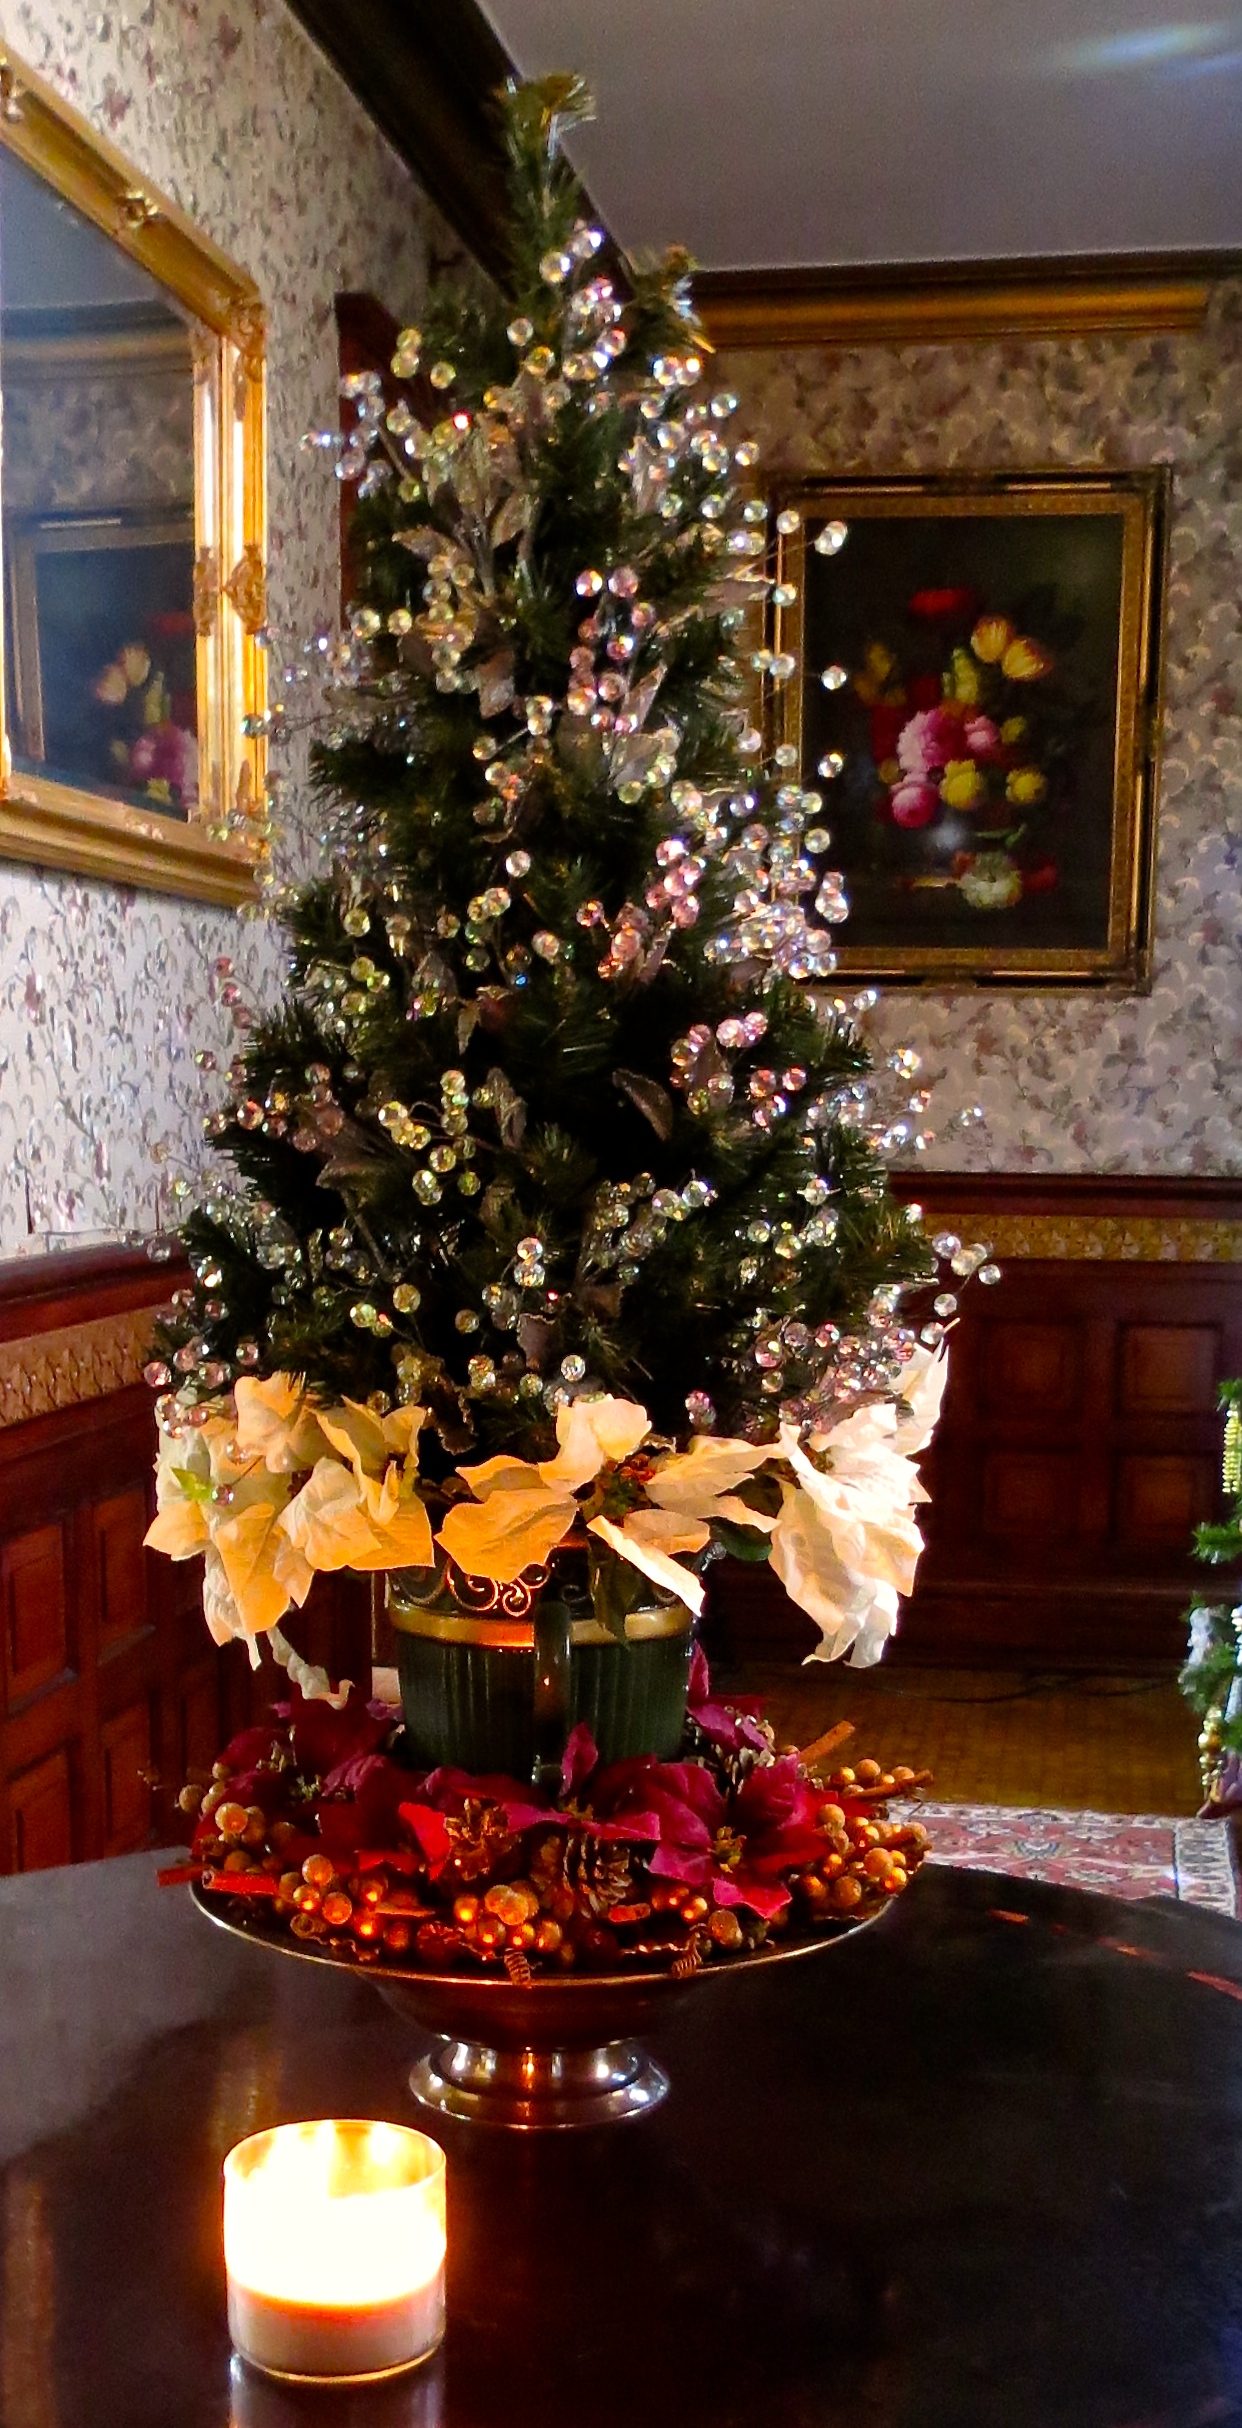
Here are a couple other examples you may want to try. (I used the same style base bowl in all three examples here.)
For this next centerpiece, I used a large pineapple finial as the center, placed in the bowl, surrounded it with artificial evergreen picks and then accented it with smaller berry and fruit picks.

For my foyer table, I used the same general idea, placing a small tabletop Christmas tree in an urn and sat it in the center of a bowl, then added pine cones, topped them with grape clusters (evenly spaced) and then inserted cinnamon sticks between the grapes. On the tree, I used a large number of crystal berry picks inserted throughout the tree with white poinsettias around the base of the tree in the urn.
I hope you’ll find these ideas useful. If they inspire you to create your own centerpiece, please share them with me. I’d love to see your unique creations!
Decking the Halls For The Holidays: Part Three- Decorating the Tree
Ornaments Galore!
I love Christmas trees. Of the fourteen Christmases we’ve spent in this old Victorian house, this year it will probably see the fewest number of Christmas trees– with a total of seven if I stick with my plan. In past years, I’ve put up as many as thirty two trees. One in every window and then some. Sounds a little crazy– okay, a LOT crazy– but it’s something I really enjoy.
You can imagine, with that many trees, you have to be a little creative when it comes to decorating all of them. I thought I’d share some general Christmas tree decorating tips, as well as some of the imaginative solutions I’ve come up with over the years to make them unique.
First off, I can’t say I’ve ever really seen an ugly Christmas tree. (Alright, maybe a couple.) Christmas trees can be a personal and unique statement of who you are. It can also be a nostalgic trip through the past. Especially, if you’re one of those people that collects a few new ornaments each year or has ornaments made for, or by members of your family. Displaying them can be fun but also a challenge.
So let’s get started with some general tips and things to consider when planning to decorate a memorable tree. (I’ll be referring to all tree decorations, generally, as ornaments.)
- Know what you have. Before you start your tree, take a look at the ornaments you’ll be using to refresh your memory. Size, color and quantities of similar ornaments, all play a part in the final outcome of your tree.
- Start with an idea. Is there a theme to your tree? Will it be certain colors or highlight certain shapes or ornament styles? You may want to add to subtract certain ornaments from your plan if you have a vision for the final look.
- What element(s) will be your constant to achieve your theme or idea? Several dozen ornaments of a specific color or style? Depending on the size of your tree, you’ll want to make sure you have enough to establish your design element covering the tree.
- Are you decorating the tree by yourself or will this be a family activity? If you want your tree to have a certain overall look and decorating it is going to be a family affair… you may want to pre-decorate with your base ornaments (or design element) before letting the family go to town with the rest. It’s also a good idea to keep fragile ornaments out of the hands of small children.
Example- You have may have lots of unique family ornaments but you want your theme to be red. In order to make sure your tree has an even balance of red ornaments, you may want to space them throughout and then let the family add all the rest.
- Ornaments don’t have to be expensive or necessarily holiday-related if they help achieve your look. Just make sure you have enough ornaments that will specifically carry your theme.
- If you want to highlight or feature a collection of special ornaments– you will probably want to adopt the less is more philosophy or else your special ornaments are likely to get lost.
- Make sure you balance the weight of your heavier ornaments on the sturdier branches and all around the tree. Too much weight on one side can make your tree tip over! Larger, heavier ornaments being concentrated towards the bottom is fine but you should still have a sprinkling throughout as you move towards the top.
- Be creative and be flexible. Don’t be afraid to add another color or style if, through the process, you discover you need something more. There is no wrong or right look– it’s your tree!
Christmas Tree Themes

Mercury glass ornament tree, accented with berry picks.
I’ve done many different themed trees over the years including Victorian trees, floral trees, mercury glass ornament trees, Santa and angel-themed trees, color based trees… Yes, even Beanie Baby trees. I know friends that do sports, hobby, Disney and occupation-themed trees as well. The possibilities are endless here. To be successful, you’ll need to have enough ornaments representing your theme– to stand out and cover your tree in balanced proportions.
Example- If you want to decorate a snowflake tree but you only have four snowflake ornaments, your theme isn’t going to be obvious. Even a dozen or so ornaments of a specific kind, can get lost on your tree if the other elements over power them.
I love mercury glass ornaments. Really nice ones can be quite expensive and I only add a few new ones each year. In order to fill out my themed tree, I’ve added other types of ornaments like painted glass, to be able to fully decorate my tree but still stick to my theme. I also add floral berry picks that add color and fill space without overpowering my featured ornaments.
Stuffing and Filling Your Tree
Try ‘stuffing’ the branches to fill gaps in large trees.
Large trees present a number of challenges including the spacing of the branches. Lower branches are frequently farther apart and if you don’t address them, can leave larger empty spaces that ornaments can’t always fill. A few years back, I adopted a method I call stuffing the tree to help solve that problem. This fills the void between branches and gives the tree a fuller look.
One of my favorite ways to stuff a tree is to use floral bunches or bouquets. The first step in decorating my tree is to stuff the voids with the bouquets, deeper in the tree. Spacing is still important. I try to fill the largest spaces first, while still spacing the bouquets throughout the tree for balance, which means also adding them where they may not be needed to fill a hole but are needs to give the tree a consistent look.
Another great inexpensive stuffing is netting or tulle. I cut or tear random-sized pieces and bunch them, stuffing the interior of the tree. It’s easy to use and manipulate between the branches, adding a soft effect to the overall look. This also might be a good solution for someone considering a flocked or specific colored tinsel tree. Tulle is available in a rainbow of colors and it’s not permanent so you could change the color of your tree every year, if you wanted– without breaking the bank.
I’ve also used pinecones, raffia and other everyday greenery to give a fuller, more natural effect.
NOTE: If your tree is especially thin, you may want to stuff your tree before you add the lights.
Though stuffing your tree may not add to your initial design or theme, it does play an important part in the final outcome. It can be subtle or dramatic, depending on what you use and how much of it.
Decorating Your Family Ornament or ‘Everything’ Tree

Family tree with only the ornaments creating the base. design element.
Since I decided to put up fewer trees this year, that leaves me with an abundance of ornaments to either use or put away.
I decided I wanted to use as many of my favorites as possible but still wanted to have a relatively designed look. Here was my solution.
This might help what many people will find they are facing when decorating the typical family Christmas tree.
- I gathered together some red and white ornaments, threw in a few silver ones and used them as my base colors. I inherited a collection of gold laser-cut ornaments (Danbury Mint) that I added next. I could have stopped right there and my tree was looking great. All the ornaments were spaced out with color, shape and style– balanced throughout the tree.
- Next I added all those favorite ornaments I love, again, paying attention to spacing. Always make sure that you don’t let one area get too heavy or unbalanced (too many, too grouped together.)
- I took a step back and made sure my tree still had a good balance of color, shape, etc. Moving a few ornaments, as necessary.
- I finished the tree, accessorizing it with berry floral picks as the finishing touch.

The finished family tree.
One of the main reasons I use a lot of floral picks in my trees is that it really helps to blend the overall tree. If you prefer a cleaner or more dramatic look, use picks sparingly or not at all.
Tree Garland or “Who Tied Up Your Tree?”
The use of garland on your tree can make or break your final designed look. Garland isn’t the easiest thing to use. I’ve seen too many trees that look like they were tied up and being held hostage as opposed to adding to the tree’s design element.
Christmas tree garland can take many forms. You rarely see the traditional popcorn and cranberry garland anymore– and personally, I’ve never had any luck stringing it together successfully. There are the metallic tinsel garlands (thick and thin), bead garlands, floral garlands, even grape vine and rafia can be used.
Do you drape the garland around the tree? In a spiral? Hang it Vertically? Do you swag it? All choices you can make depending on your skill and taste. Keep in mind that the way you hang the garland on your tree will also affect the quantity you will need.
My 7 ft. ‘natural’ tree with grapevine garland.
You can add garland at any point in the decorating process but I prefer to add it first, if at all. When you wait until the end, moving and re-spacing the garland to get it just right can tangle with your ornaments and cause a big mess. You would also have to move a number of ornaments that would be hidden behind the garland. Adding it first allows you to adjust it until it’s just right, before hanging all your precious ornaments.
Christmas Trees and Pets (Children Too!)
You want to make sure you protect your loved ones, whether thay have two tiny feet or four furry paws.
- Cats climb trees! They also like to bat their paws at dangling ornaments. I’ve know more than one person that has come home to find a toppled tree due to a kitty-climber. Make sure your tree is weighted properly and keep an eye out for felines that show too much interest in your tree.
- Ornaments are not dog toys… or are they? My Boxers, even at ten years old, pull ornaments off my tree. I have to keep watch to make sure they leave them alone. It doesn’t matter whether they are round (like a tennis ball), plastic or stuffed (like a chew toy), or long (like a stick)– they all look like toys to them. Dogs being dogs, will chew and possibly swallow even glass ornaments so take precautions to avoid that emergency trip to the vet.
- The rules that apply to toys with small parts should apply to your Christmas decorations. Try to avoid sharp or small ornaments that might be swallowed. Keep the more fragile ornaments out of reach. By all means, supervise small children around your Christmas tree. As hard as you try, no tree is completely childproof, so be safe!
Finally, a word about our foyer tree. We had talked about eliminating many of our other trees and getting one tall tree that would climb through the stairwell from our foyer to the second floor. I decided to experiment this year and found I could combine tree sections from two of our 12 ft. trees and created a 20 ft. tree! The poles of the trees were the same size allowing them to be interchangeable. By bending and manipulating some of the branches, I was able to combine them pretty convincingly.
Best Tip of the Day: With a little thought and creativity– and a focus on color and balance– you can create your most beautiful Christmas tree ever!
Victorian Foyer Tree. I created this 20 ft tree from two 12 ft trees we already owned.

Next Up: Tabletop Centerpieces
Decking the Halls For The Holidays: Part Two- Selecting and Prepping Your Christmas Tree
Live or Artificial… Large or Small… I hope you’ll find some tips here to take a little stress and frustration out of prepping your Christmas tree this year. I highly recommend adults setting up and prepping the tree prior to having young ones participate in the actual decorating.
Choosing Your Tree
There are many things to consider when selecting a new Christmas tree that rely heavily on your own personal taste and the space where it will be displayed. Height , color, fullness and shape are all considerations… pre-lit or not? There are also safety issues to consider, and things you can look for to anticipate the longevity of your tree.
 Live or Artificial? For some a matter of taste, could be a cost or storage issue and for others a necessary tradition.
Live Trees- Benefits include: scent, natural and no storage concerns. I have friends that always insist on using a live Christmas tree. Part of their holiday tradition is going out and cutting their own. Very nostalgic. For those that don’t have that luxury, you are likely purchasing a tree that was cut and stored in a refrigerated truck back in August. No wonder there is often little scent and the needles barely make it past Christmas Eve! I’m not going to say a lot here, there is a lot of information online about things to consider and to watch out for when selecting a healthy, safe, live Christmas tree. Remember, the cost does not indicate the freshness!
Artificial Trees– The possibilities here are endless. Height, color, fullness, thick or thin… it’s out there if you look hard enough. Benefits include: Reusable, many are made from recycled materials, more cost effective over time and they are considered safer to display than live trees.
Best Tip of the Day: Strapped for Cash? Did you know there are lots of people giving away trees on Craigslist.com?
There are affordable options out there but artificial Christmas trees can be quite expensive. Remember no tree is perfect, live or artificial. Here are a few things to consider when purchasing a new artificial tree:
- Fullness and strength of branches. When buying a tree online it’s really difficult to check the quality and details. You want sturdy branches that have lots of tips for a full look.
- Check the tips for needle drops. Better quality trees tend to hold their needles because of how they are manufactured. Cup the tip (a finger of the branch) and run your hand back and forth on it. You should little or no needles fall off on a new, good quality tree. Overtime, of course, the needles will become more fragile. I have one tree that is 10 years old and it is so well made, the only way I can get any needles to fall off is to pluck them off.
- Pre-Lit or Not? Personally, I prefer a tree that is not pre-lit. Even though the lights are hidden in the branches and it makes it easier to prep the tree, the light will inevitably stop working. Finding that one missing bulb or short in the wire in nearly impossible. Removing the lights if they stop working can be difficult but you can always add strings of lights to the tree if they do stop working. NOTE: Pre-lit trees can be very, very heavy. Something to consider for moving and storage.
- Branches. Check to see if the branches are individual and have to be added one by one or if the branches are all hinged to the pole. A tree with individual branches can be stored easier if space is an issue. You have to be careful because the plastic fittings where the branches attach to the pole can crack if there is too much weight or force on the branch. The plastic also becomes more brittle over time causing breakage.
- Collapsible Pop Up Trees? They do exist! I’ve seen them in traditional evergreen styles and collapsible tinsel garland trees, that seem to be in most of the stores this year. These aren’t usually very full and most can’t hold many or even any ornaments. They are easy to set up and to store but I wouldn’t expect that these would last more than a year or two.
- As always, shop after Christmas to get your best bargains. Every tree I’ve used for the past 15 years was purchased after Christmas for 70-90% off!
Prepping Your Tree
Decorating your Christmas tree is the fun part. No one looks forward to setting up and prepping the tree, which for me, starts when I take it out of the box, through adding the lights.
Tree Stands. Whether you are using a live or artificial tree, it’s very important to have a good, strong tree stand that is the right size for your tree. It’s also probably a good idea to make sure your live tree stand can hold plenty of water. Most artificial trees come with stands appropriate for that tree. In rare cases, I’ve had to find a better stand so the tree would stand safely and securely in place. If you are reusing an old tree and have had tipping issues– you need a better stand.

Before
Fluffing the Branches. This obviously only applies to artificial trees. Once your tree is out of the box and assembled in its stand, you need to fluff out all the branches before you add any lights or ornaments. I highly recommend wearing a cheap pair of work gloves during this process to avoid scratches and skin irritation.
Start at the bottom of the tree and work your way around and then up, fanning the tips on every branch as you go so they aren’t laying flat and clumped together. This accomplishes two things:

After
1) It makes the tree appear to be much fuller; and 2) It will actually help stabilize and support the surrounding branches.
(If the tree still looks thin or sparse, I’ll cover what you can do to add fullness in the next blog post– and this works for both artificial and live trees.)
Now you are ready for the lights.
Lighting Your Tree.
Stringing your lights on the tree can be one of the most frustrating parts about decorating. I’ll talk about the different types available in a minute– but here are some things to consider when actually lighting the tree: If you prefer a more sparse or uniformly decorated tree, then you want to try have your lights evenly spaced without holes or dark spots in your tree. If you use a lot of decorations, you don’t have to be as concerned with this as some of the decorations are inevitably going to block some of the lights anyway.
I find to get the best coverage, you should move around the tree completely, all in one direction. Save a few strings of lights to fill any troublesome dark spots once this step is complete. I personally prefer to to move around the tree in circles, from the bottom moving up in a slow spiral (horizonally) instead of stringing the lights up and down (vertically) on the tree. I have tried winding lights around the branches to help hide the strings, only to find: a) it’s very time consuming; b) you need a lot more lights; and c) you still end up needing to run additional strings around the tree to fill the dark spots. After I run the lights completely around the tree, I’ll take my extra strings and move around the tree diagonally, to hit the dark spots and to try and avoid creating a noticeable light pattern.
 Light Types.
LED lights are the newest technology and also the most costly to purchase. The good news is that after a few years, the energy savings will outweigh the initial investment. If you are purchasing white, pay attention whether you are getting cool or warm white. There is a definite difference and you’ll want to avoid accidentally buying both. I’m in the process of switching over to LED lights completely. One of the best things about LED lights is that you can connect up to 40 strings together end to end, eliminating a lot of extra outlets and cords.
Mini lights make up the bulk of what most people currently use today. They can still have different covers or shapes but if you use different styles on the same tree. Make sure you spread out each type evenly or you will likely be disappointed with the result. Most mini lights can be connected end to end with a maximum of 3 strings without blowing fuses on the plugs. Mini lights are currently the most affordable and come in the largest variety of colors and styles.
C-Series lights should not be used indoors, period. These are the larger old fashioned bulbs. They are still available but designated for outdoor use only. They can get extremely hot and become a fire hazard, particularly on live trees. I will admit that I have used them on an artificial tree in the past… and they melted the needles on the branches that they were touching.
Multifunction Mini or LED lights. If you want twinkling lights, flashing or fading these are the ones you want. If you use these, you need to run them around your tree more random than uniform and overlap them to get the desired effect. One of the drawbacks is that they cannot be connected end to end and must each be plugged in separately.
White, Colored Lights or Both?.
Completely based on your individual taste, adding colored lights to your tree can create several things you’ll want to watch for. If you use all one color or use the multicolored strings, you should be fine. If you mix colored strings of lights, you need to make sure you evenly distribute the different colors evenly throughout the tree. If you don’t, you could end up with unwanted patches or blotches or color.
The other day I notice one store selling trendy pink, lime green and lavender lights (the wire was colored too.) If you decide to go with something trendy, keep in mind the cost, longevity of the trend and by all means, make sure you purchase enough to finish the job. Keep in mind that 6 strings may work this year but next year you may need 8 and they are no longer available. Then what? Back to the drawing board.
AND, make sure the lights you are purchasing are green wire and not white wire! You may need to look in the box to be sure. White wire strings of lights are very difficult, if not impossible to hide on a traditional green tree.
Now you’re finally ready to decorate!
After you have all your lights on the tree, you might want to take a moment to vacuum up any dropped needles so they don’t get tracked all over the house, especially if your family will be decorating the tree together.
One Last Thought– Say NO to Canned Snow!! The only situation where this might be a good idea would be a live tree. If you do, try and spray it outdoors or take careful precautions to protect furniture and walls if you must spray the tree indoors. Never spray canned snow on an artificial tree unless you plan on throwing it out after that use. And please, please, PLEASE… only spray a tree BEFORE you add lights or ornaments. The spray will ruin them for future use. If you want the snow effect on your tree, buy a flocked tree. They are some other options that I’ll share with you in the next installment.
If you have any questions or comments, please contact me! I’d be happy to help.
Next Up: Decorating Your Tree– To Stuff or Not to Stuff?
Decking The Halls For The Holidays: Part One- Getting Ready
I thought I’d share a series of posts on one of my favorite pastimes: Decorating for the Holidays. From trees to garlands to centerpieces– for some, decorating can be a daunting task. Whether you’re a novice or a pro, and whether you love or dread decorating, I hope you’ll find a few of my suggestions helpful as you begin adding a little magic to your home.
 Here we are, one week before Thanksgiving and if you haven’t already, its time to start thinking about decking the halls. I want to start with a few tips that might help spark some creativity before you either haul out the old decorations stored in the attic or hit the stores in search of the perfect holiday items.
Most important: Let your creative juices flow! Don’t be afraid to think outside the box. Express Yourself!
Best Tip of the Day: Use Ribbon and Picks & Stems* to hide imperfections and add the finishing touches to your holiday decor.
Five Things to Consider Before You Start:
1. Cost– It might be a good idea to have a budget of how much you want, or can afford to invest in your decorating. It’s very easy to spend more than you intend if you don’t nail down an amount as you start your planning.
Do a little research before you buy anything. What may seem like a simple idea could end up costing you a lot more than you anticipated. Ten ornaments are not going to decorate your whole tree and three strings of lights aren’t going to be bright enough. Be prepared to purchase more than you originally thought you’d need or have a backup plan if you run out.
You can save a lot of money on future decorating by shopping the after Christmas sales where you can usually save 70-90% off retail. In recent years, a lot of retailers are marking down decorations by 50% a week or two before the holidays just to clear the shelves.
Some stores have sales running now. If you wait until after Thanksgiving weekend, you are probably going to pay premium prices. AND– the longer you wait, the smaller the selection.
 For the Christmas Fanatic— Keep your eyes open year round for items that might be used seasonally. I’ve found lots of end-of-season clearance bargains where I can find large quantities of items for pennies on the dollar. I have a Victorian house so it’s easy for me to incorporate spring, wedding, and other specific floral bunches and floral picks & stems* into my holiday decorating. I also have at least one Christmas tree that I decorate with a natural or woodsy theme, making many fall clearance items a perfect addition.
2. Storage– Be realistic about how much space you have for storage. Many holiday decorations are fragile and require careful packaging and storage which takes up even more space. Christmas trees take up a lot of space. I know a lot of city apartment dwellers still prefer buying live over investing in an artificial tree because of limited storage space.
3. Time & Space– Decorating can be time consuming. It can also be very relaxing way to spend your free time if you aren’t in a rush. If this is your first year decorating or you are trying something new– allow for more time. I suggest taking the time to get organized and sort out what you have before you actually start decorating. I always find I’m missing a box or have less of something than I remembered. There’s nothing worse than getting deep into a project and discovering you don’t have enough to finish. When computing your time equation, don’t forget the time you’ll need to take it all down after the holidays are over and store it away.
You can do wonderful things in a smaller space if you put some thought into it. A small tabletop tree in a loft can be as equally effective as a 10 foot tree in a larger home. A few small additions to your space can do wonders to create that holiday atmosphere.
4. Theme– Are you going to have an individual room theme or overall theme to your decorating? A color theme, perhaps? Themes are great but can be limiting, especially if you are on a tight budget. Keep in mind that trendy styles and colors might not satisfy you in future years. Consider what will work best with your year-round decor and lifestyle first.
When considering color, remember green ornaments don’t stand out on a green tree. Also, colored lights can be a challenge. I found years when simple red or green Christmas lights were impossible to find! Make sure you have enough before you start!
5. Purpose or Repurpose– As much as I love new decorations, I find it’s more fun to find new uses for old ones. There are elements of my decorating that stay the same from year to year and others that I always change, at least make alterations. I often use items in my holiday design that aren’t specifically intended for Christmas decorating.
Try to incorporate items you already have into your holiday look. The everyday items on your mantle or table don’t necessarily have to disappear until January. Unless you want something completely different, try adding a little garland, artificial poinsettias, a few ornaments… and you can achieve the same festive look.
Holiday decorations that may start to look tired and worn and don’t stand up well on their own, may still work perfectly as part of a larger grouping or display.
Keep in mind that effective Holiday Decorating does not necessarily mean you need to completely transform your space into something different. Try simple accessories and you may be able to achieve the same results. No matter how elaborate your decorating plan becomes, don’t let it become so overwhelming that you aren’t able to take the time to relax and enjoy the beautiful atmosphere you’ve worked so hard to create.
*Picks & Stems– Artificial flowers, berries, fruit and baubles used to accent floral arrangement.
Next Up: Selecting and Prepping Your Christmas Tree
